
Sculptural Techniques
Clay Modeling
Through direct observation and intuitive modeling,
forms gradually emerge while preserving
the vitality of the artist's hand.
-
step1
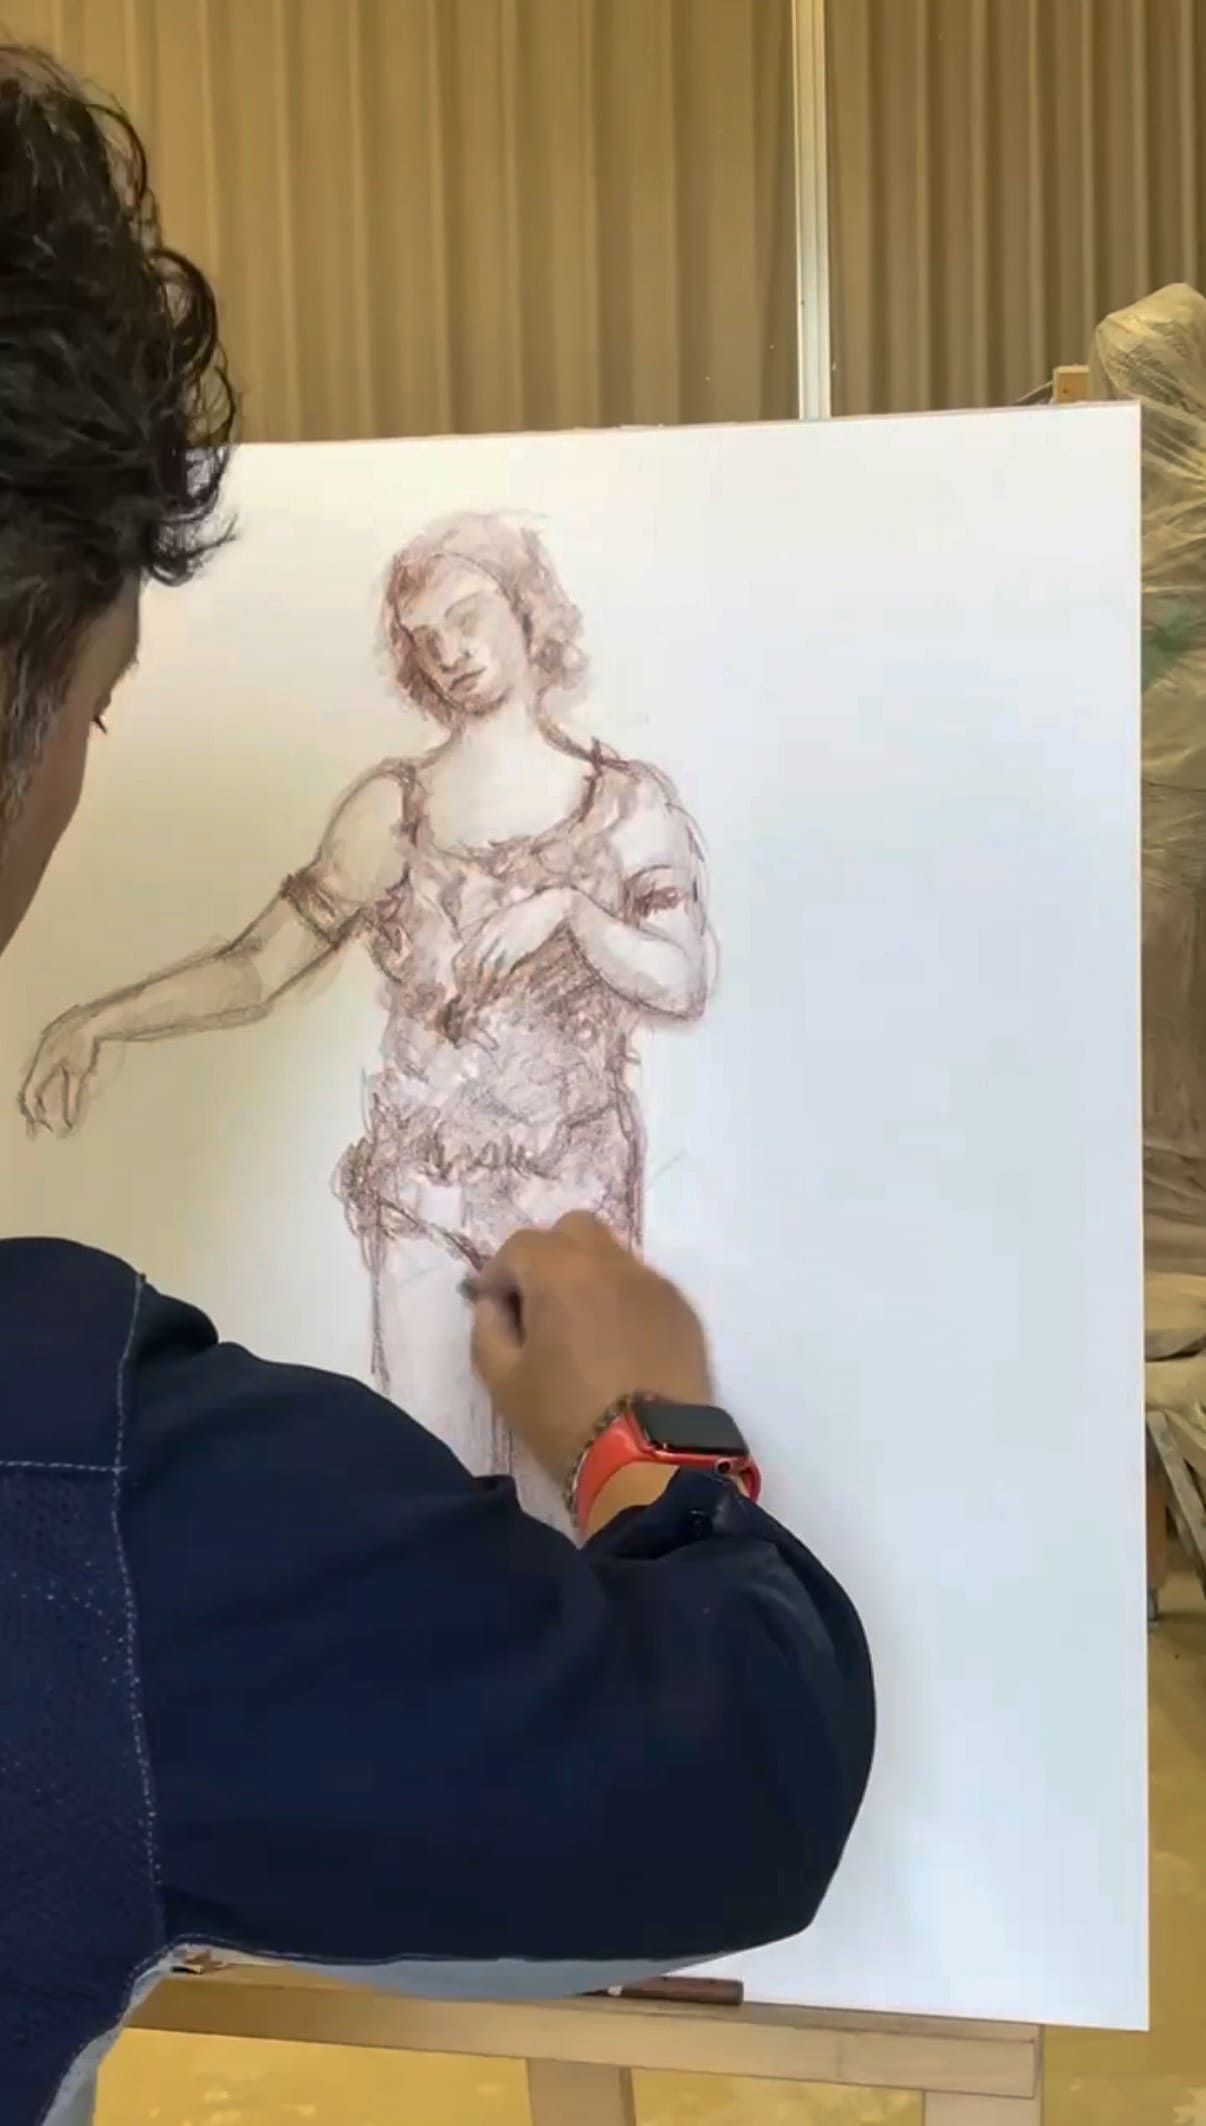
Before beginning the sculpture, I repeat a series of drawings to refine the concept, clarify the pose, and narrow the central theme.
-
step2
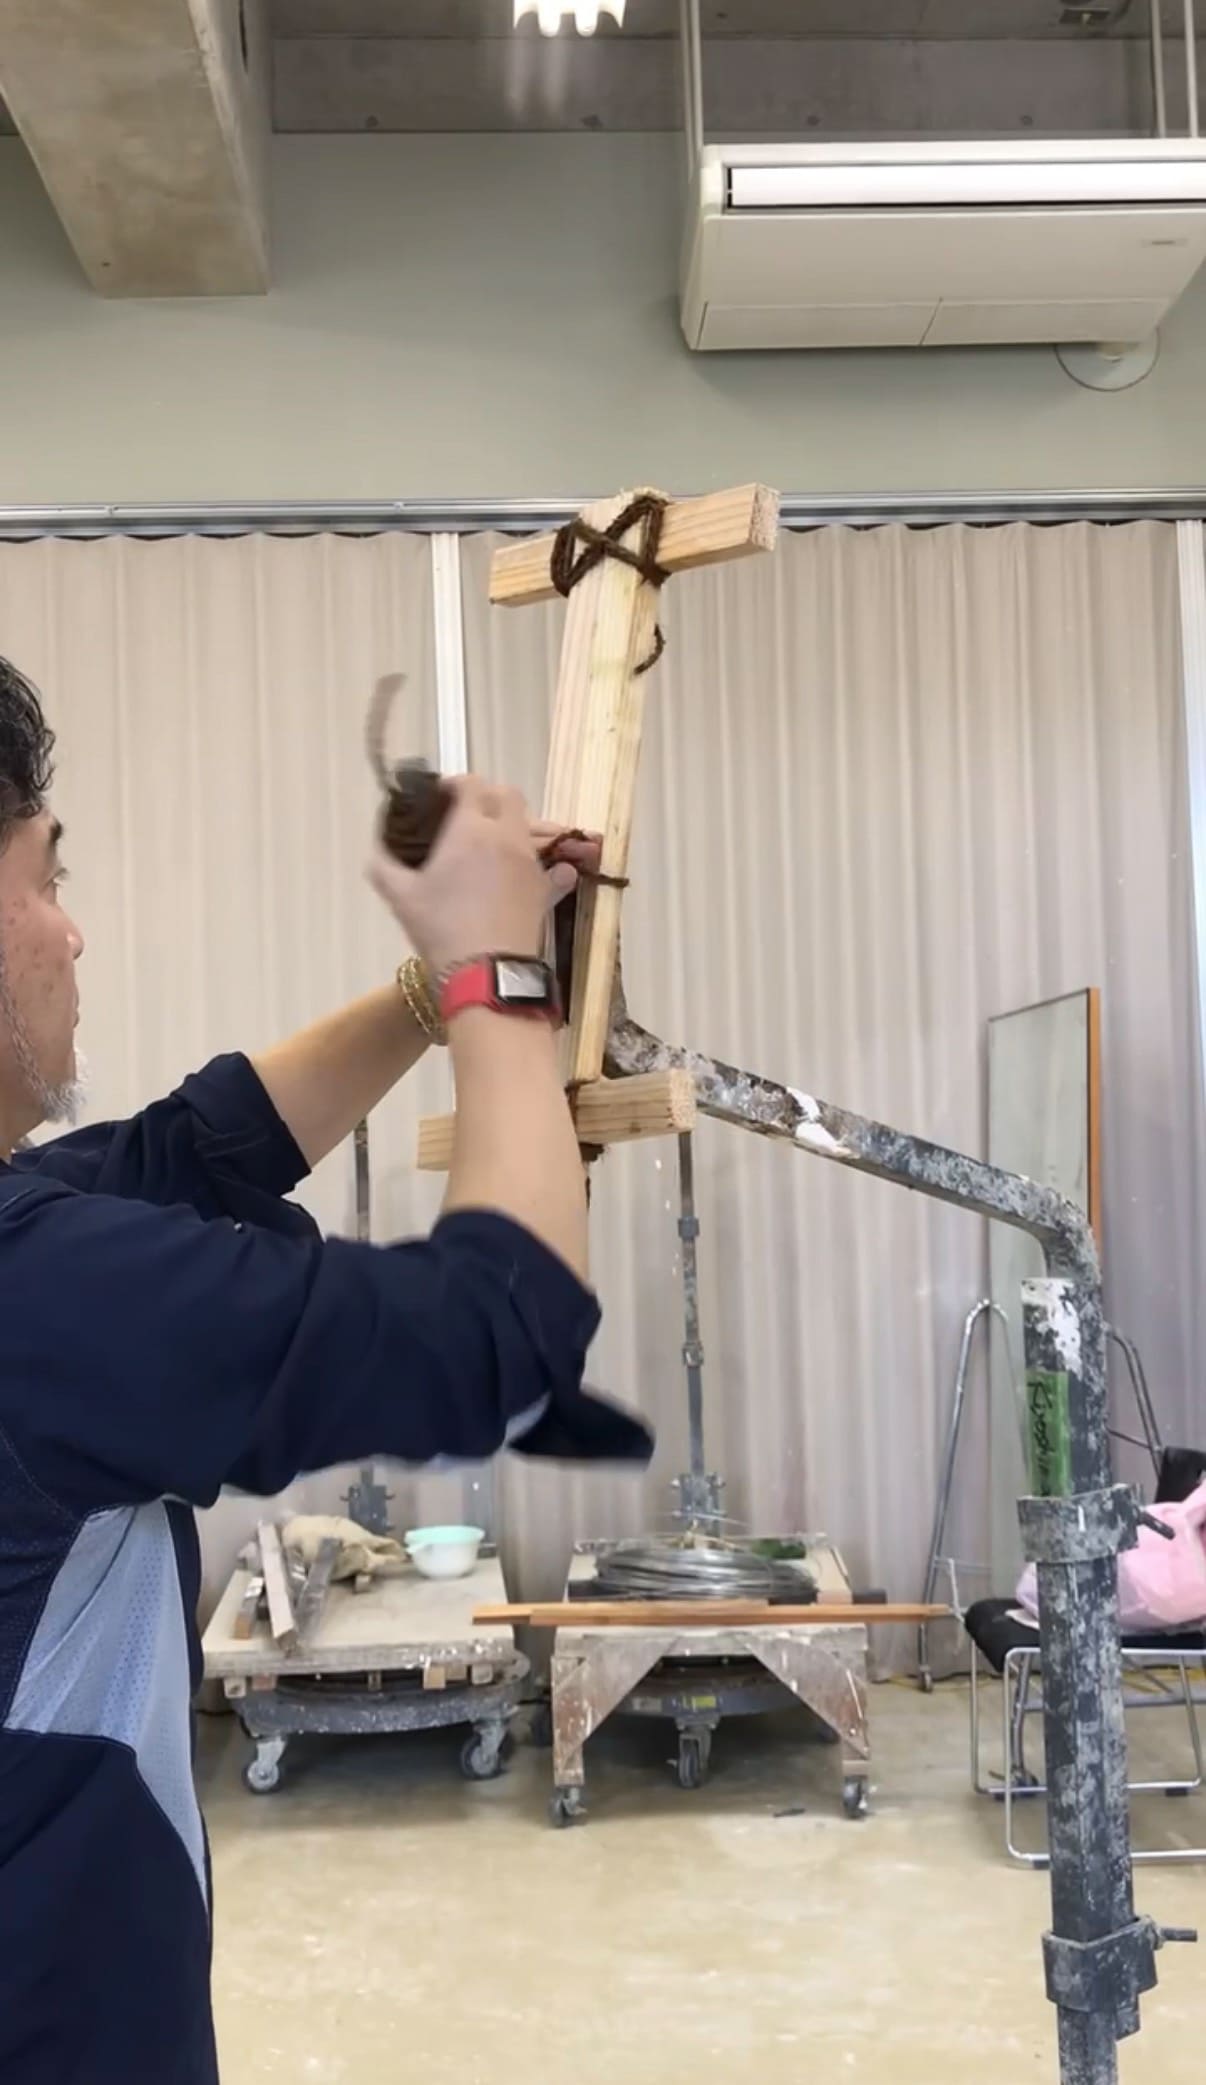
The armature is assembled first. I use a custom bent steel armature designed specifically to support a life-size figure.
-
step3
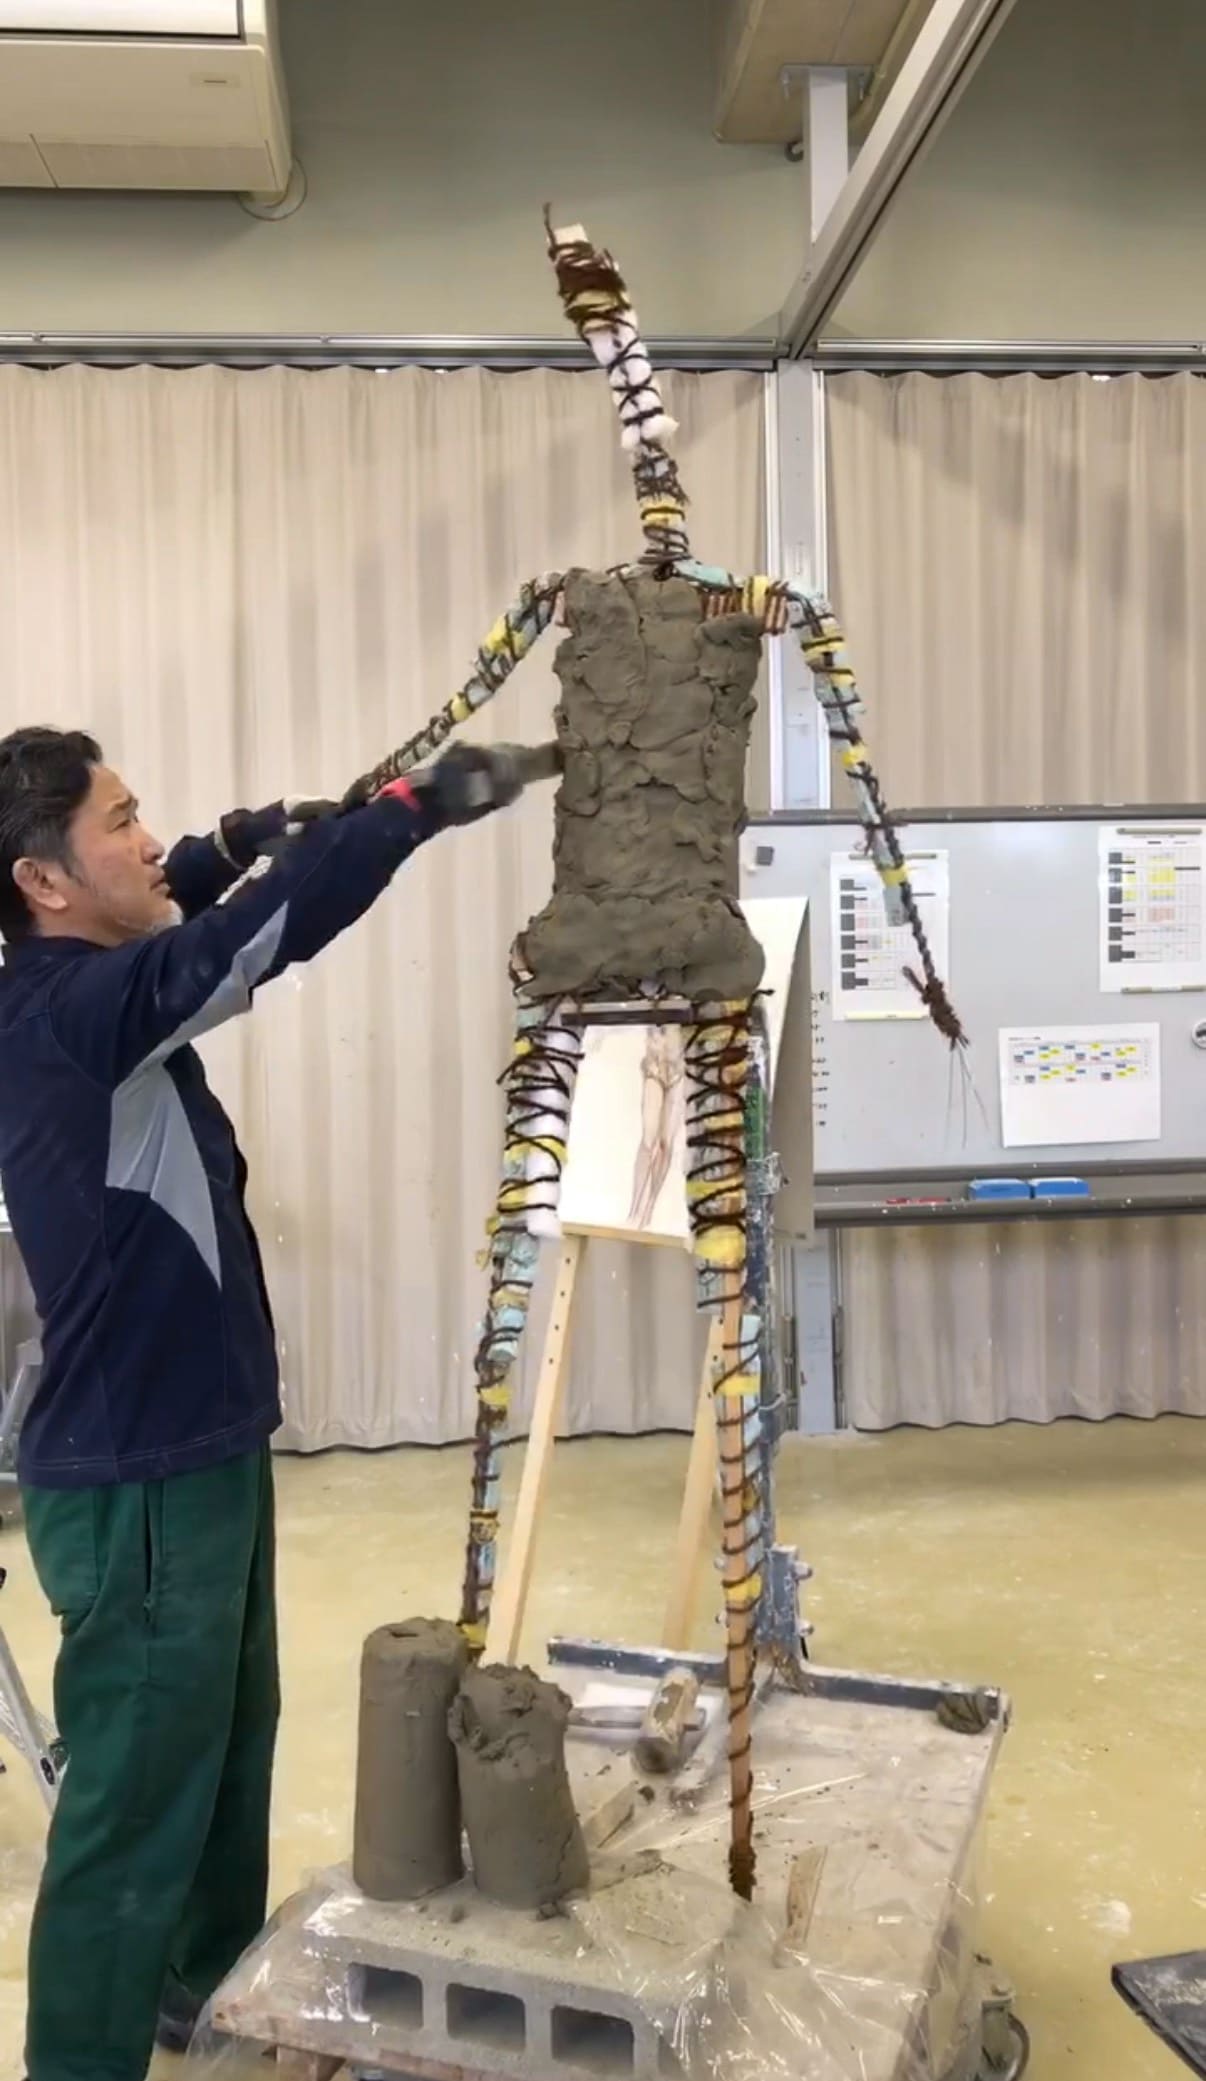
The limbs and head are formed with thick wire, and clay is added roughly around the structure. Because a life-size clay sculpture can weigh around 200 kg, the clay must be firmly attached from the beginning to prevent collapse later.
-
step4
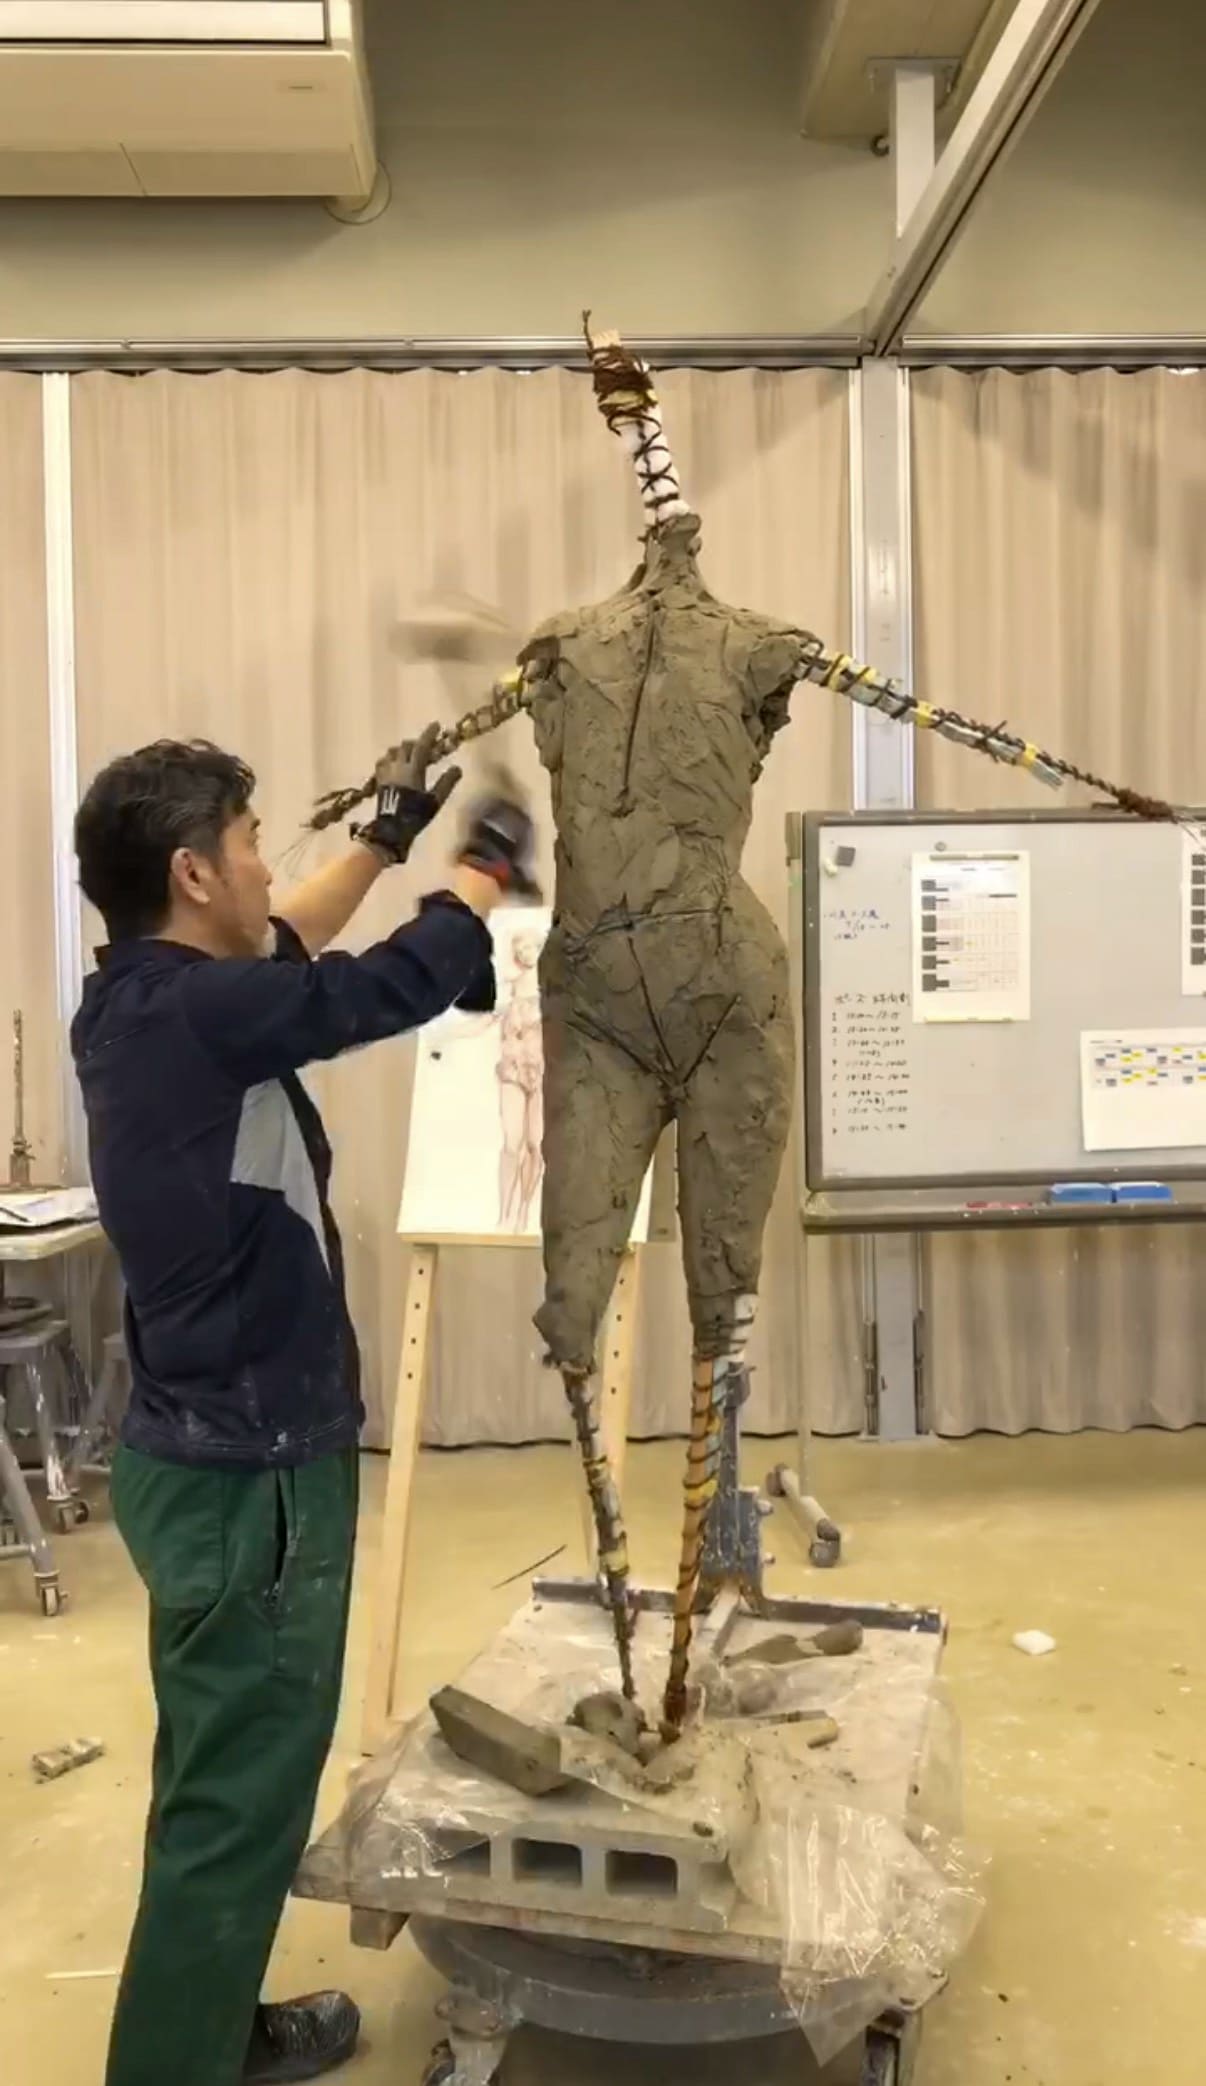
While repeatedly checking the central axis and structural lines through drawing, I confirm again and again that the overall movement matches the image I am seeking.
-
step5
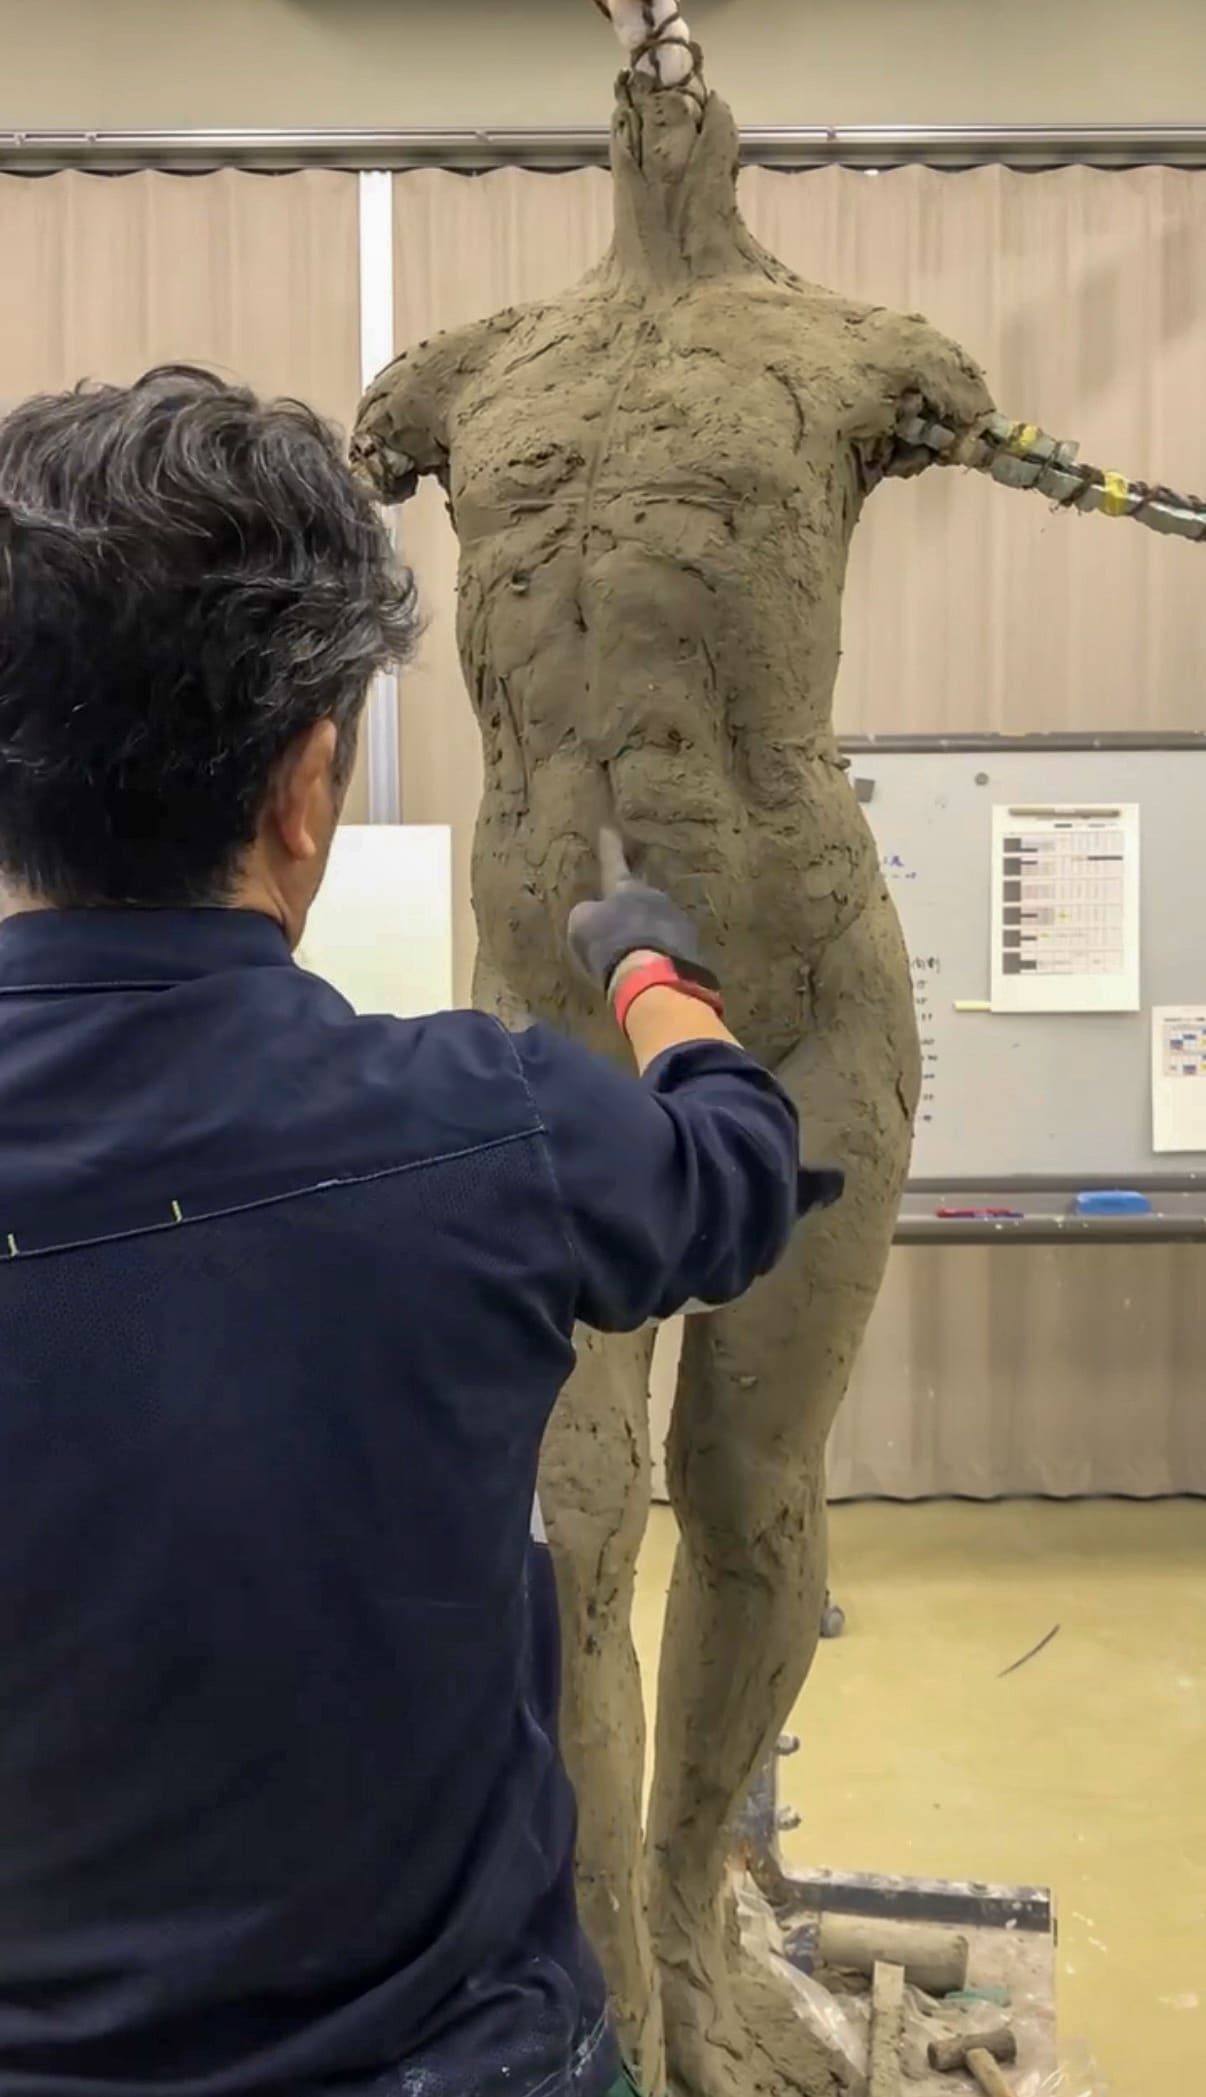
Once the overall structure begins to settle, I start building the muscular forms and clarifying the anatomy of the figure.
-
step6
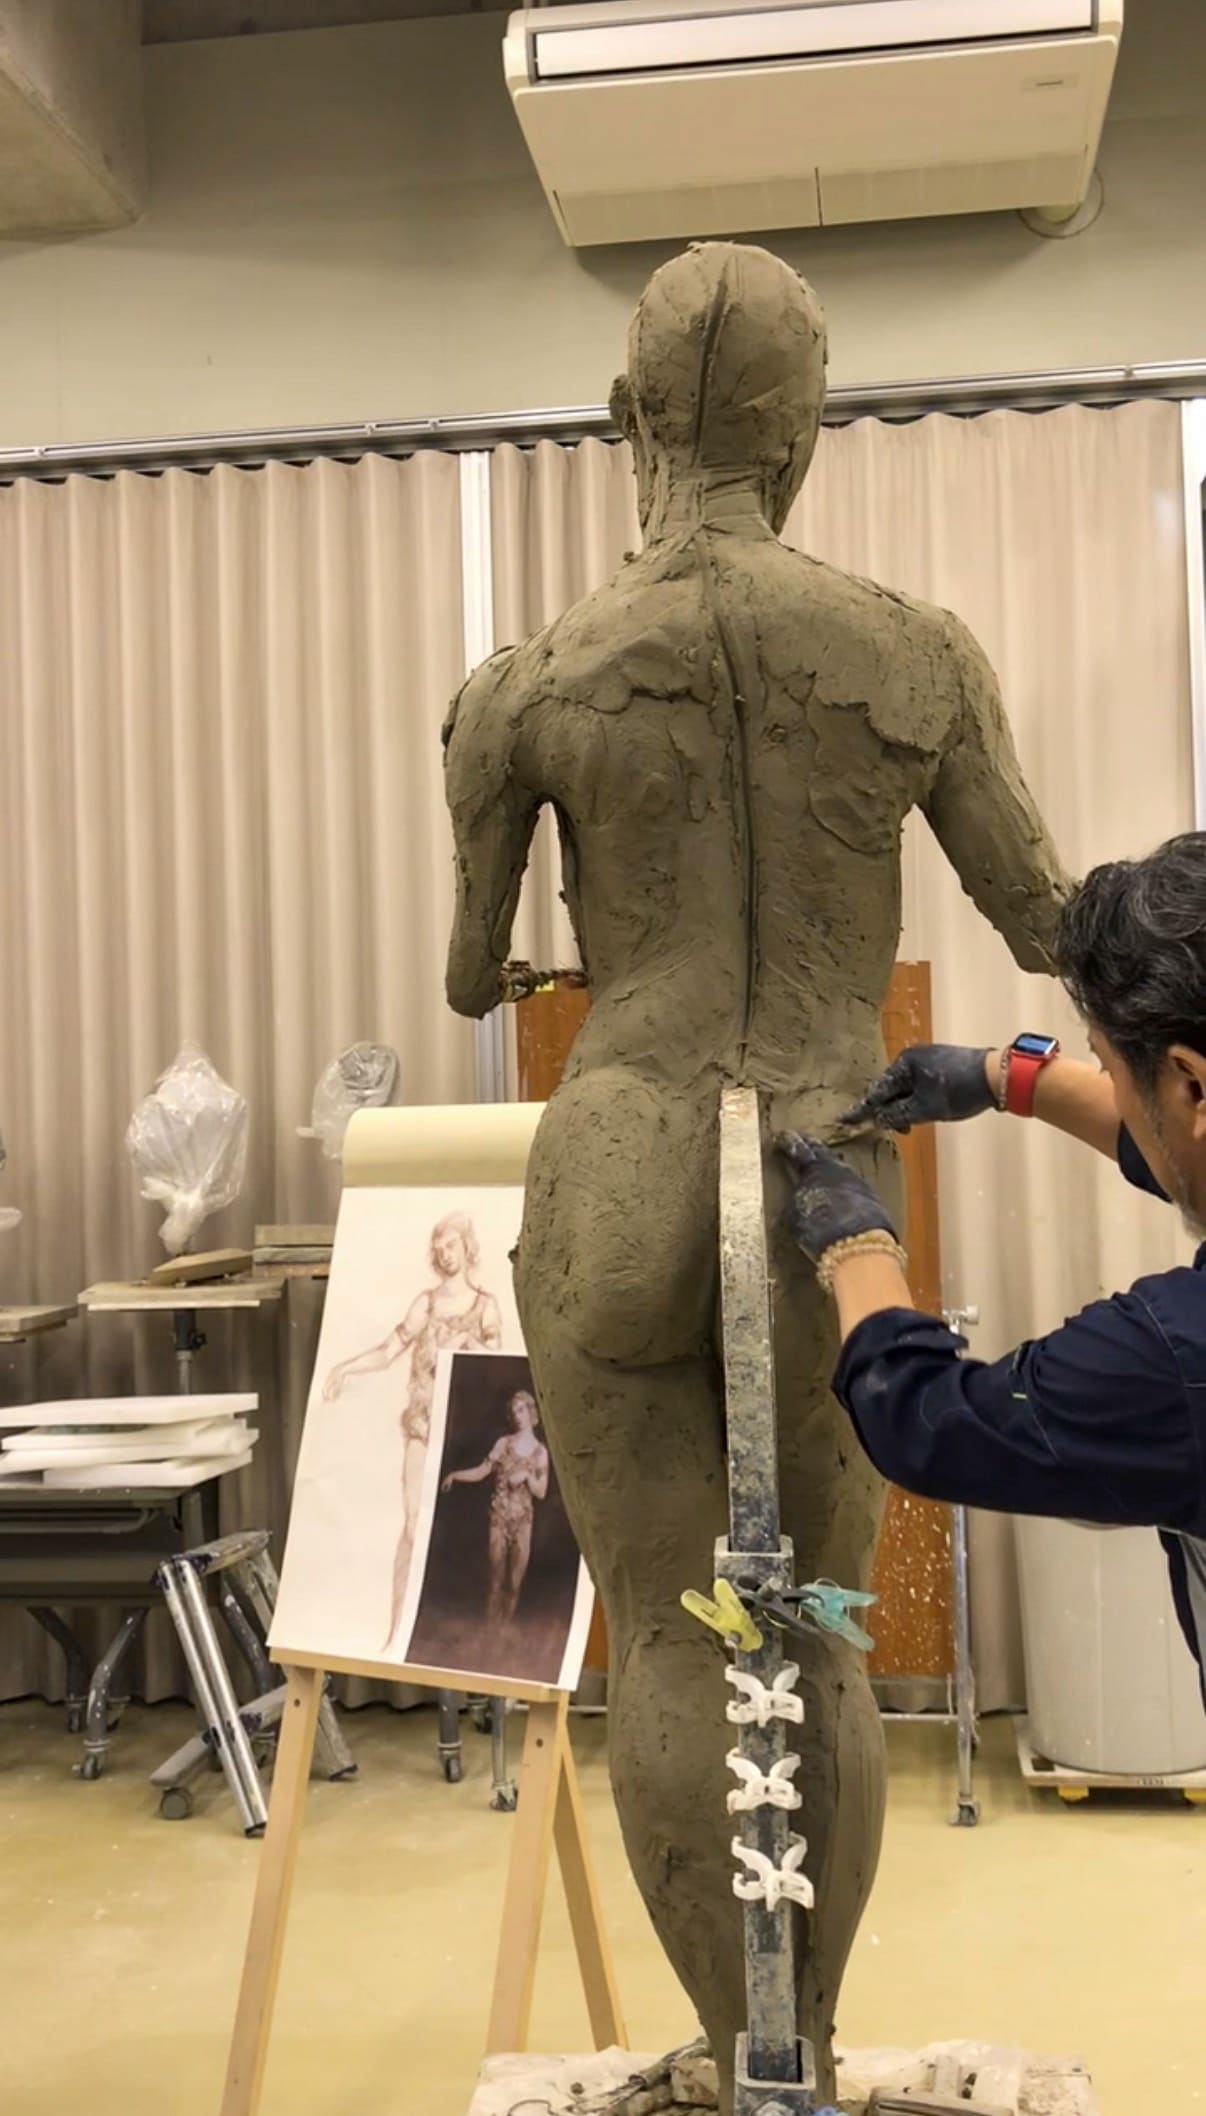
I continually check whether anatomical landmarks, such as the pelvis, are placed correctly within the flow of the body, revising the modeling as needed.
-
step7
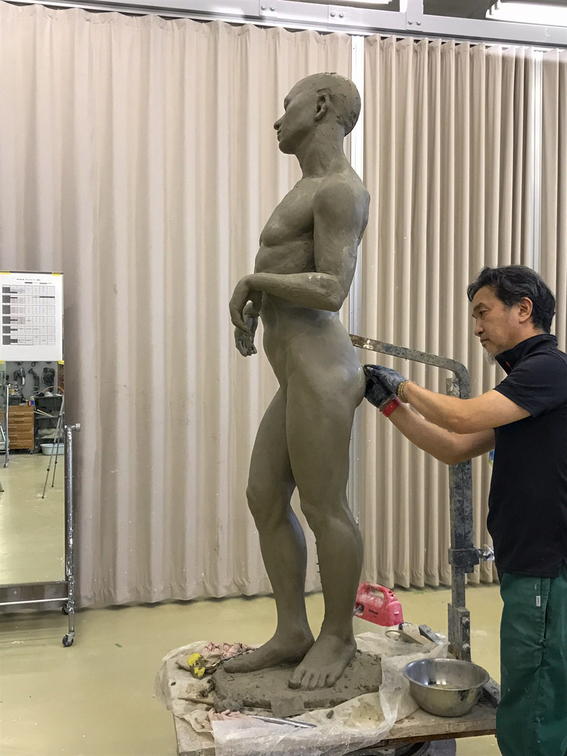
The modeling continues until the whole figure has a convincing sense of volume. For my work, the building of flesh and mass is one of the most important stages.
-
step8
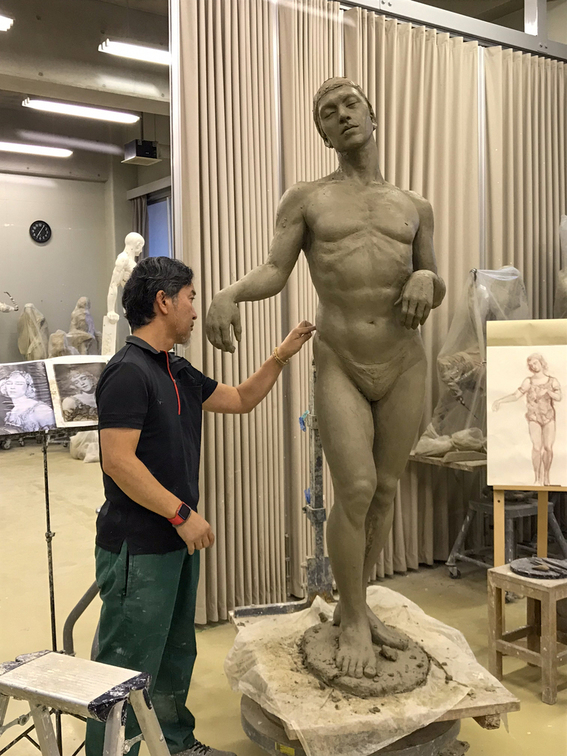
After the overall balance is established, I move on to refining the smaller forms and details throughout the body.
-
step9
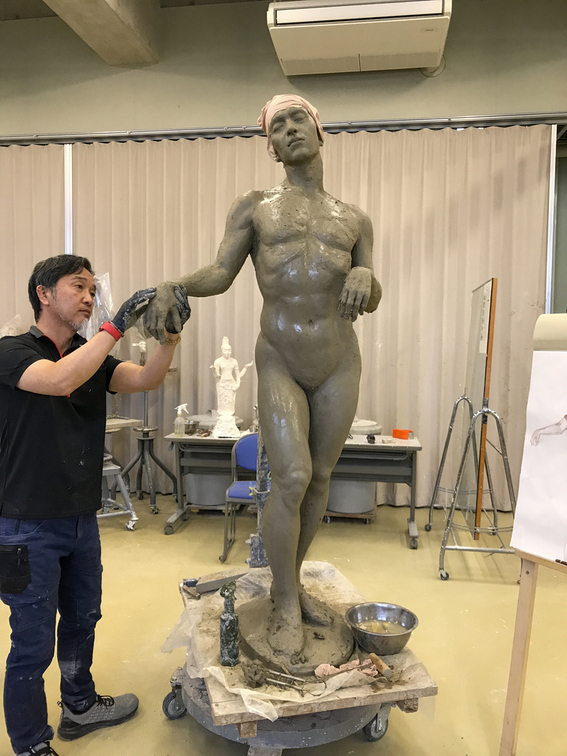
The fingertips are also crucial because they determine the final flow and expression of the sculpture. I work on them carefully without treating them as secondary details.
-
step10
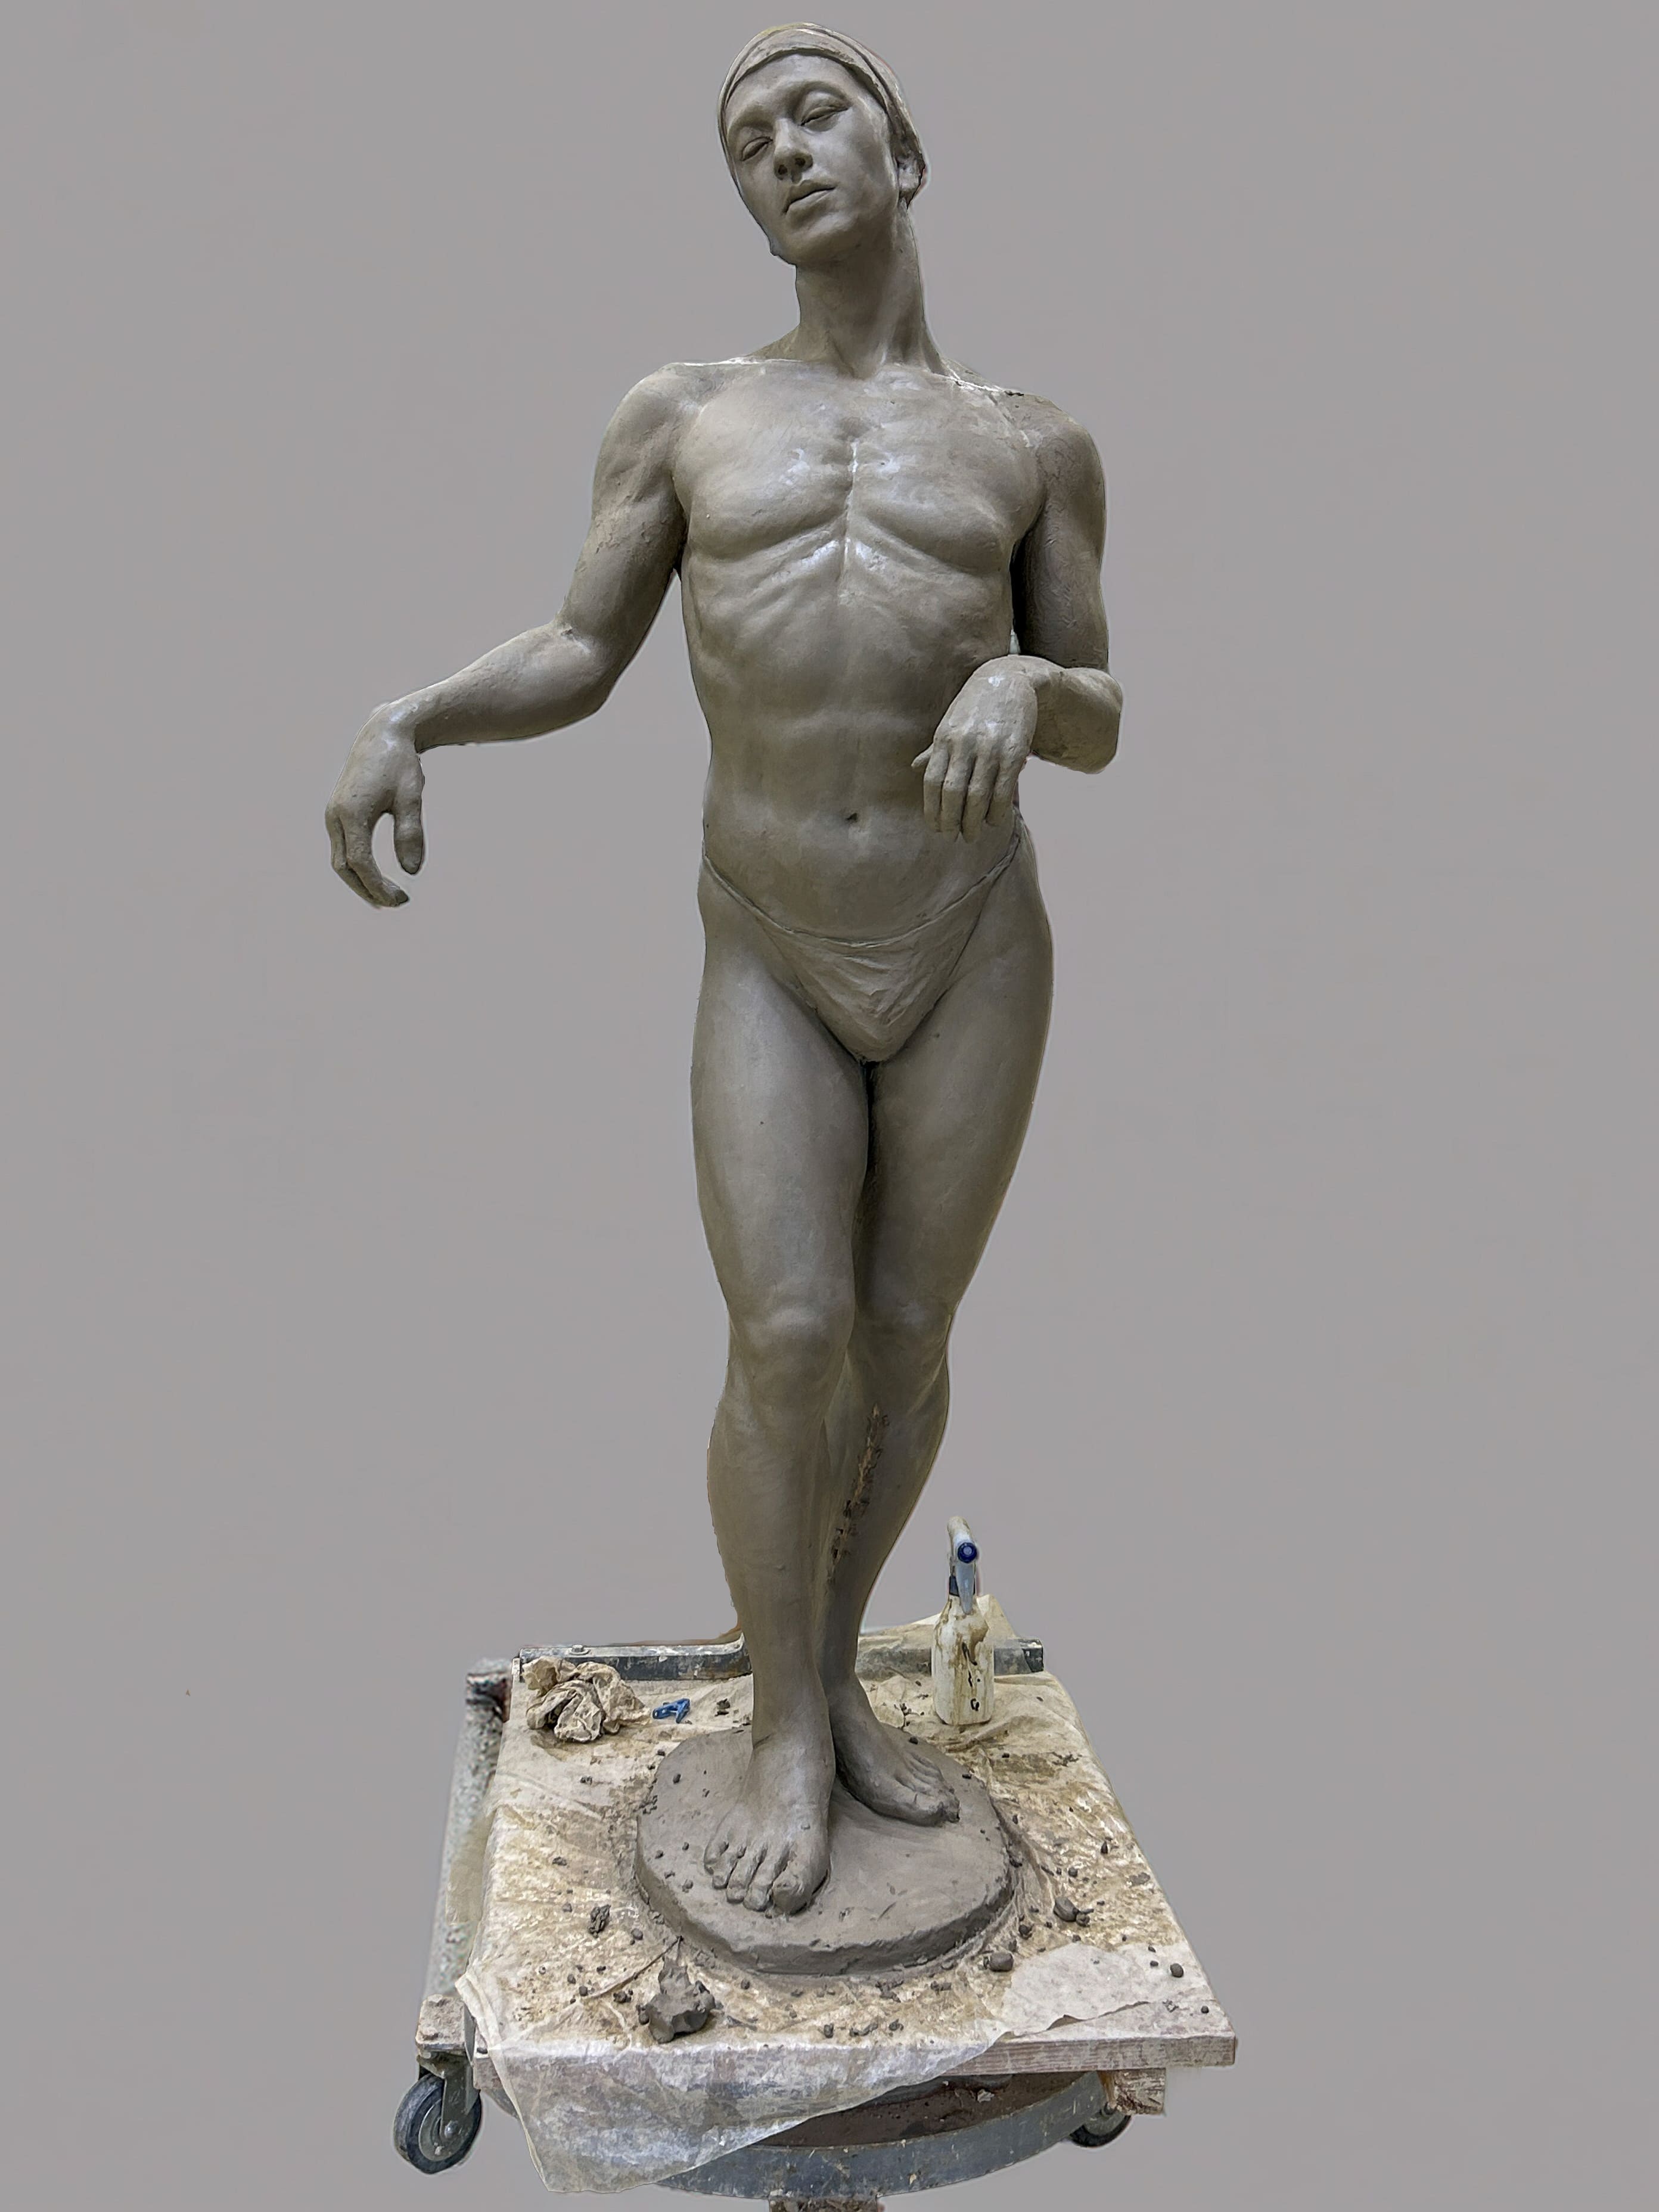
The clay original is completed. For me, this is the halfway point of the entire process. The work will then move through mold making, acrylic resin casting, and final surface finishing.
Mold Making
& Casting
allow original sculptures to be transformed
into durable materials
while maintaining their expressive qualities.
-
step1
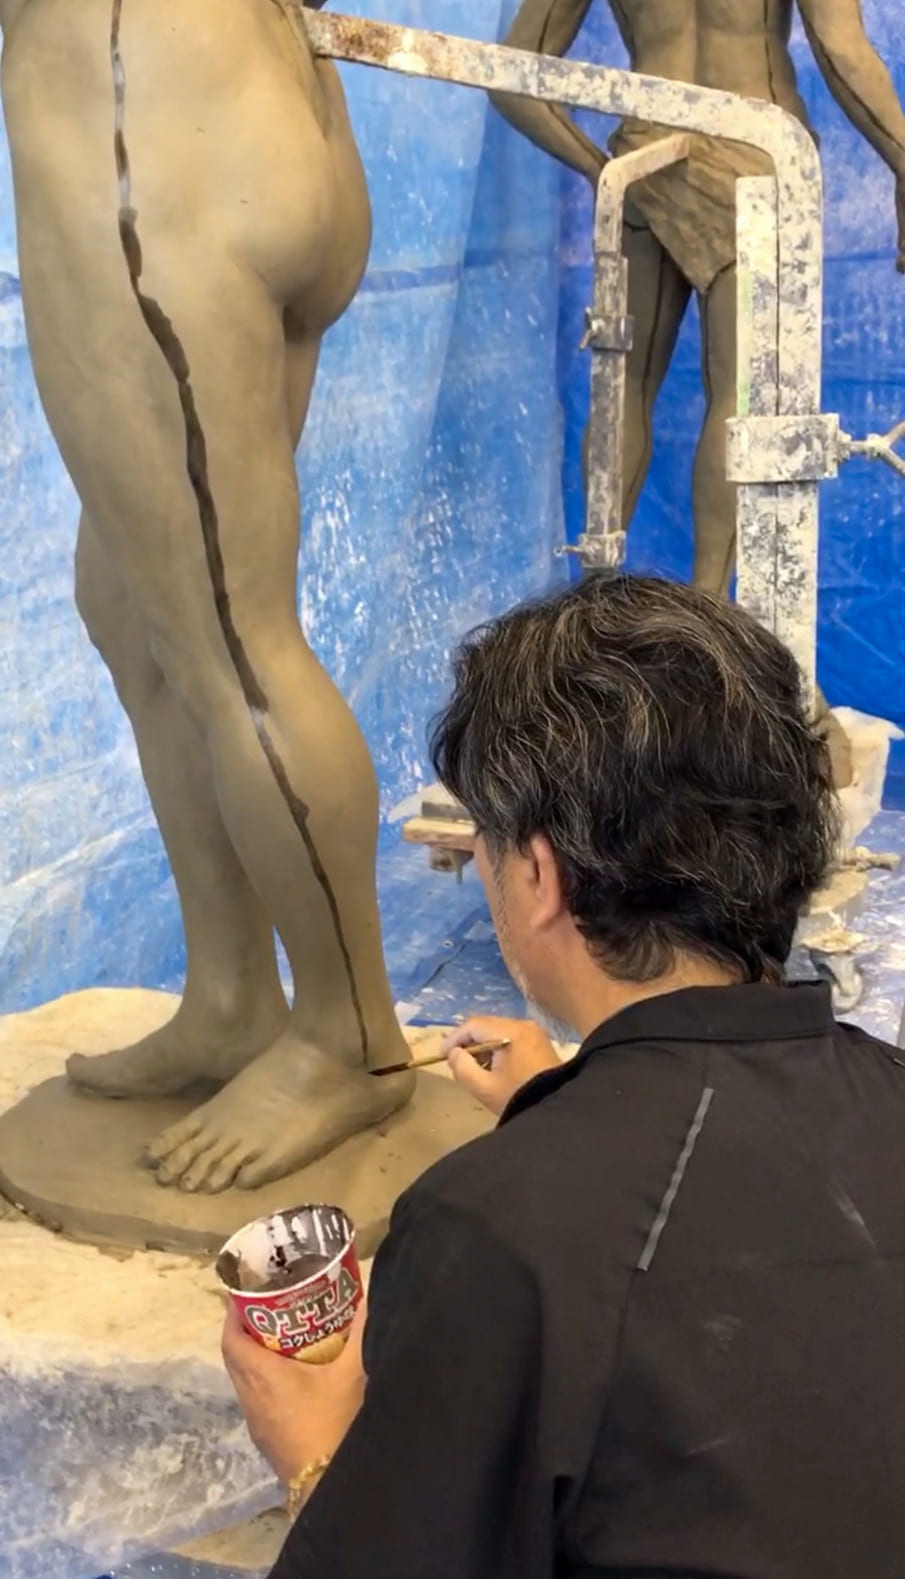
Mark the planned parting lines for the mold with ink in advance.
-
step2
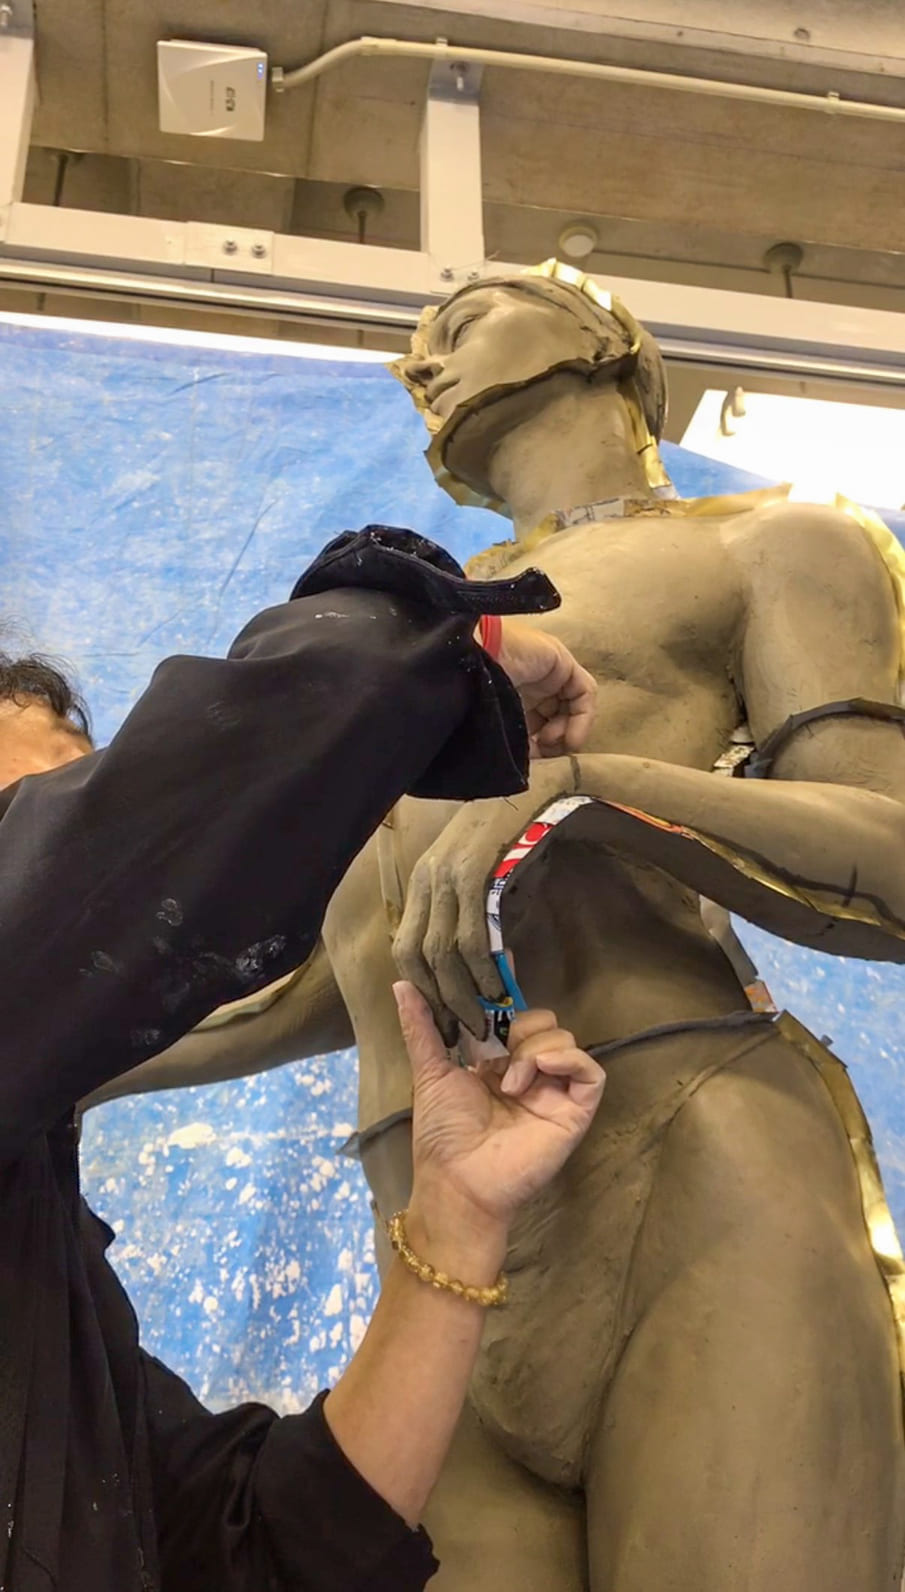
Insert thin brass sheets along the marked lines to define the mold divisions.
-
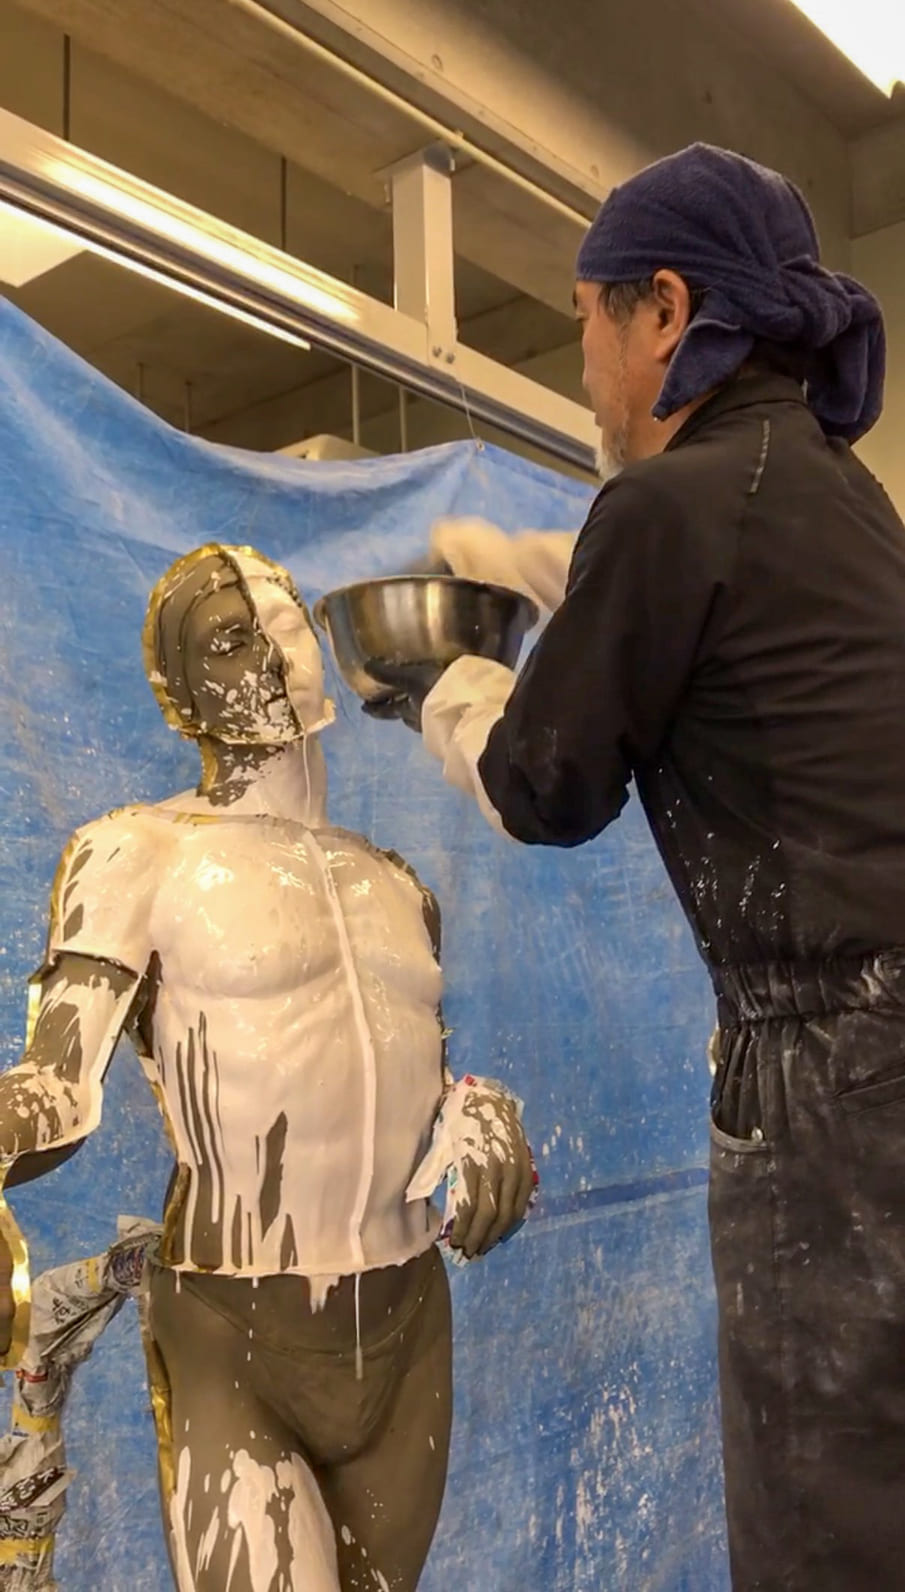
step3
Apply the first, more fluid layer of plaster carefully over the surface of the clay figure.
-
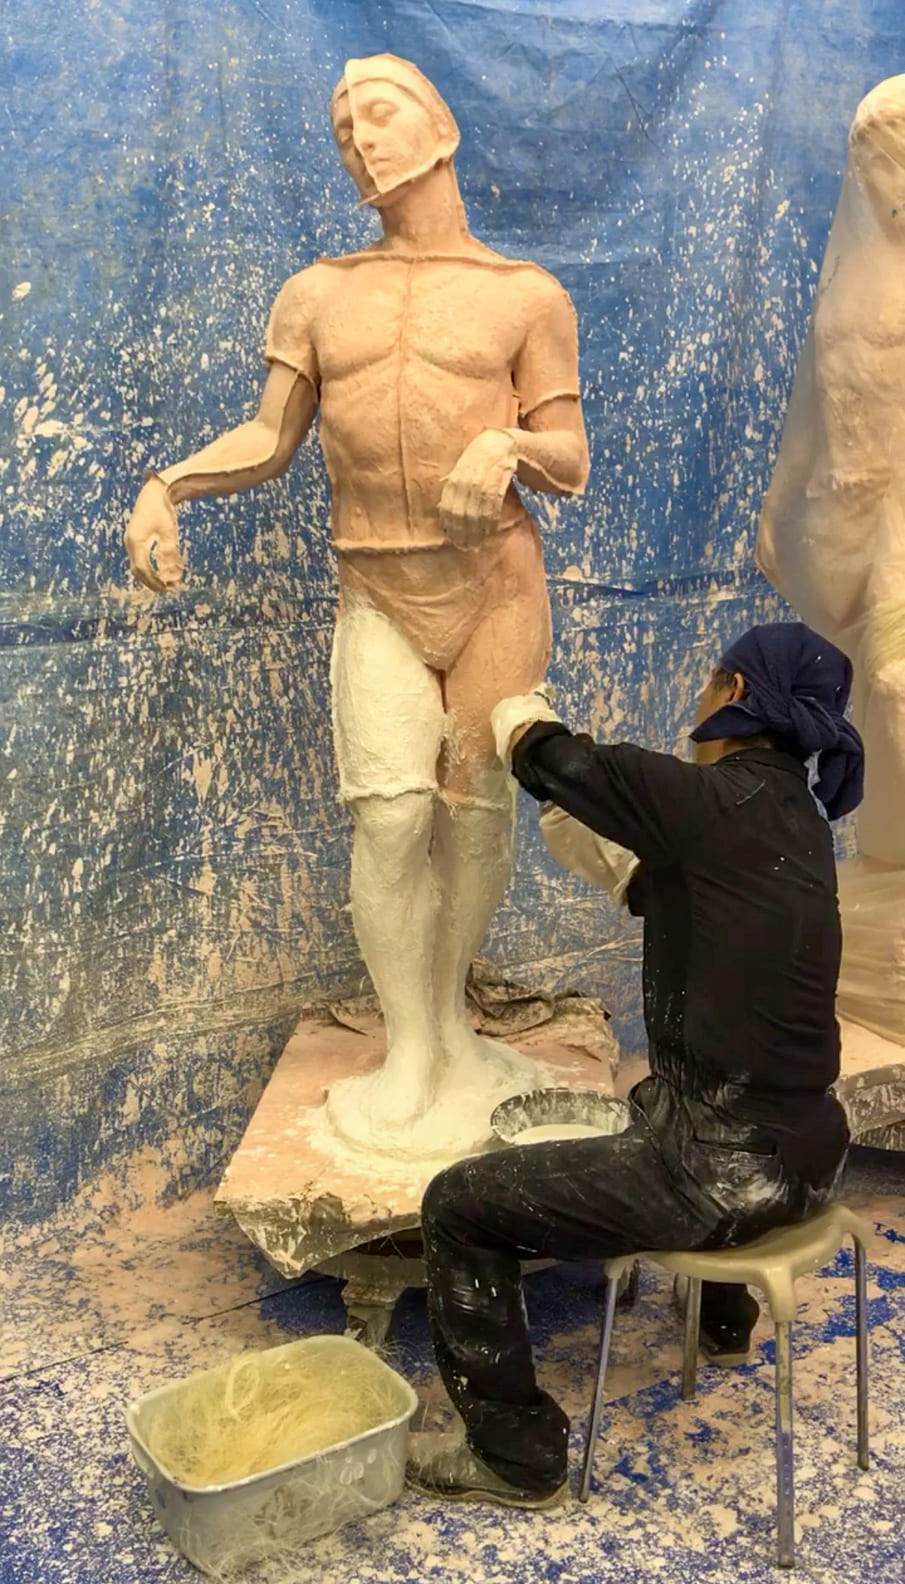
step4
Once the first layer has set, cover the entire mold with plaster-soaked sisal fiber to build strength.
-
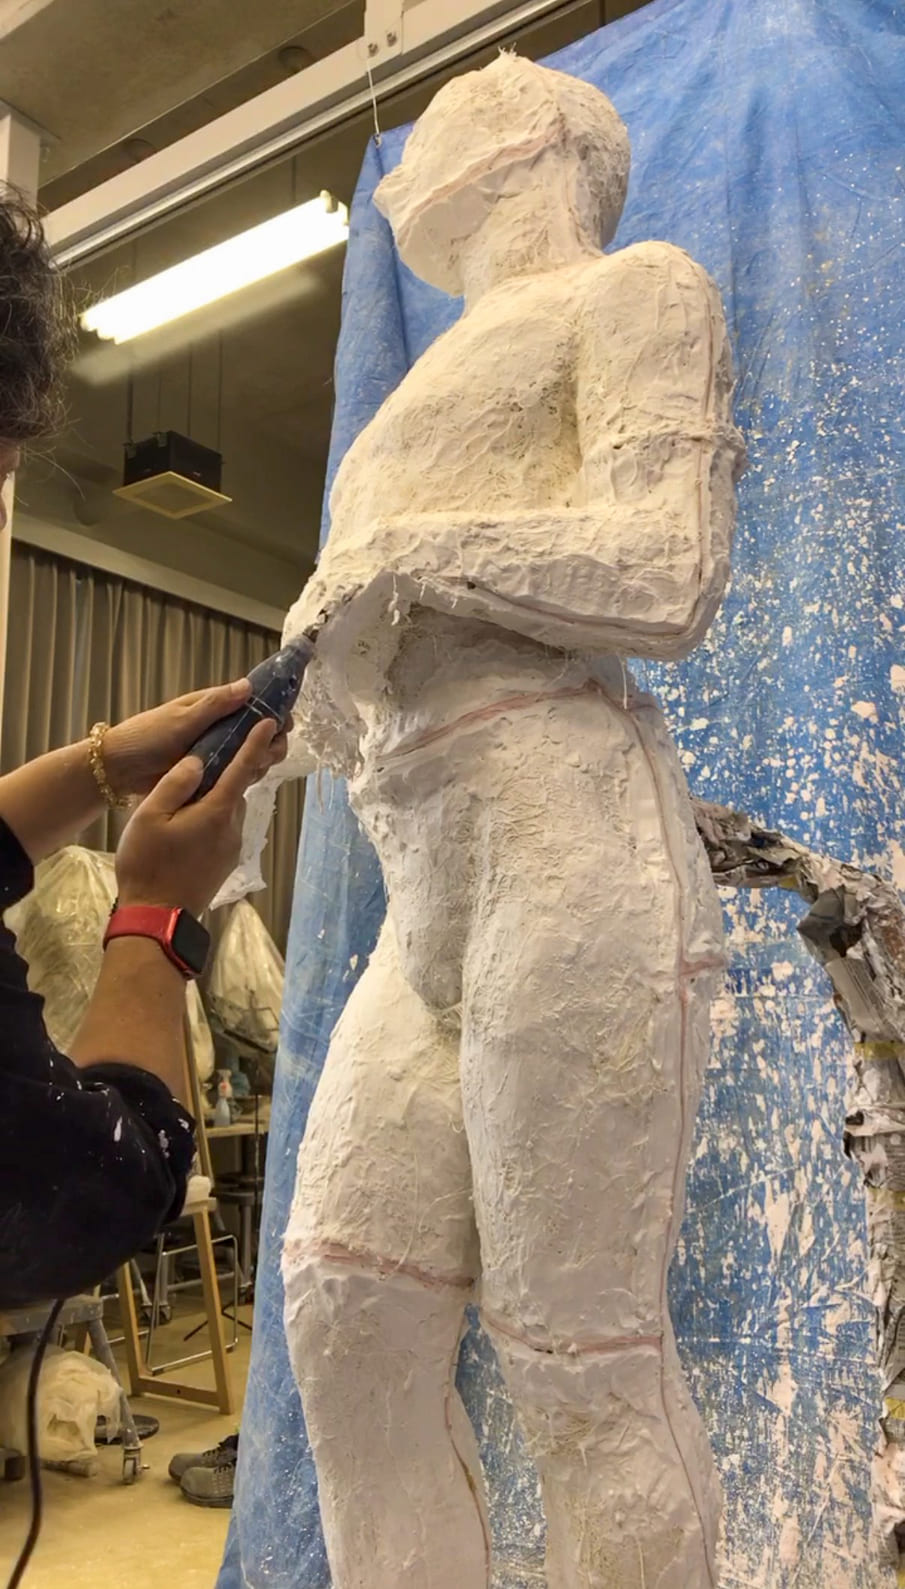
step5
Carve back the plaster surface until the line of the brass sheets becomes visible.
-
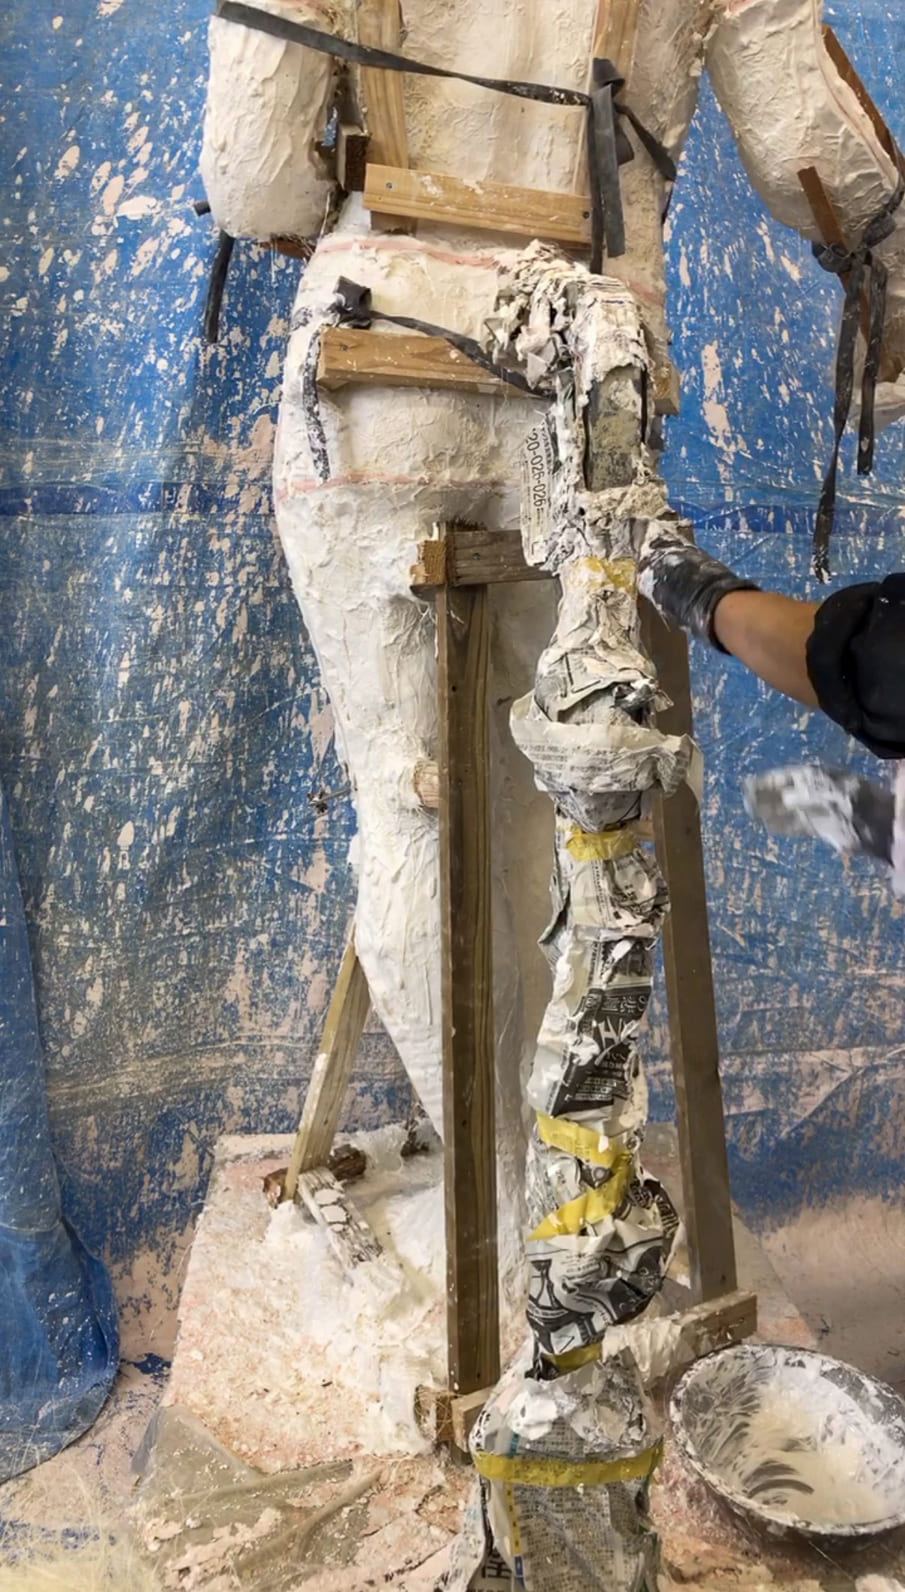
step6
Reinforce the mold from the outside with wooden supports to prevent damage or distortion.
-
step7
Pour water into the seams and carefully open the mold along the parting lines.
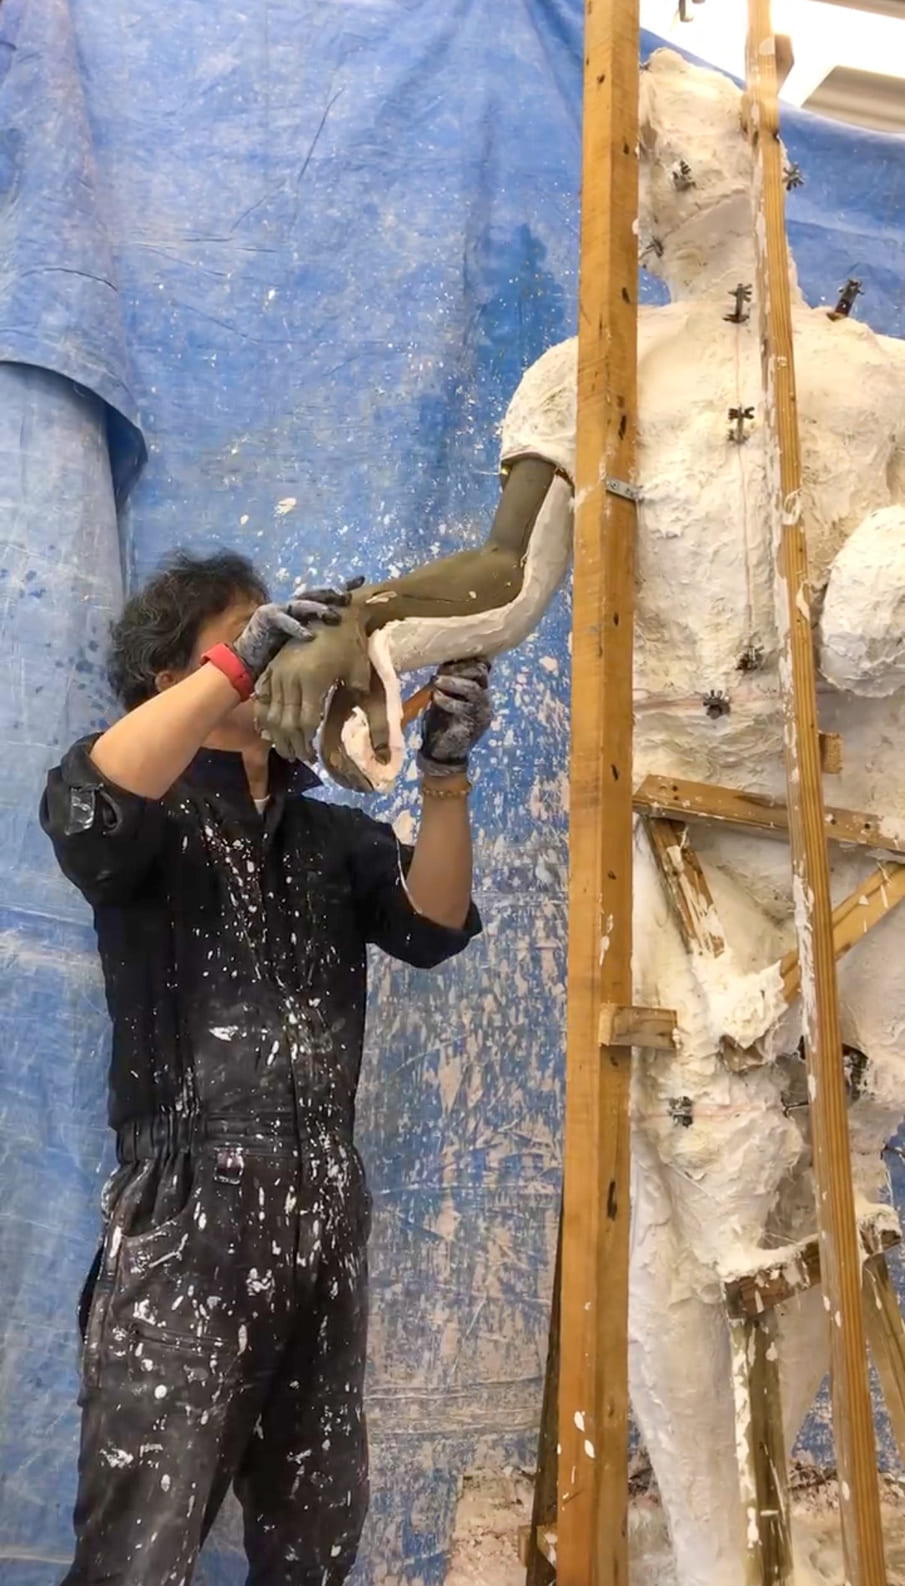
-
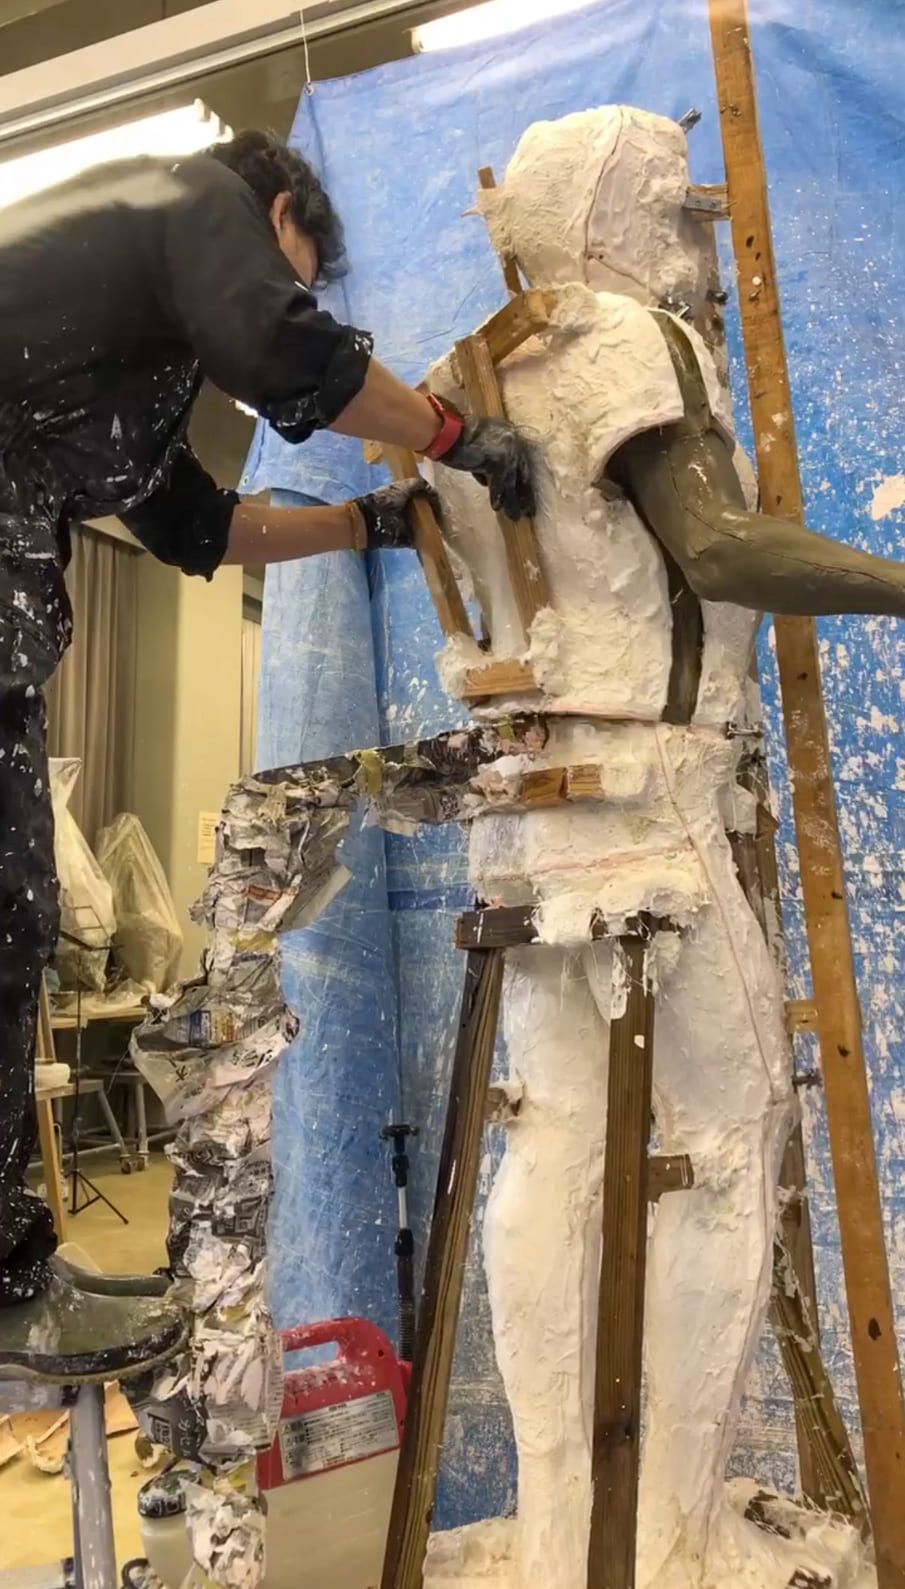
step8
Once the mold is opened, remove the clay from inside, working gradually from the upper parts of the figure.
-
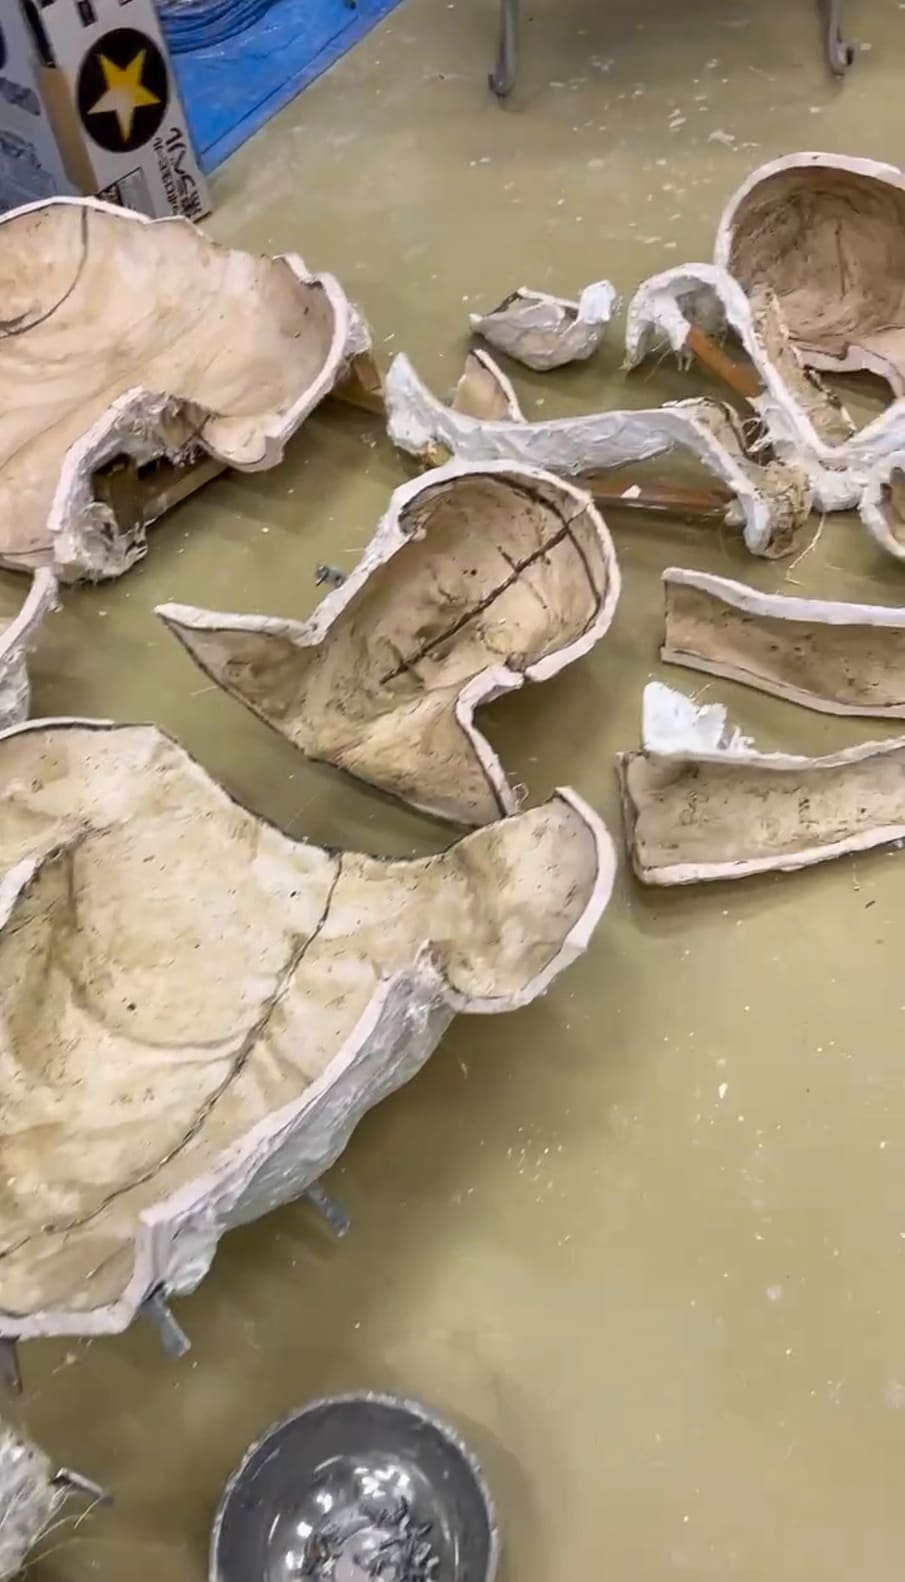
step9
After completing the plaster negative mold, clean away any remaining clay from the interior surface.
-
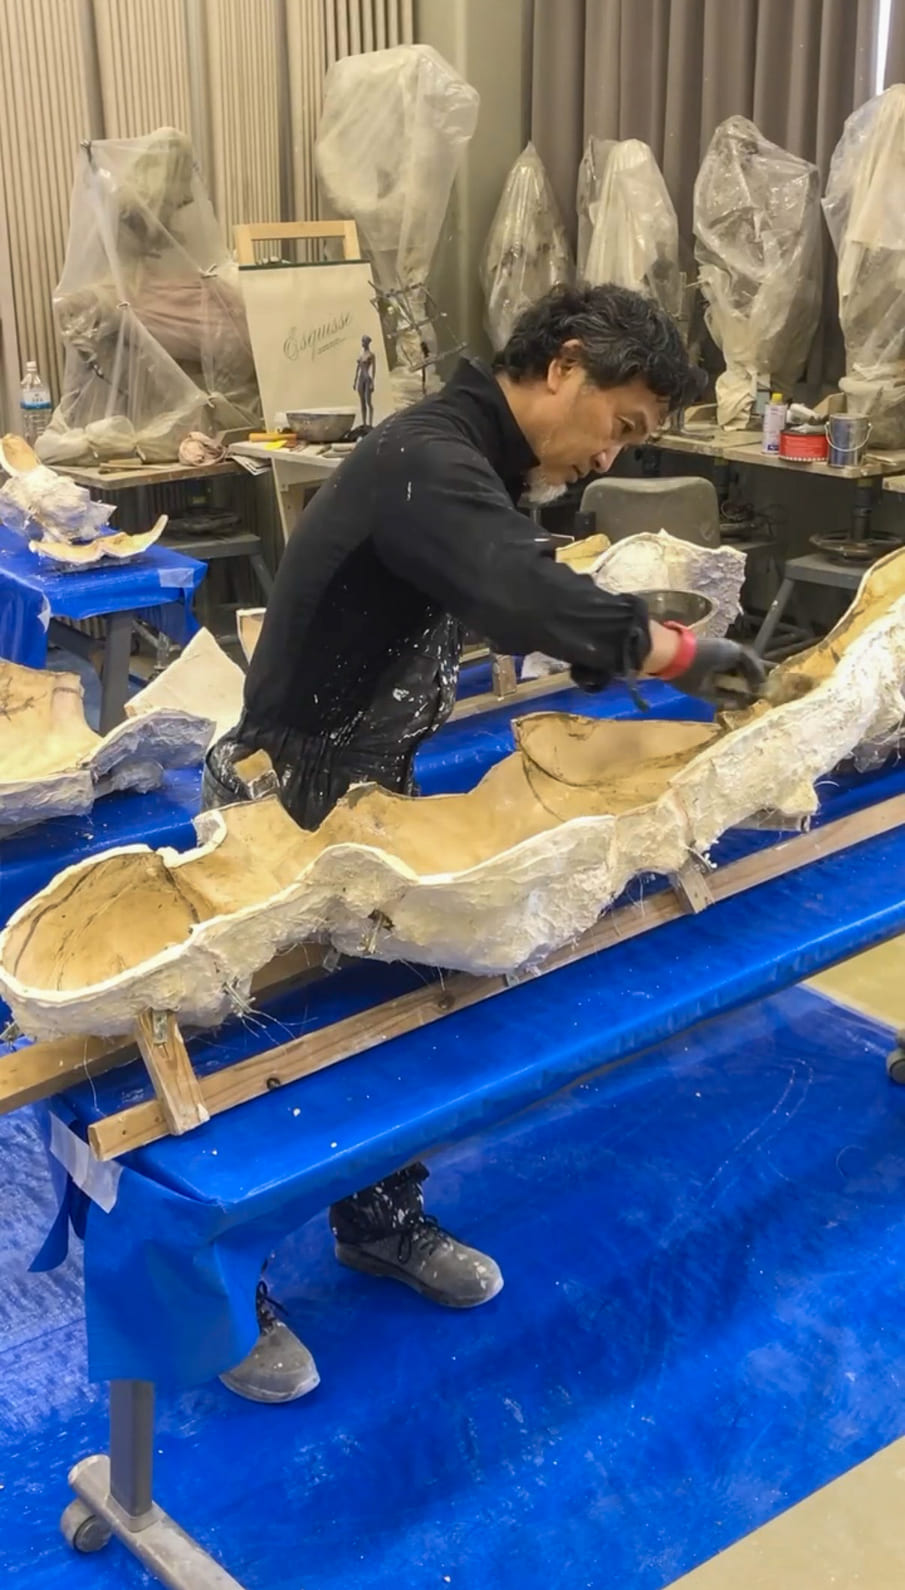
step10
Apply potassium soap evenly to the inner surface of the mold as a release agent.
-
step11
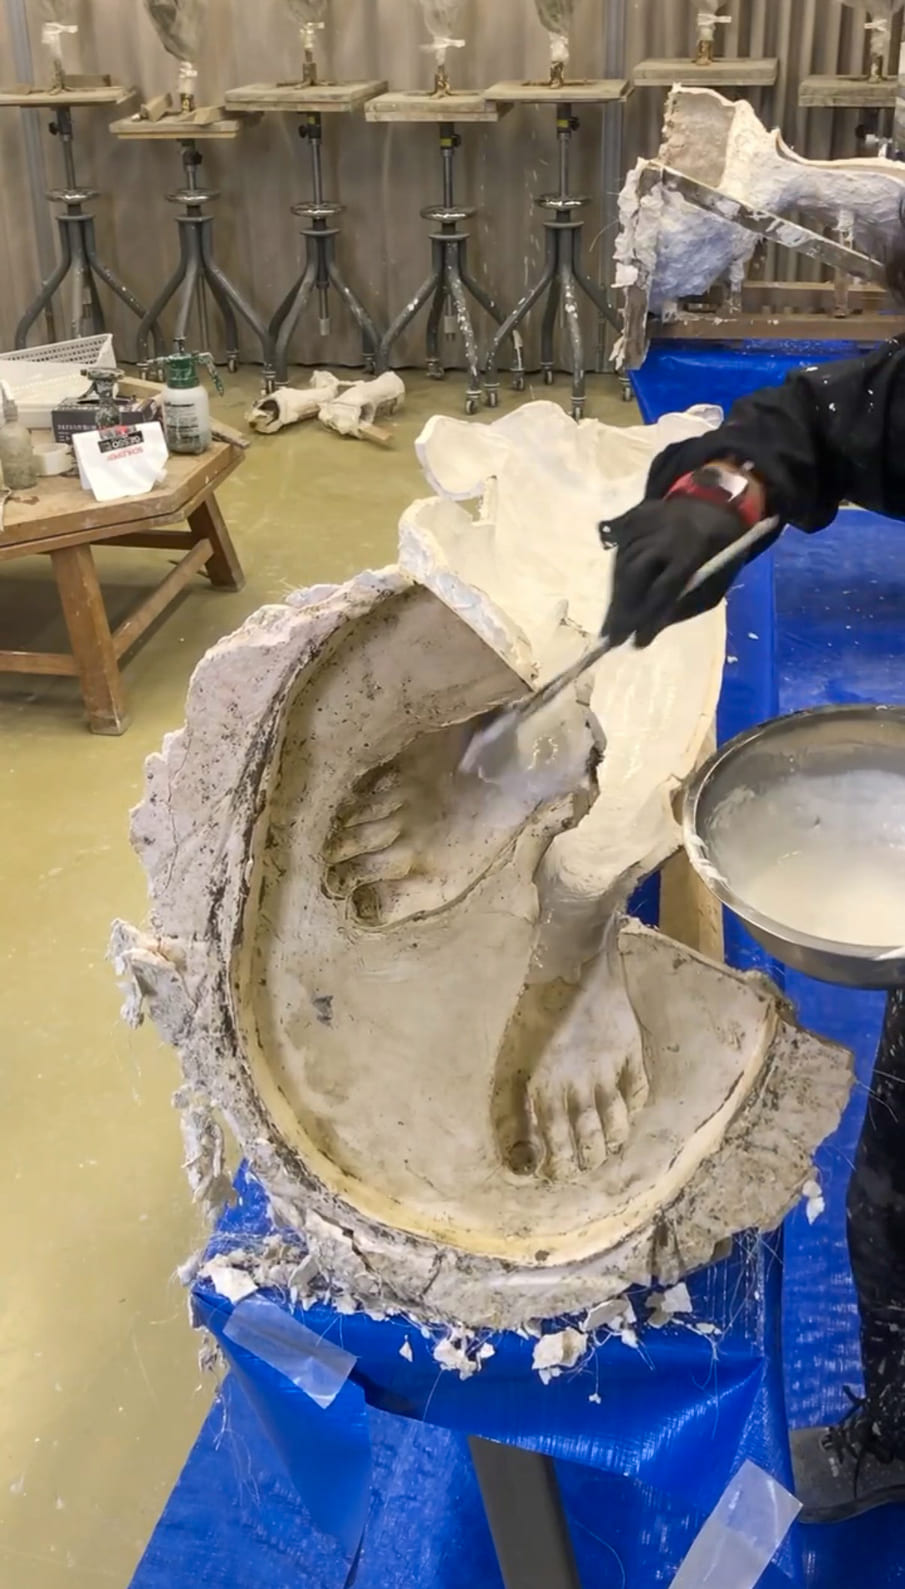
Pour the first layer of acrylic resin into the mold.
-
step12
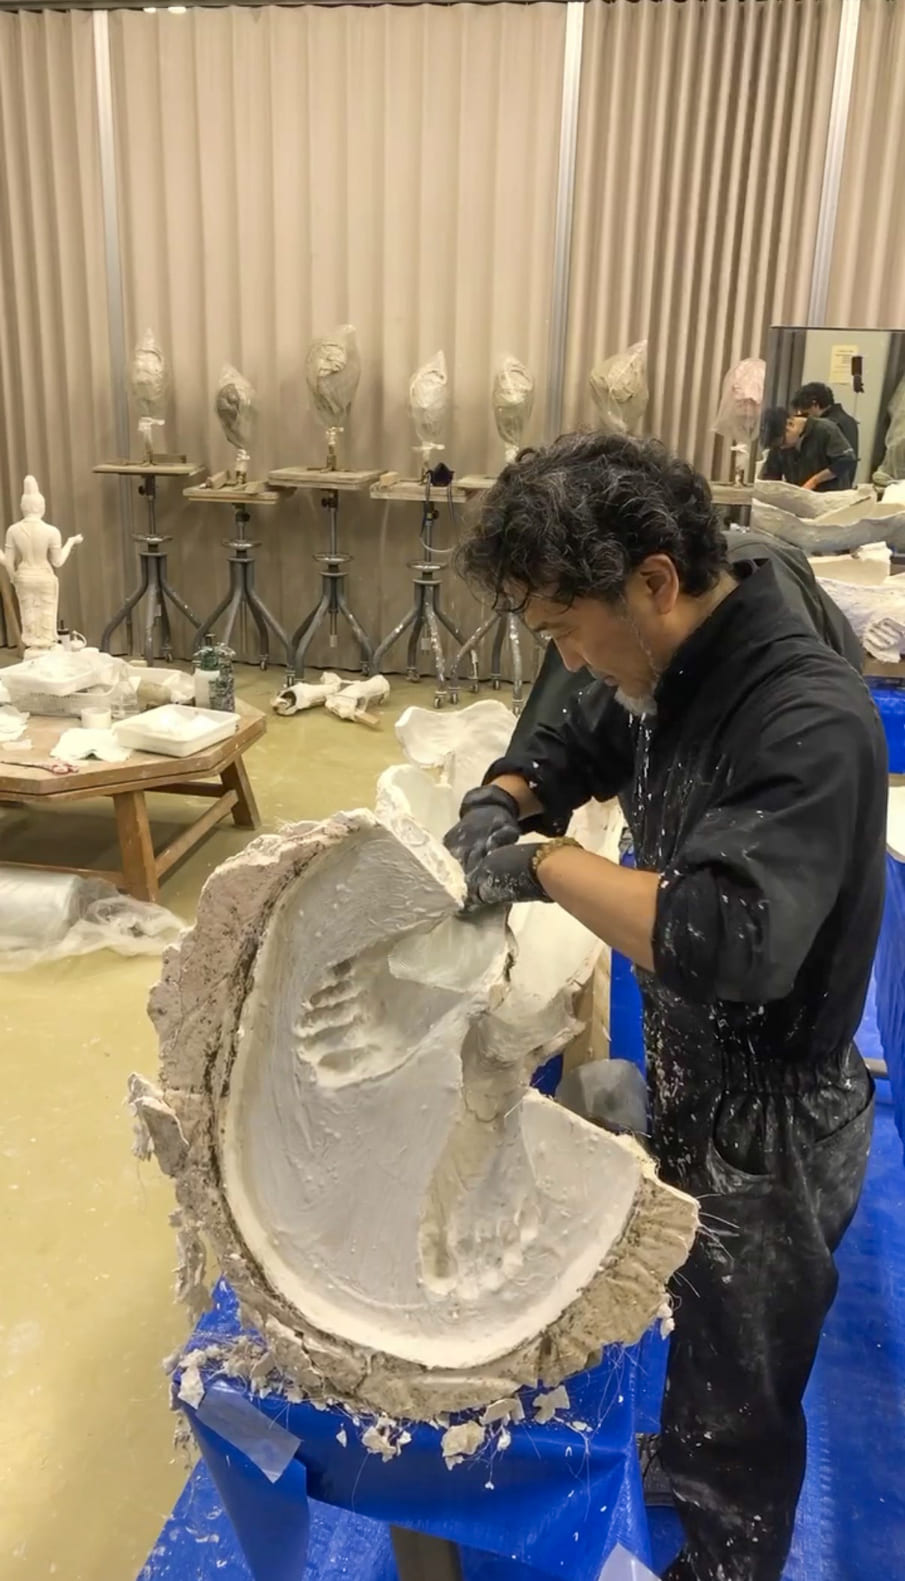
After the first layer has cured, apply thickened acrylic resin and lay glass fiber cloth into it before it hardens, leaving no gaps.
-
step13
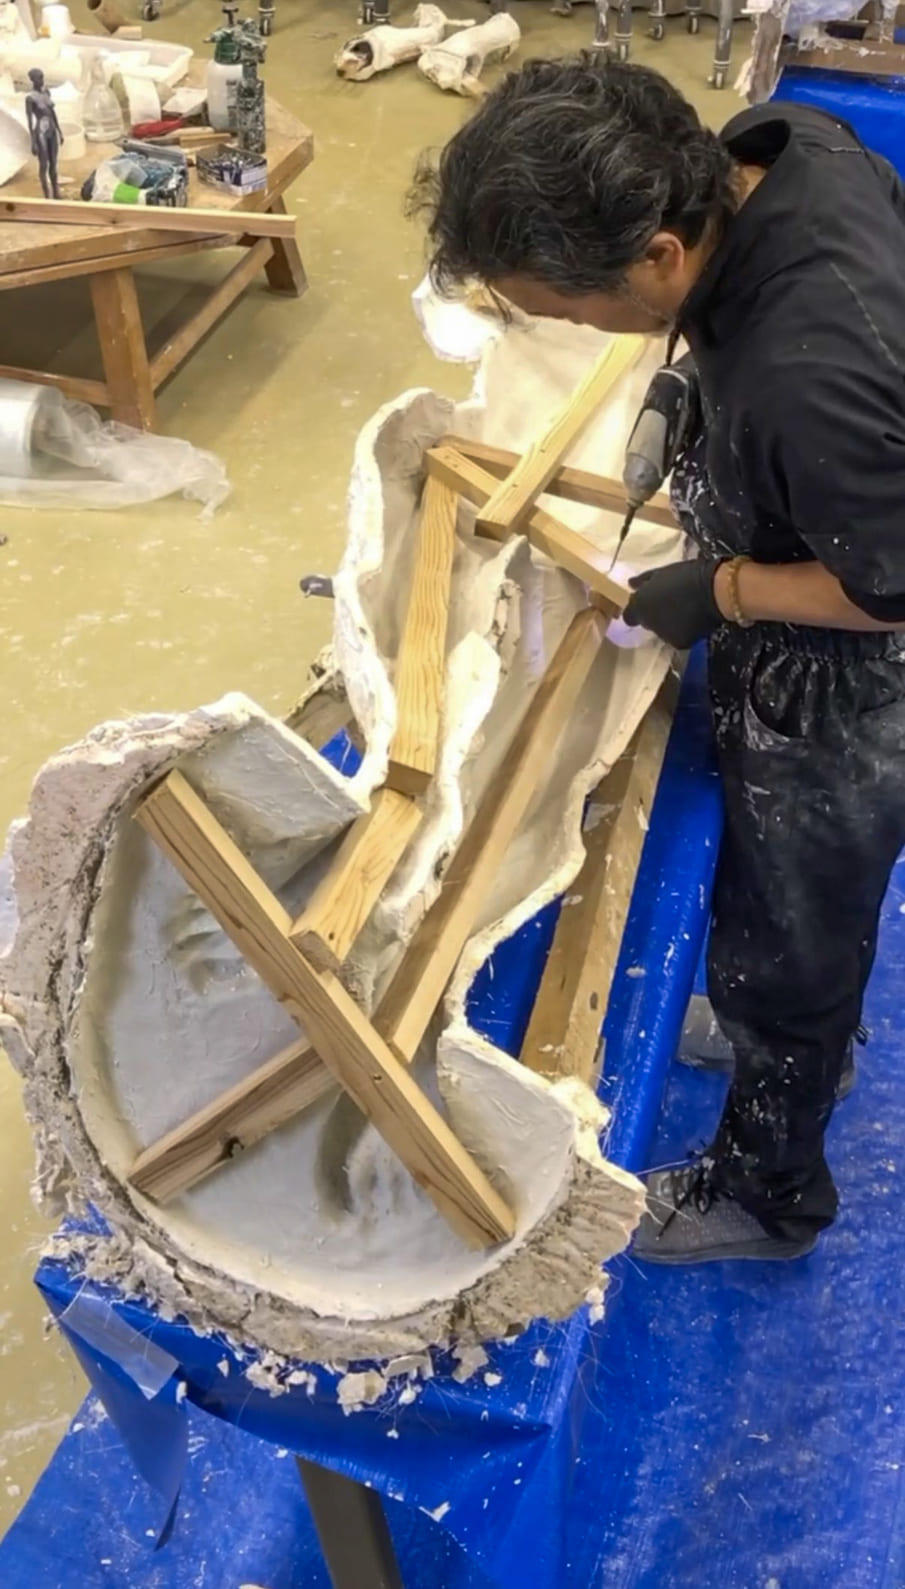
Insert a wooden internal structure for reinforcement, and secure it firmly to the body with glass fiber cloth soaked in acrylic resin.
-
step14
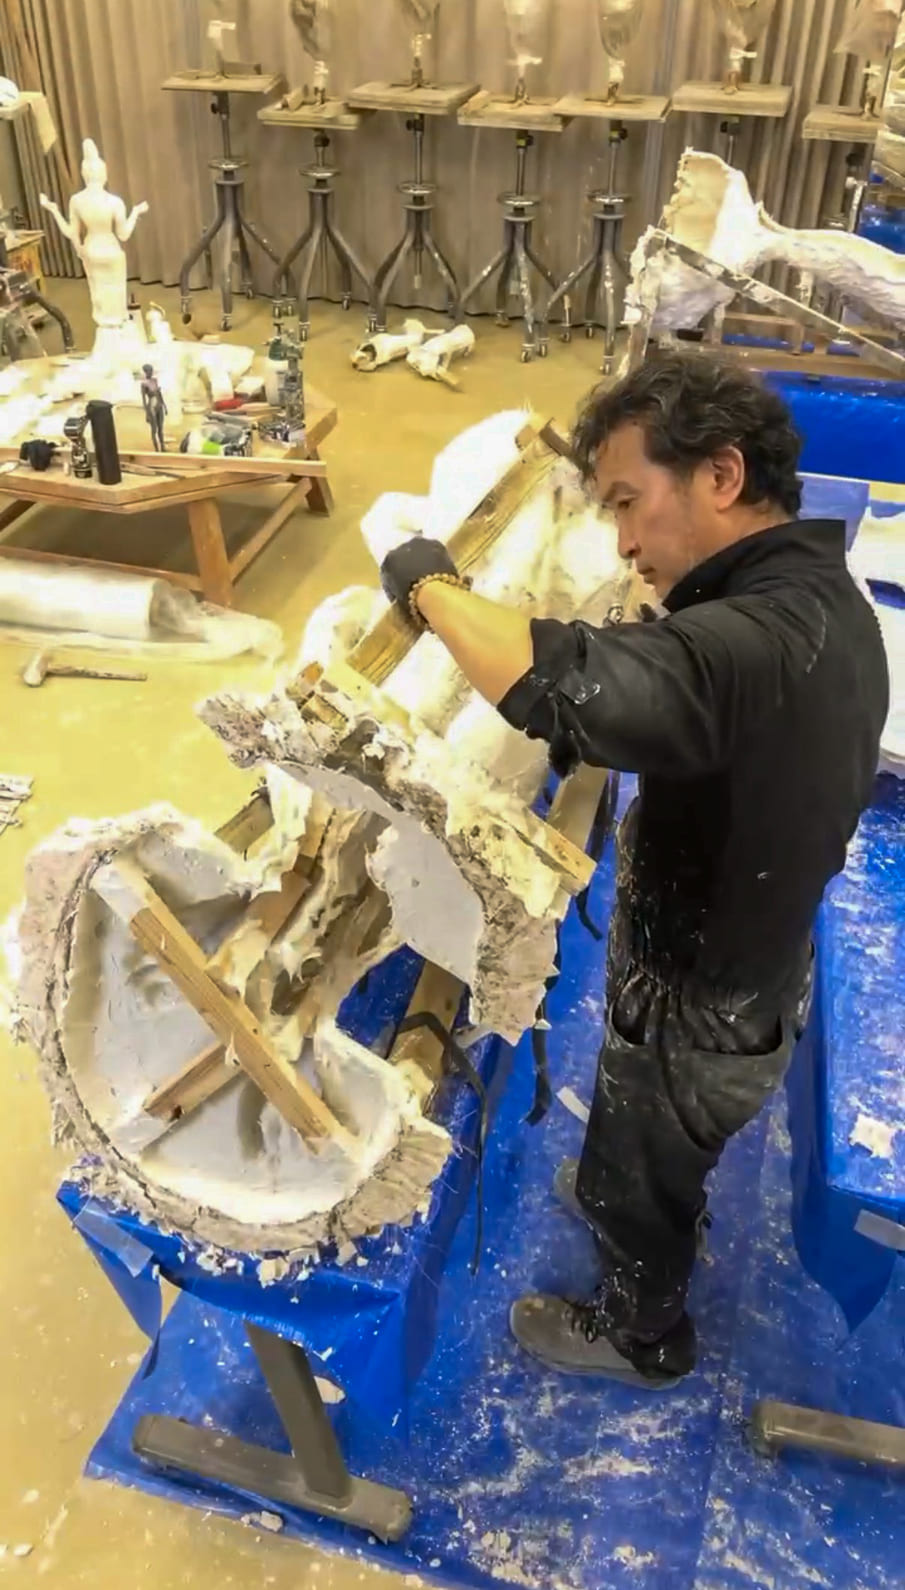
Apply acrylic resin and glass fiber cloth along the rim of the mold, then align and close the mold parts securely.
-
step15
After the resin has cured, break away the outer plaster mold and remove the cast sculpture from inside.
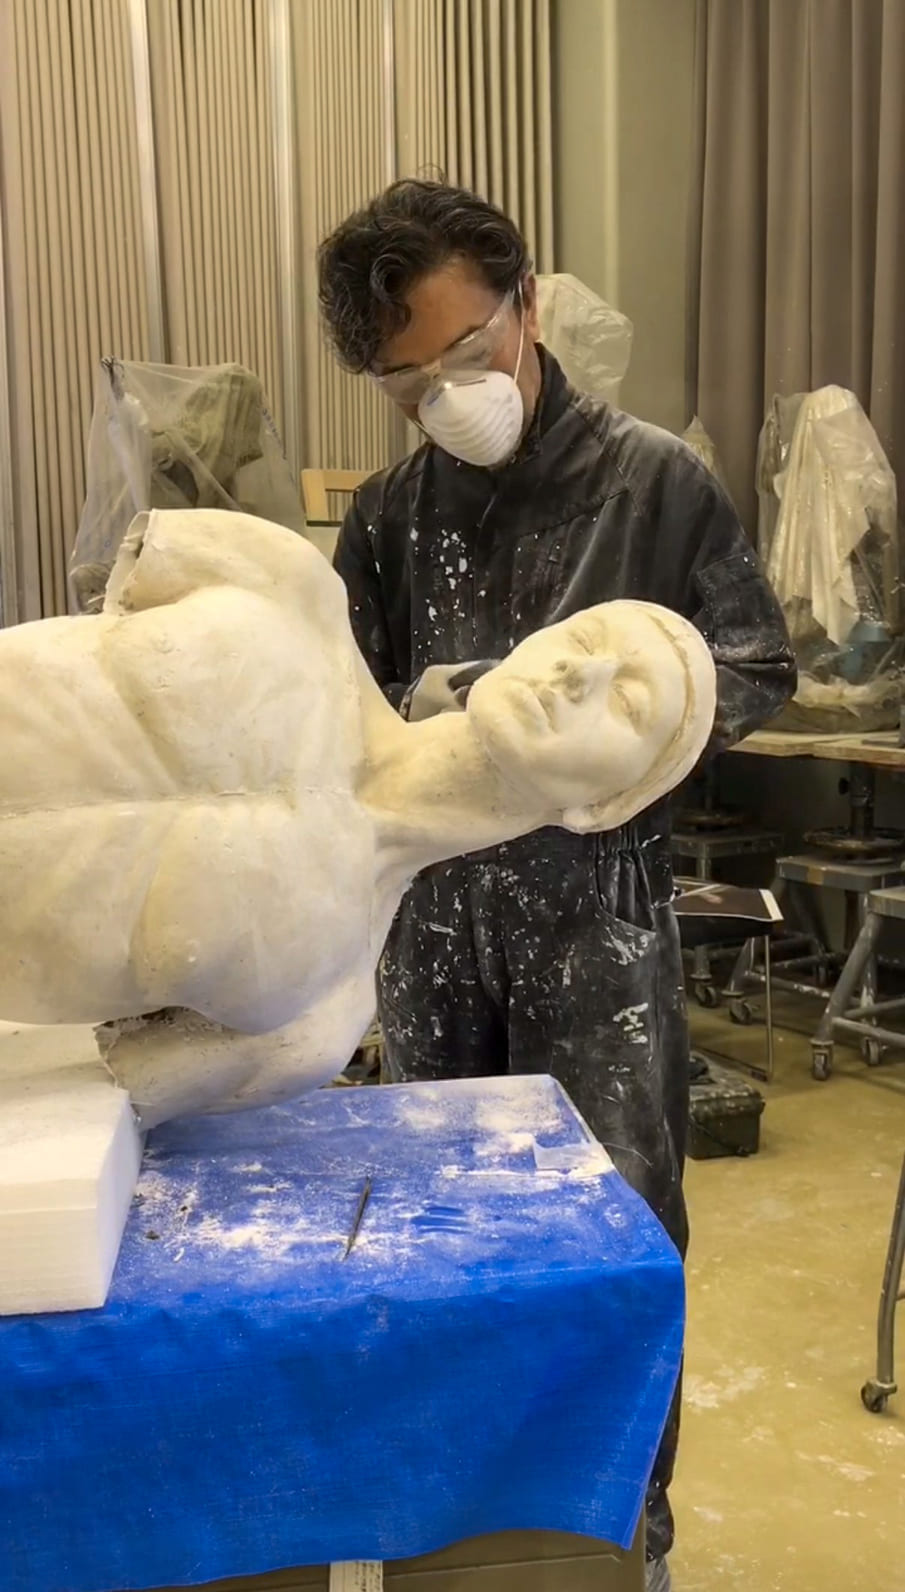
-
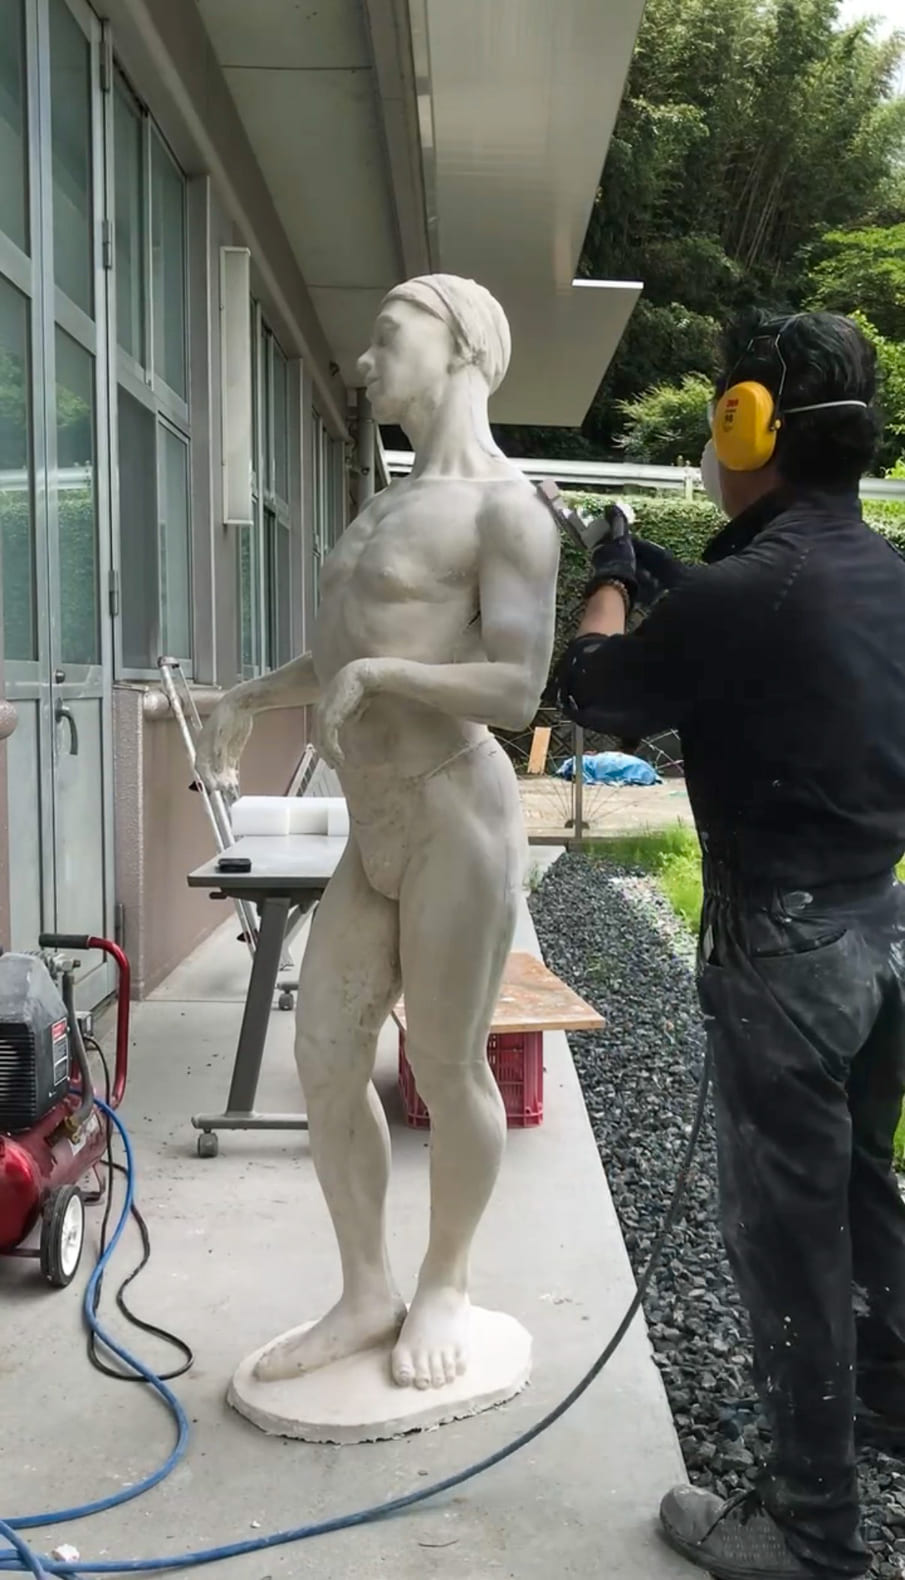
step16
Grind and refine the surface so that the mold seams disappear and the form is corrected.
-
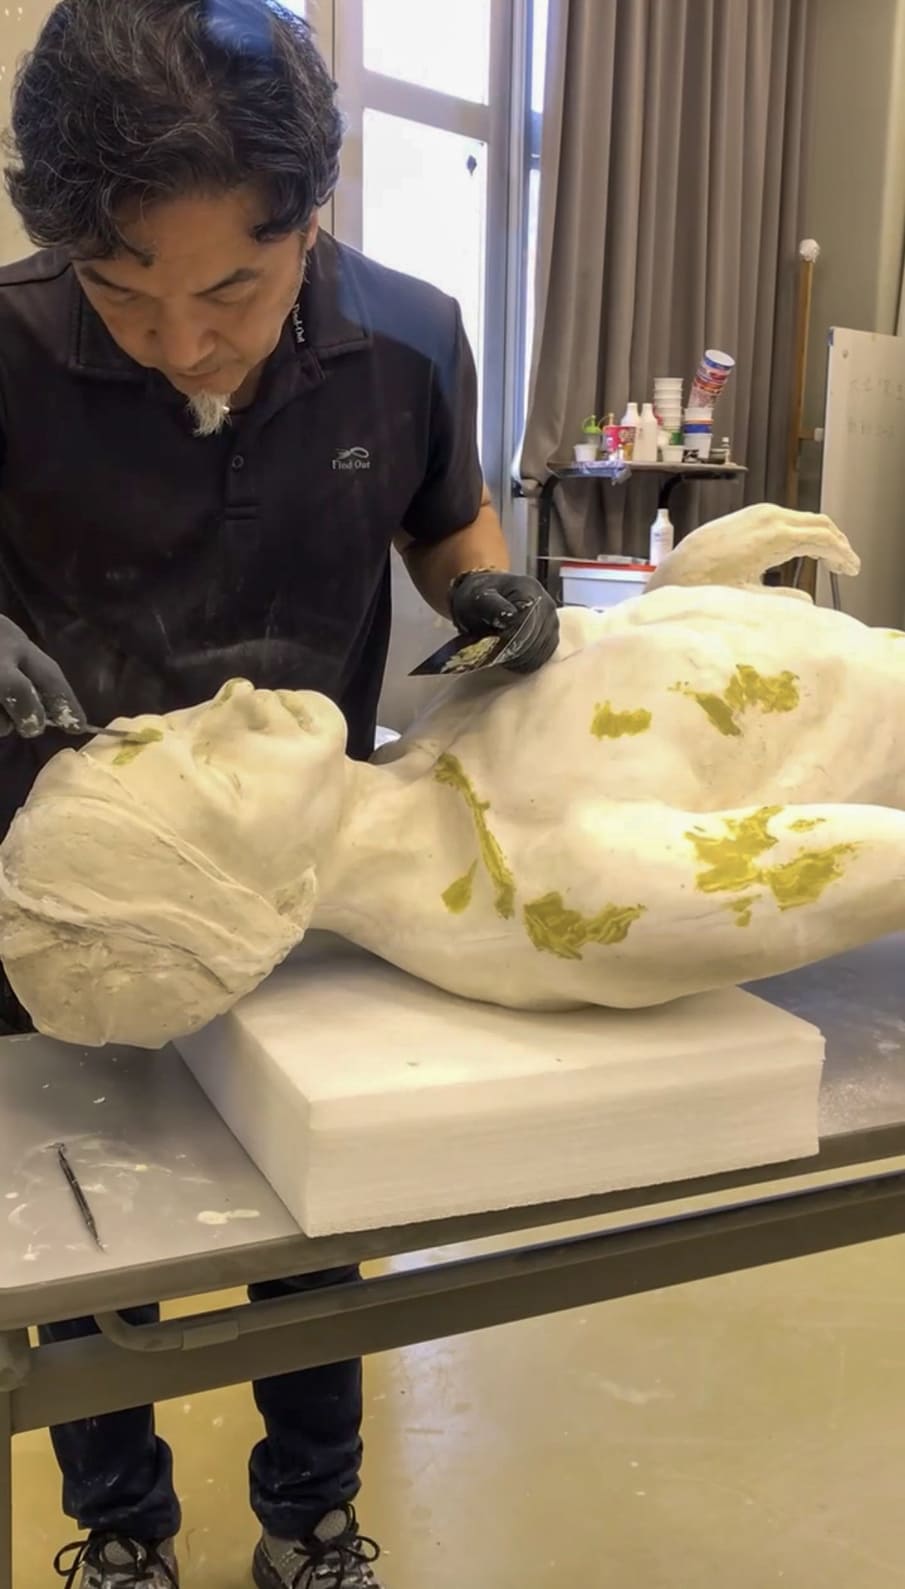
step17
Fill small scratches and surface imperfections with putty, then smooth the surface.
-
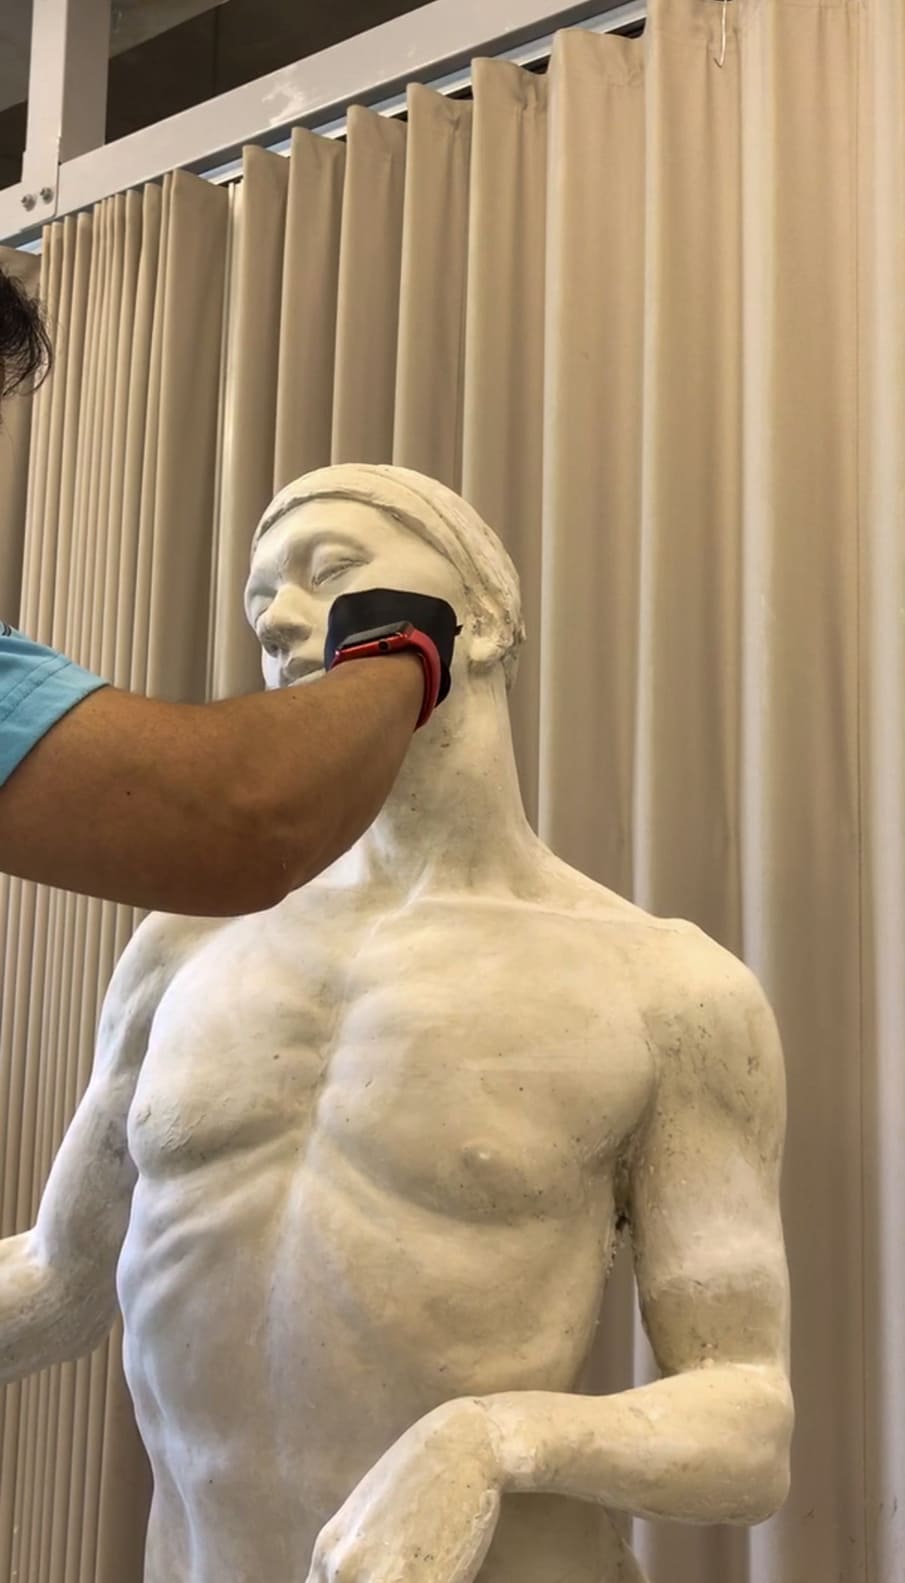
step18
Repeat the sanding process many times until the desired surface quality is achieved.
-
step19
Apply urethane paint in multiple thin spray coats.
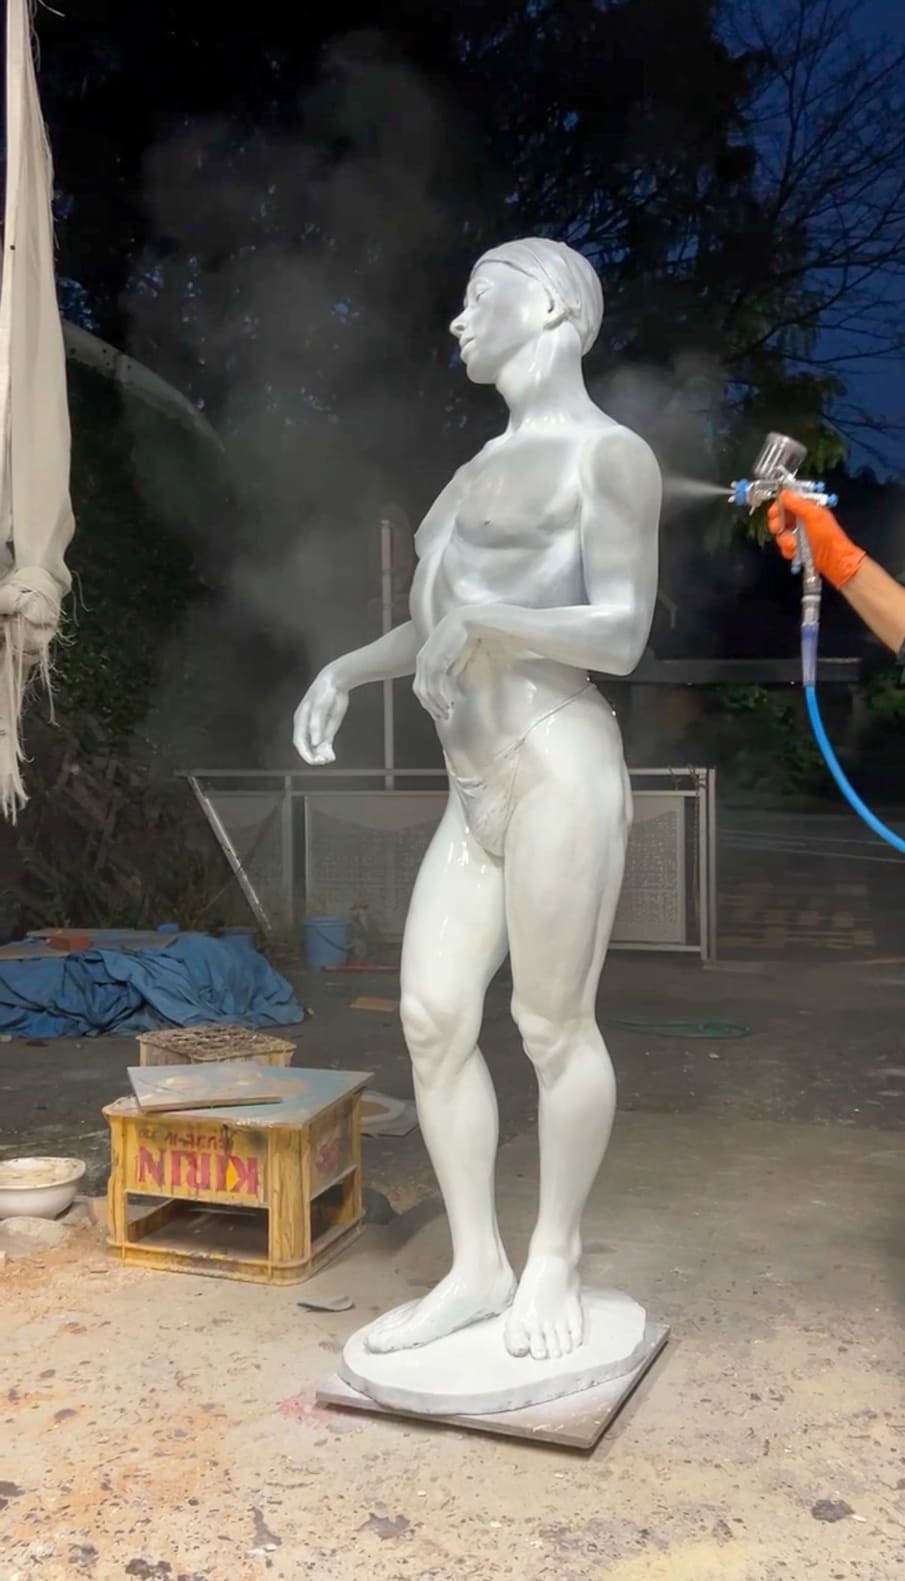
-
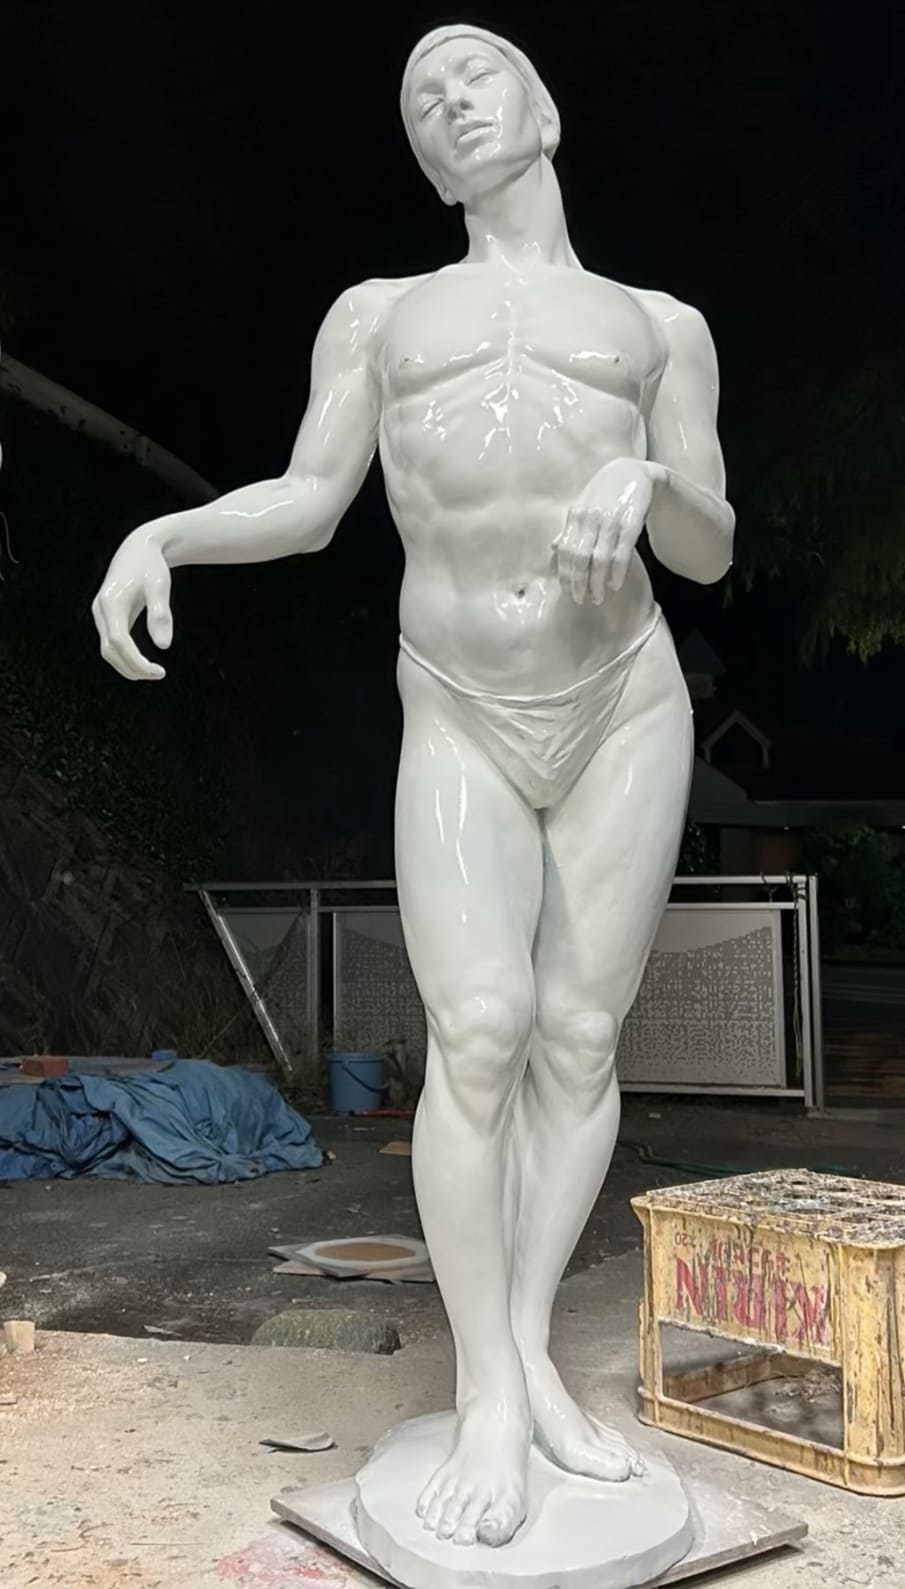
step20
Once the painting is complete, the sculpture reaches its final finished form.
Silicone Mold Making
-
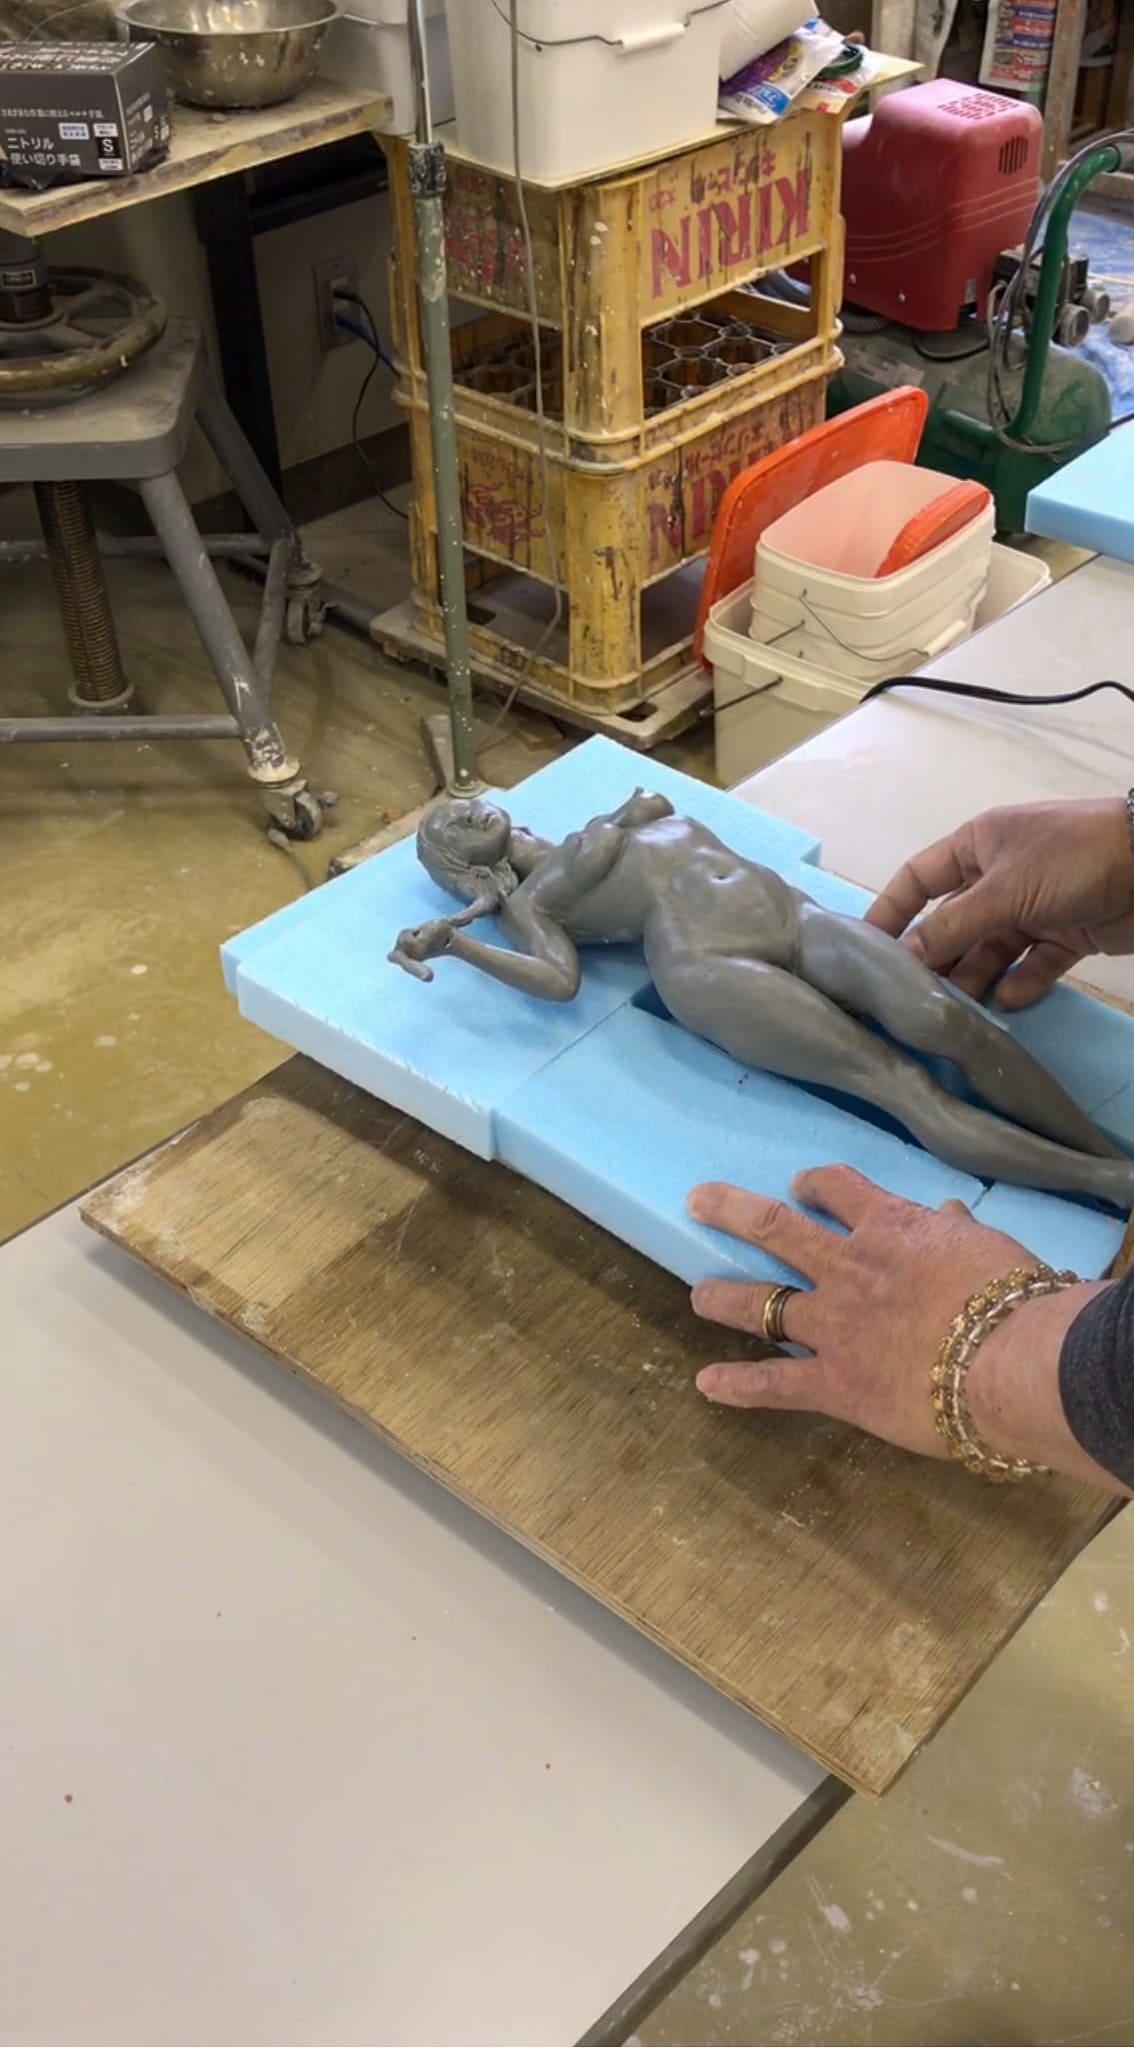
step1
Place the sculpture to be molded on a base made from cut Styrofoam, positioning it securely for the silicone molding process.
-
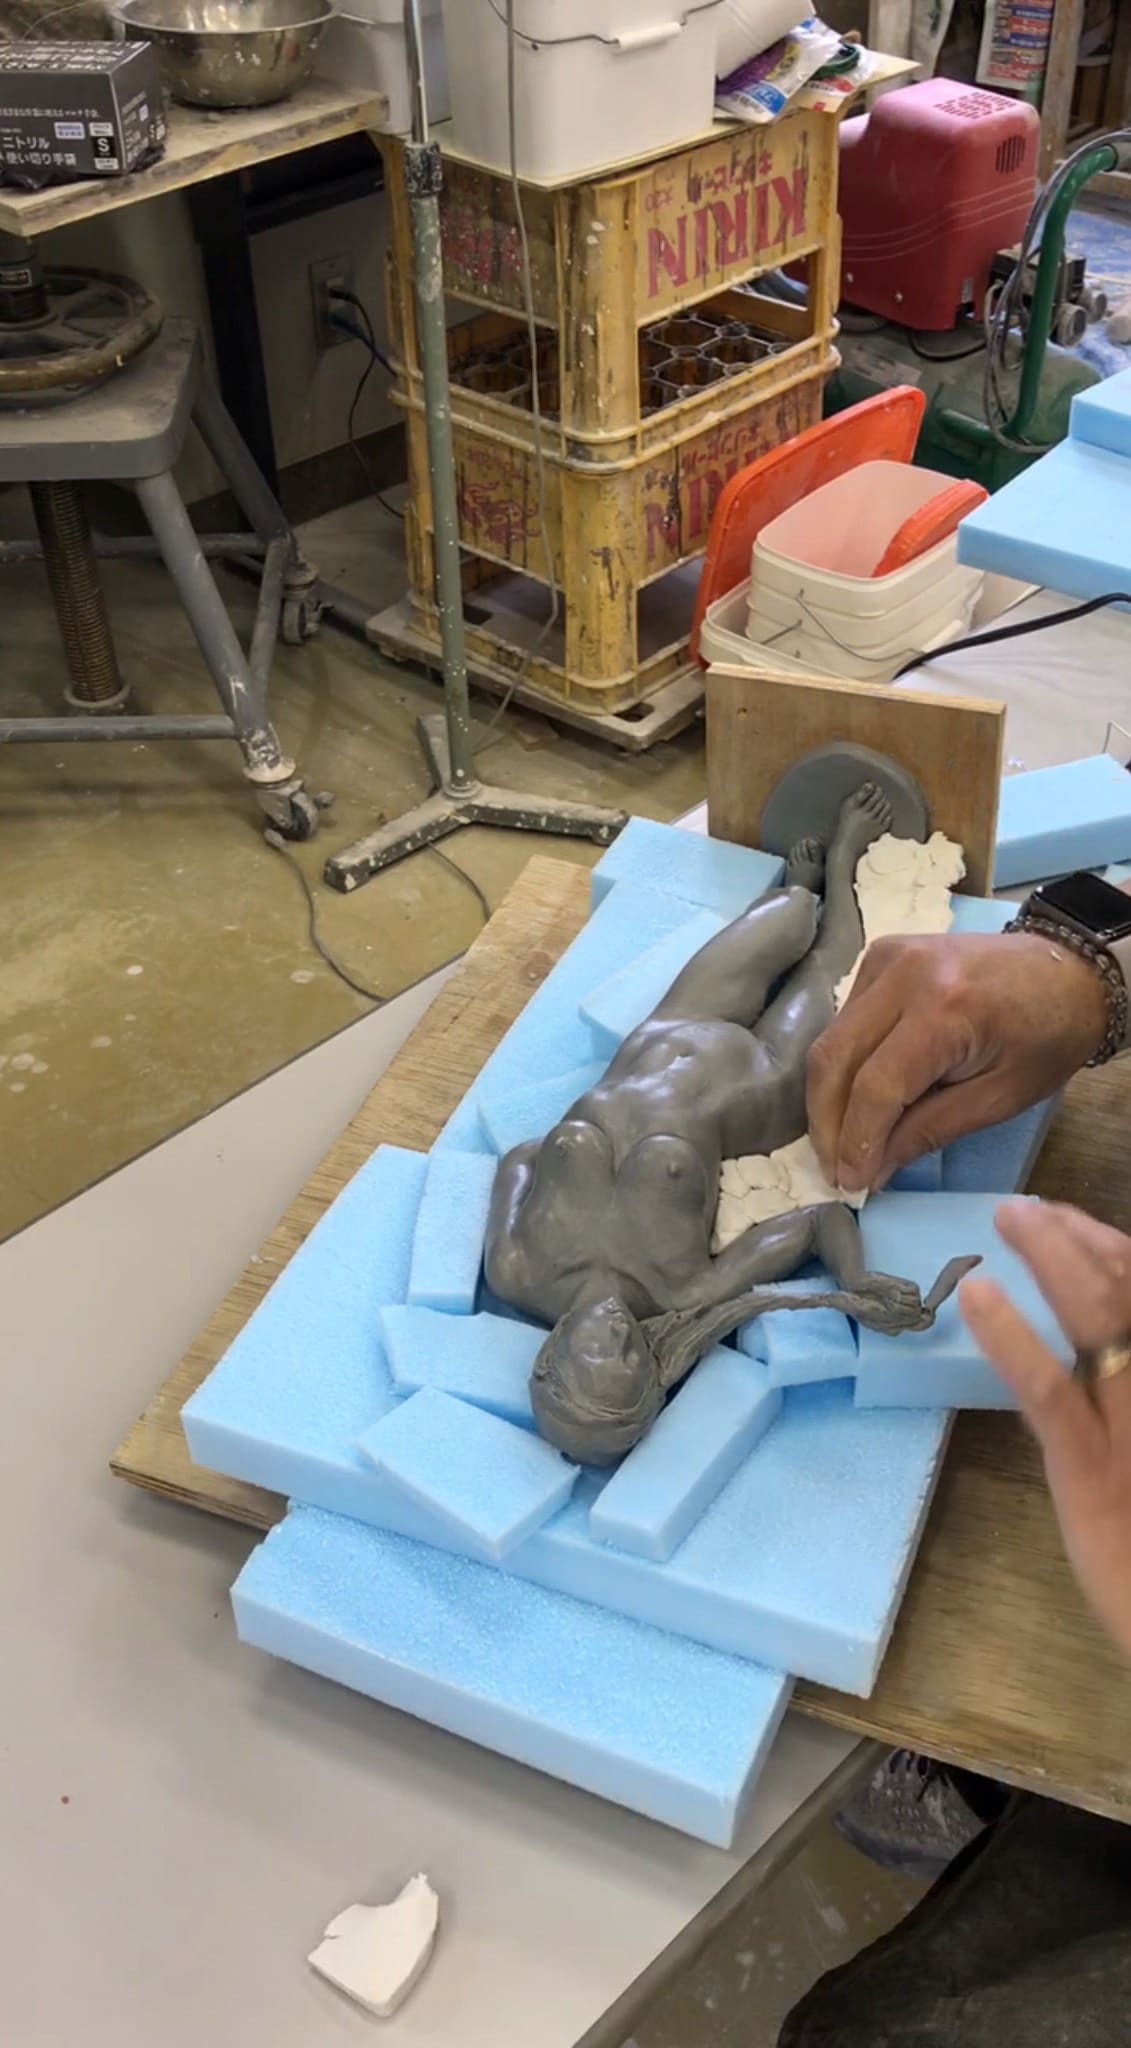
step2
Cut additional Styrofoam pieces and adjust the support so that the height around the work is as even and stable as possible.
-
step3
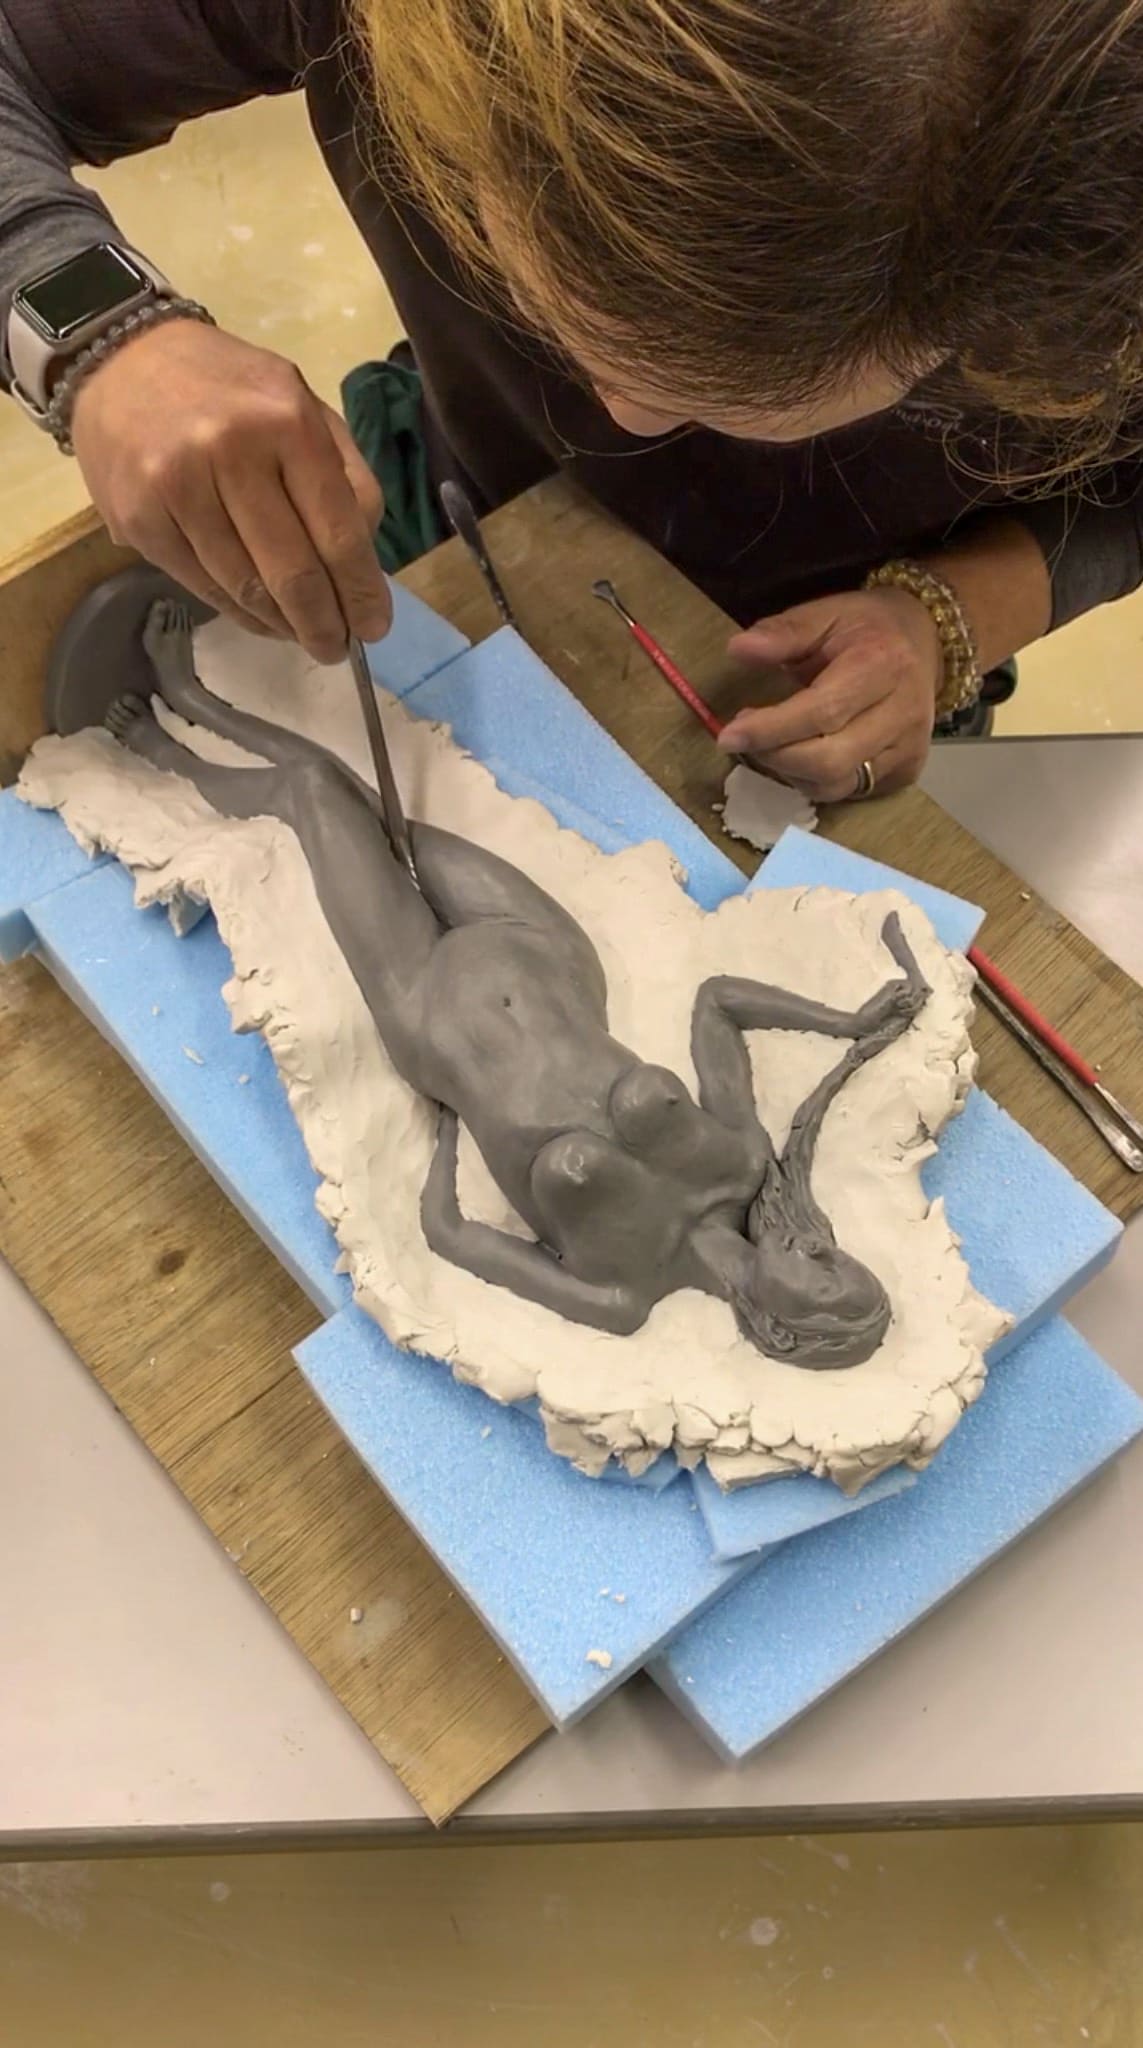
Build up the surrounding area with oil-based clay. Carefully fill any gaps where the clay meets the sculpture, using a spatula to create a tight seal.
-
step4
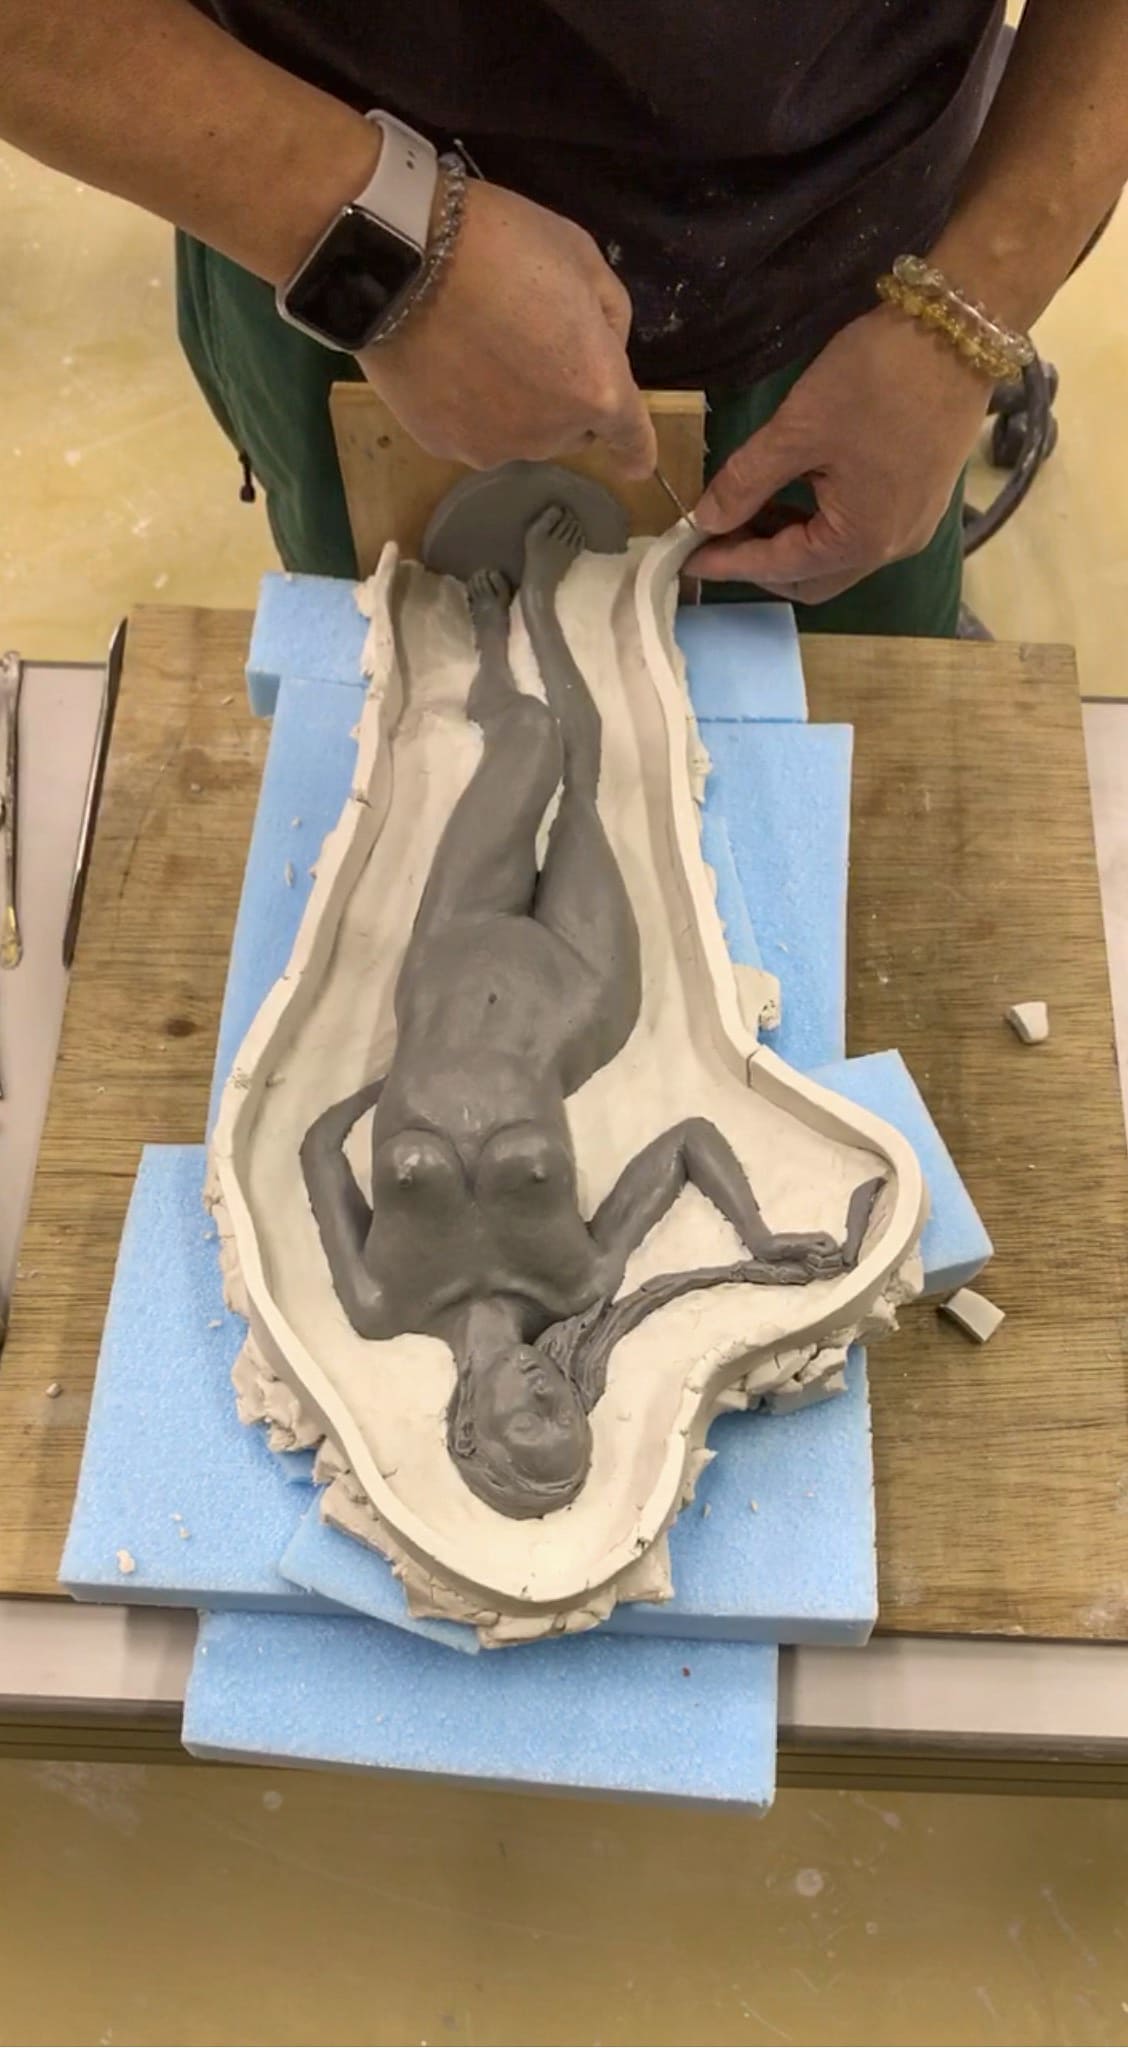
Create a clay retaining wall around the work to prevent the silicone from leaking. Pack oil-based clay into all openings and edges to ensure a complete seal.
-
step5
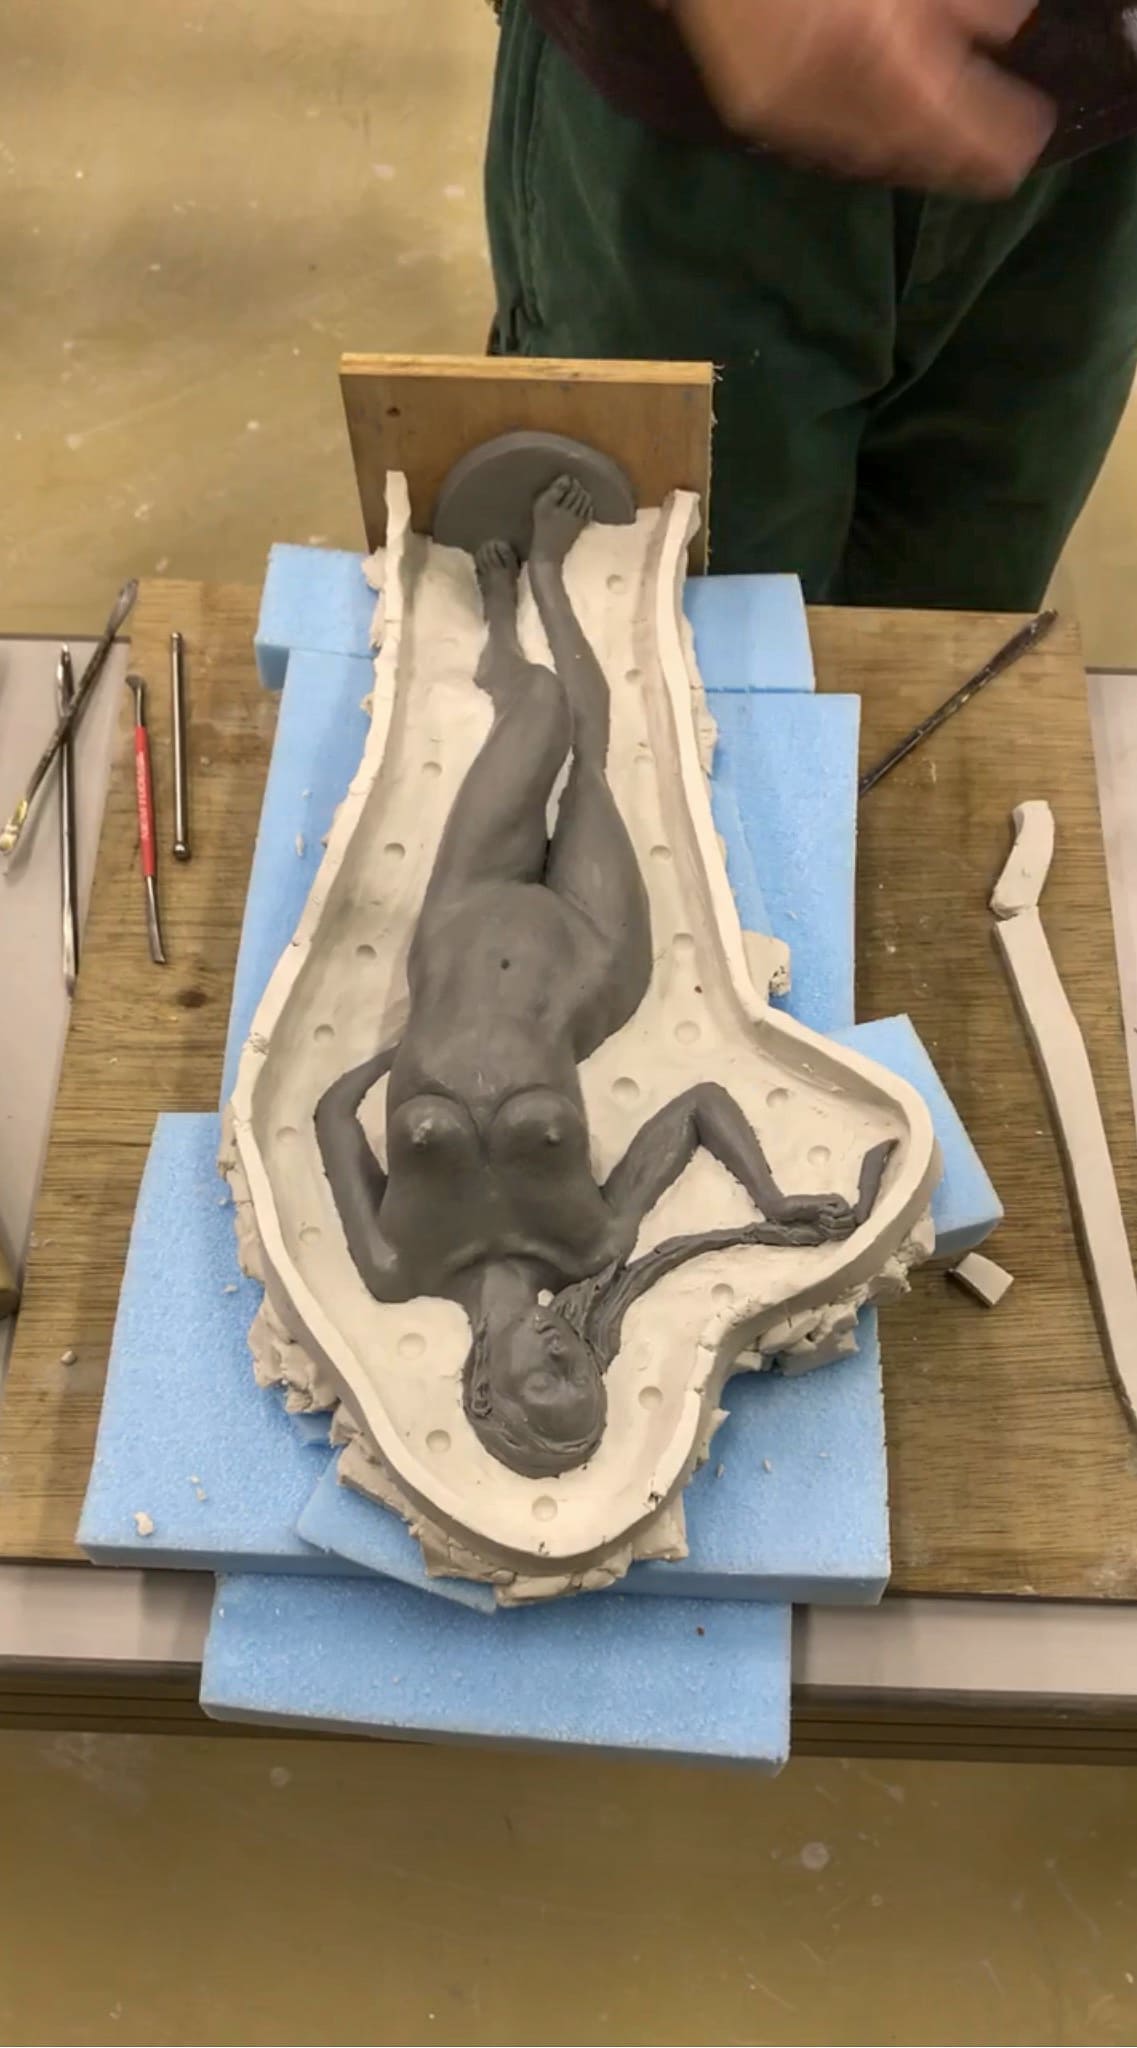
Form registration keys around the mold using a ball-ended spatula or similar tool. These indentations help the two silicone halves align accurately later.
-
step6
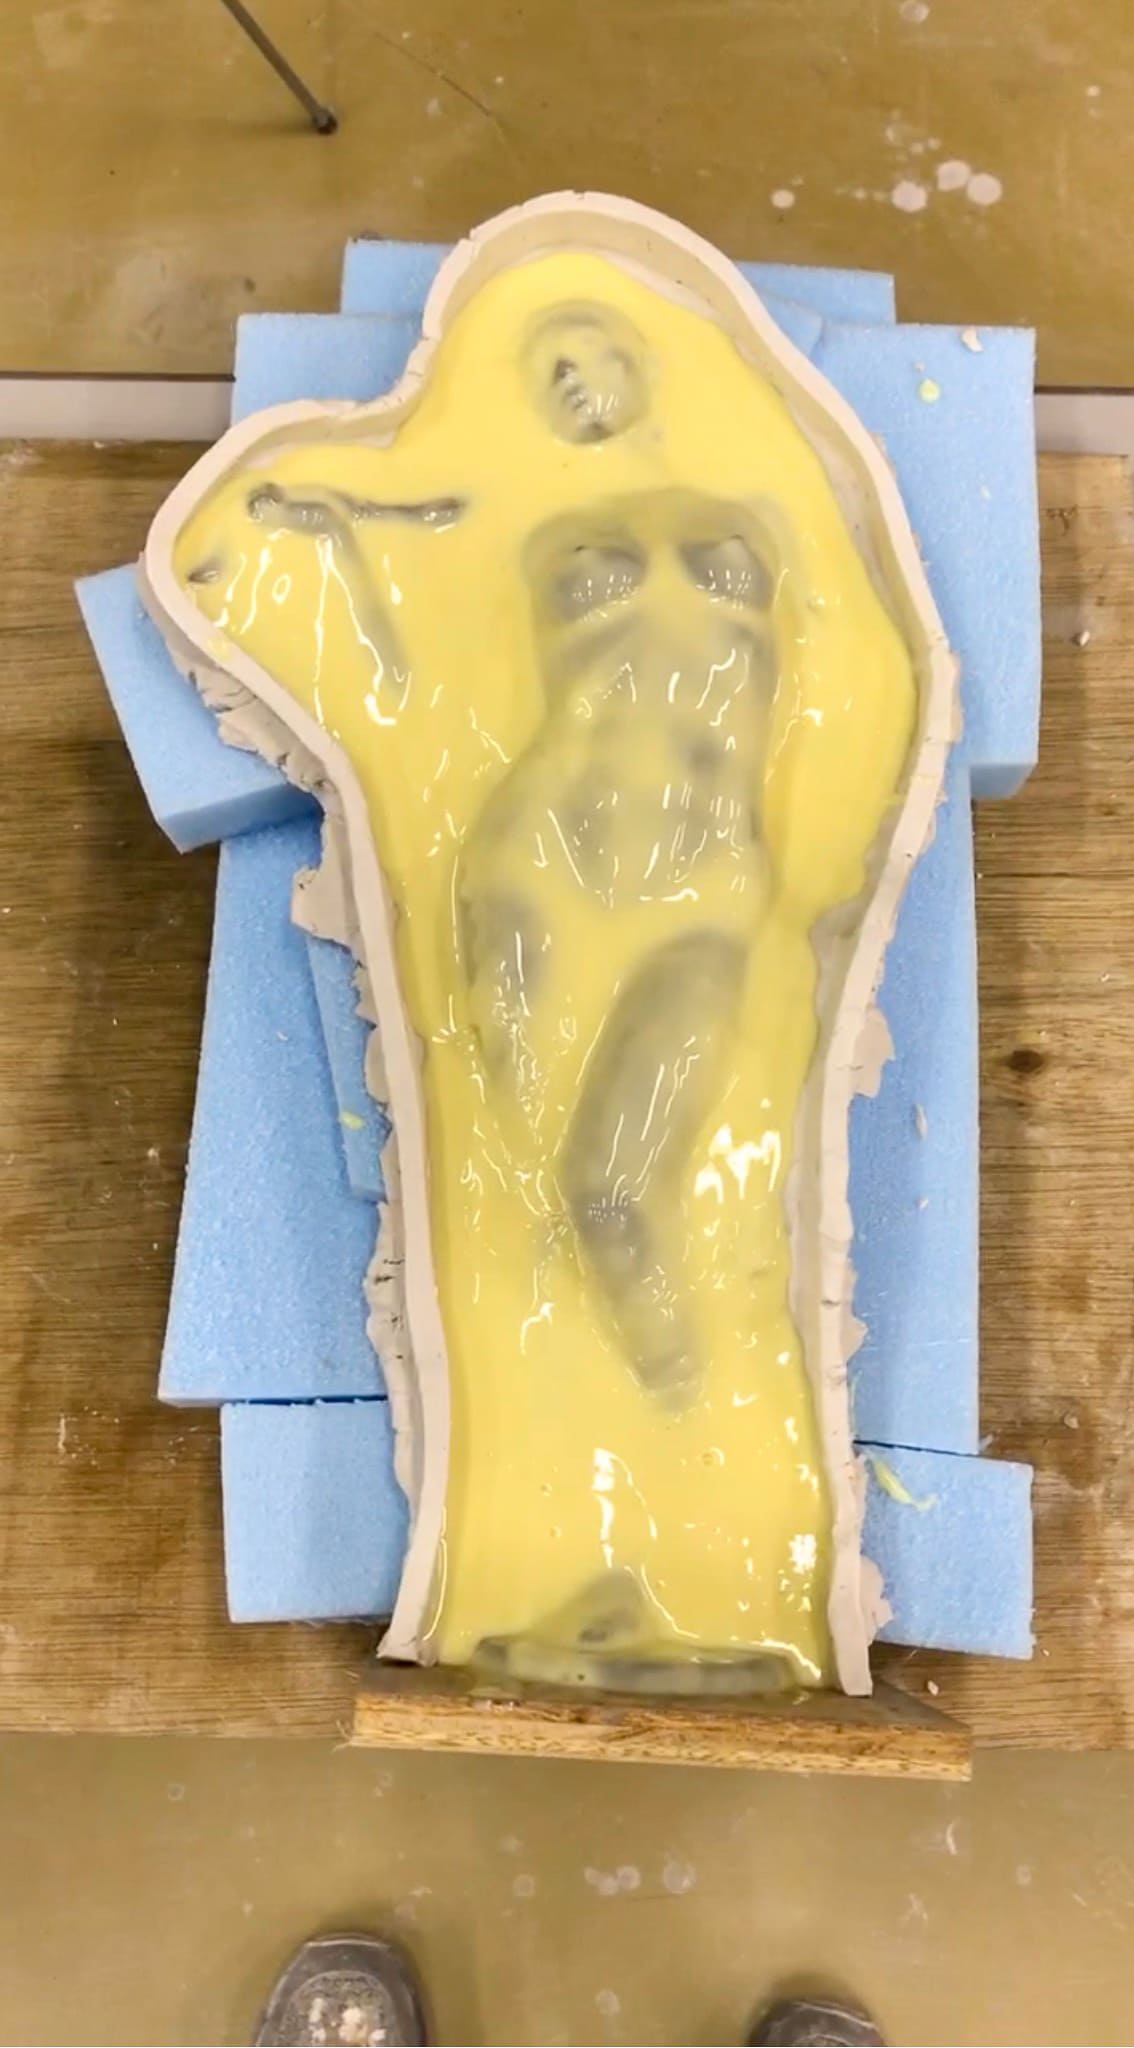
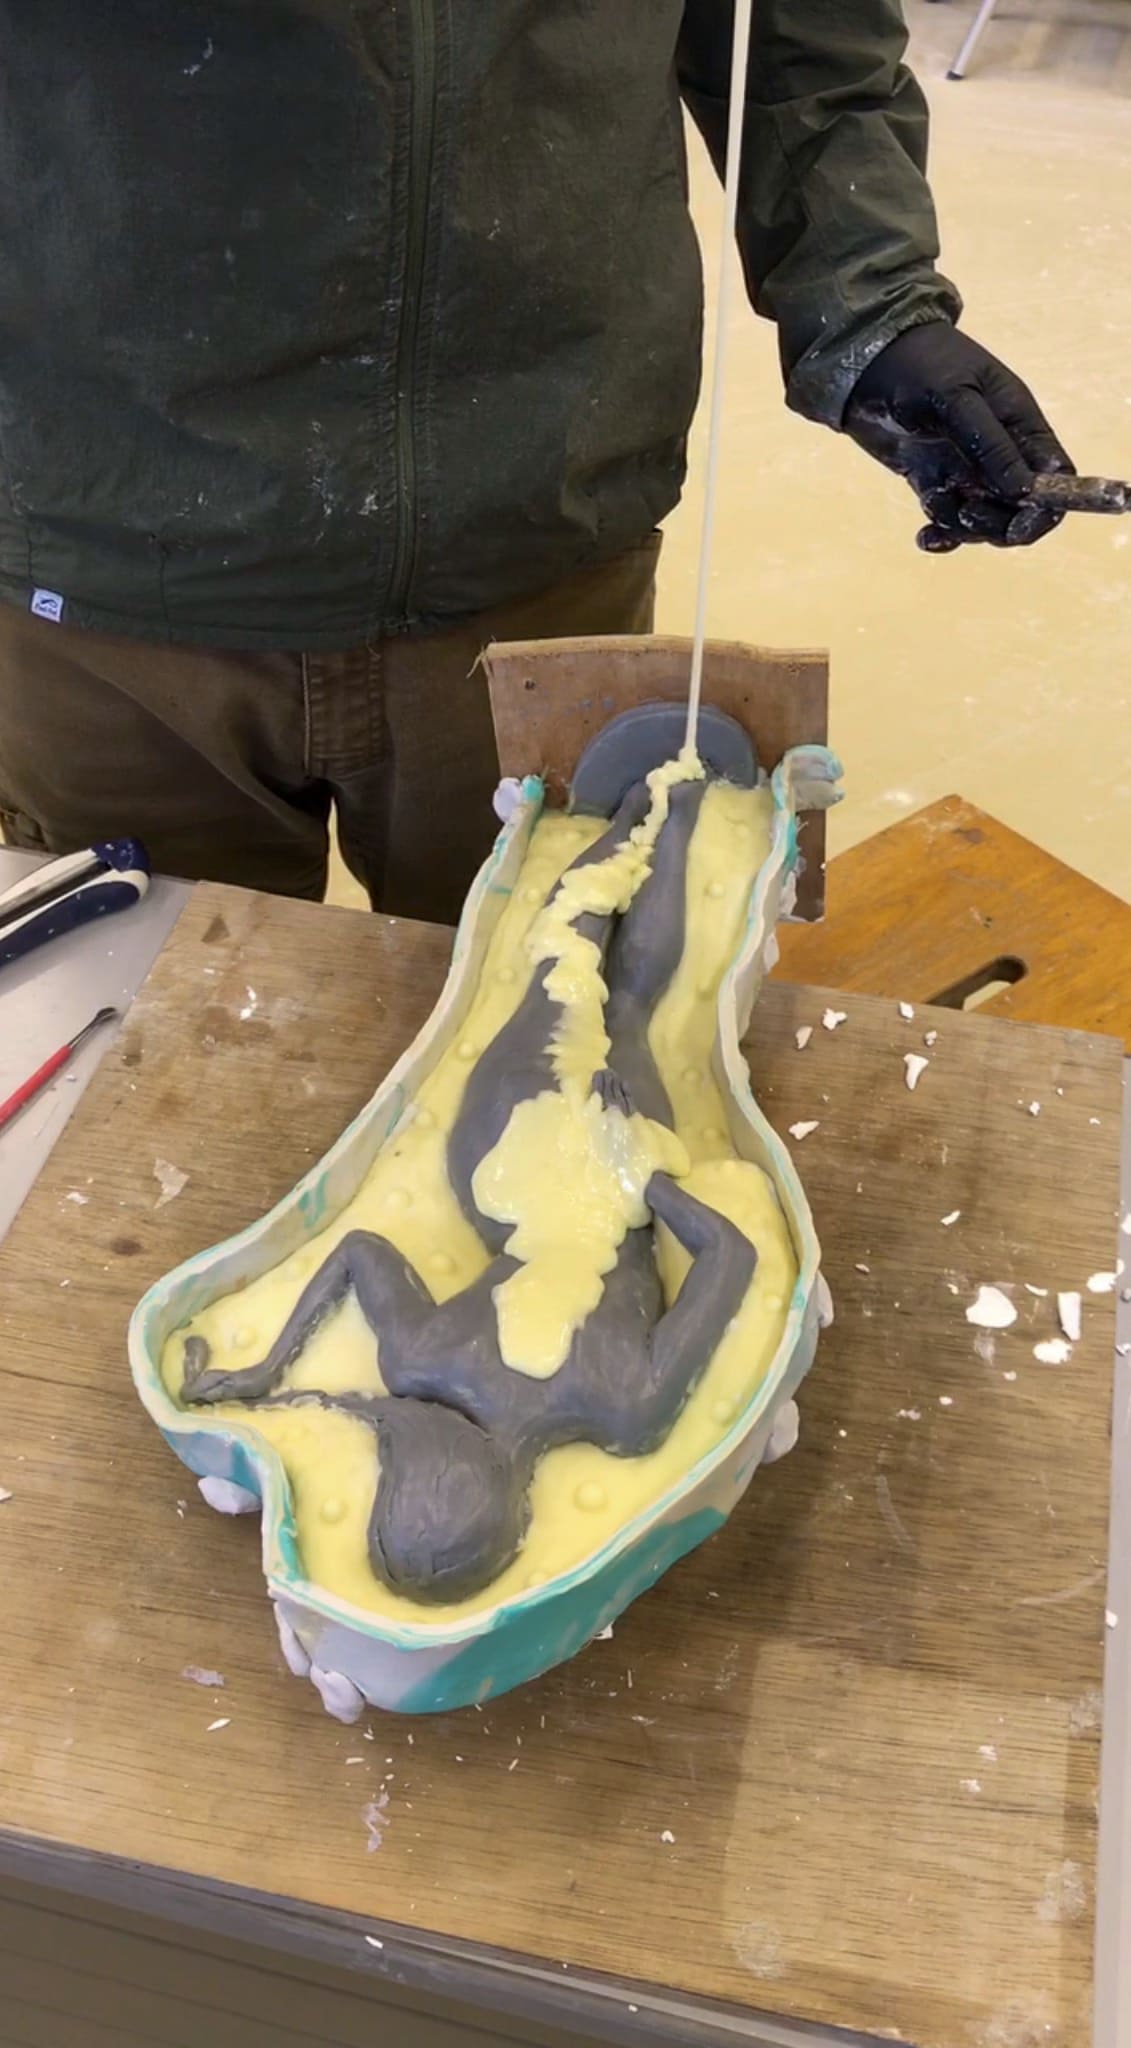
Pour silicone rubber over the entire surface. Pour from a higher point in a thin stream to reduce air bubbles. For highly detailed works, degas the silicone before pouring.
-
step7
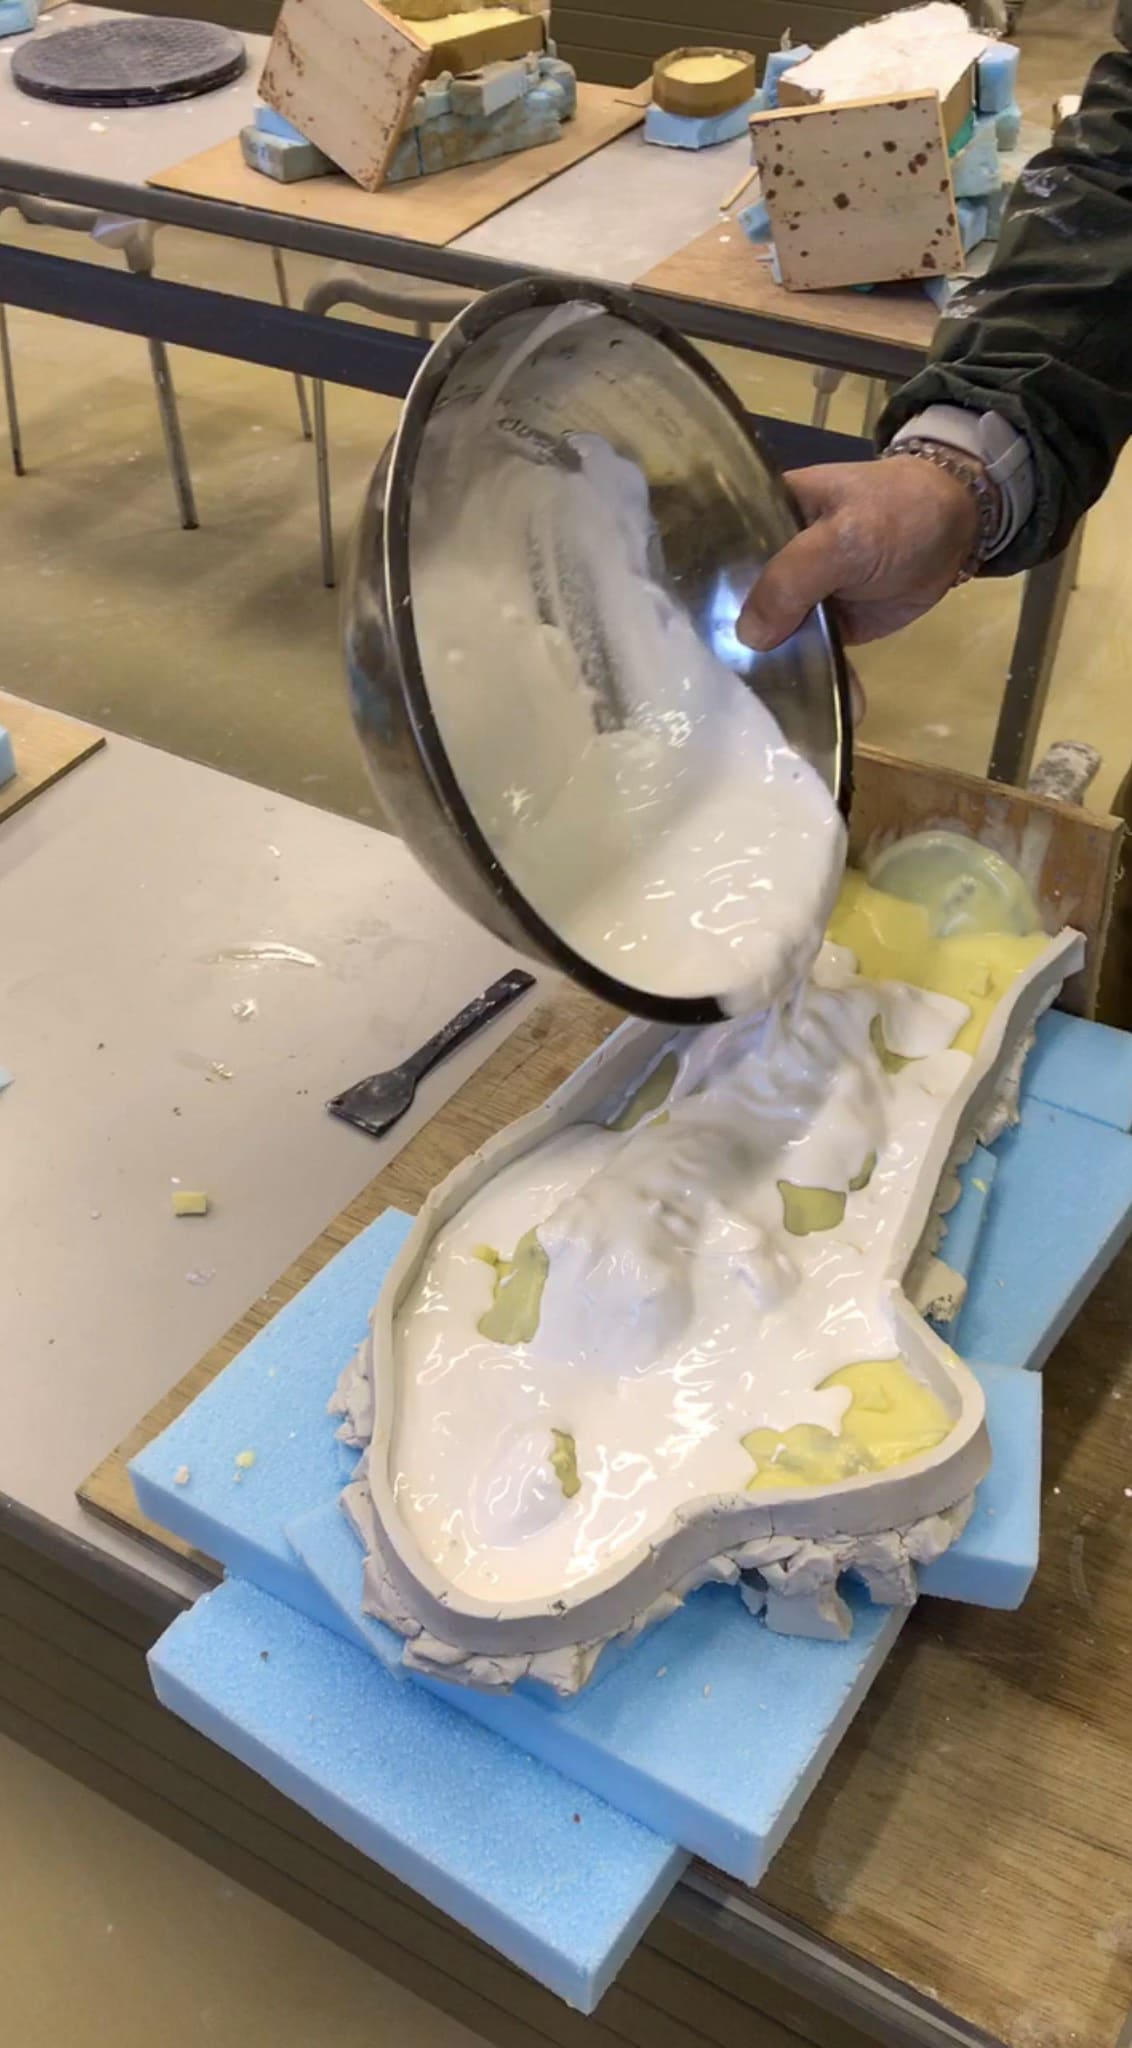
Once the silicone has cured, apply plaster over it to create a rigid support shell, often called a mother mold or backup mold.
-
step8
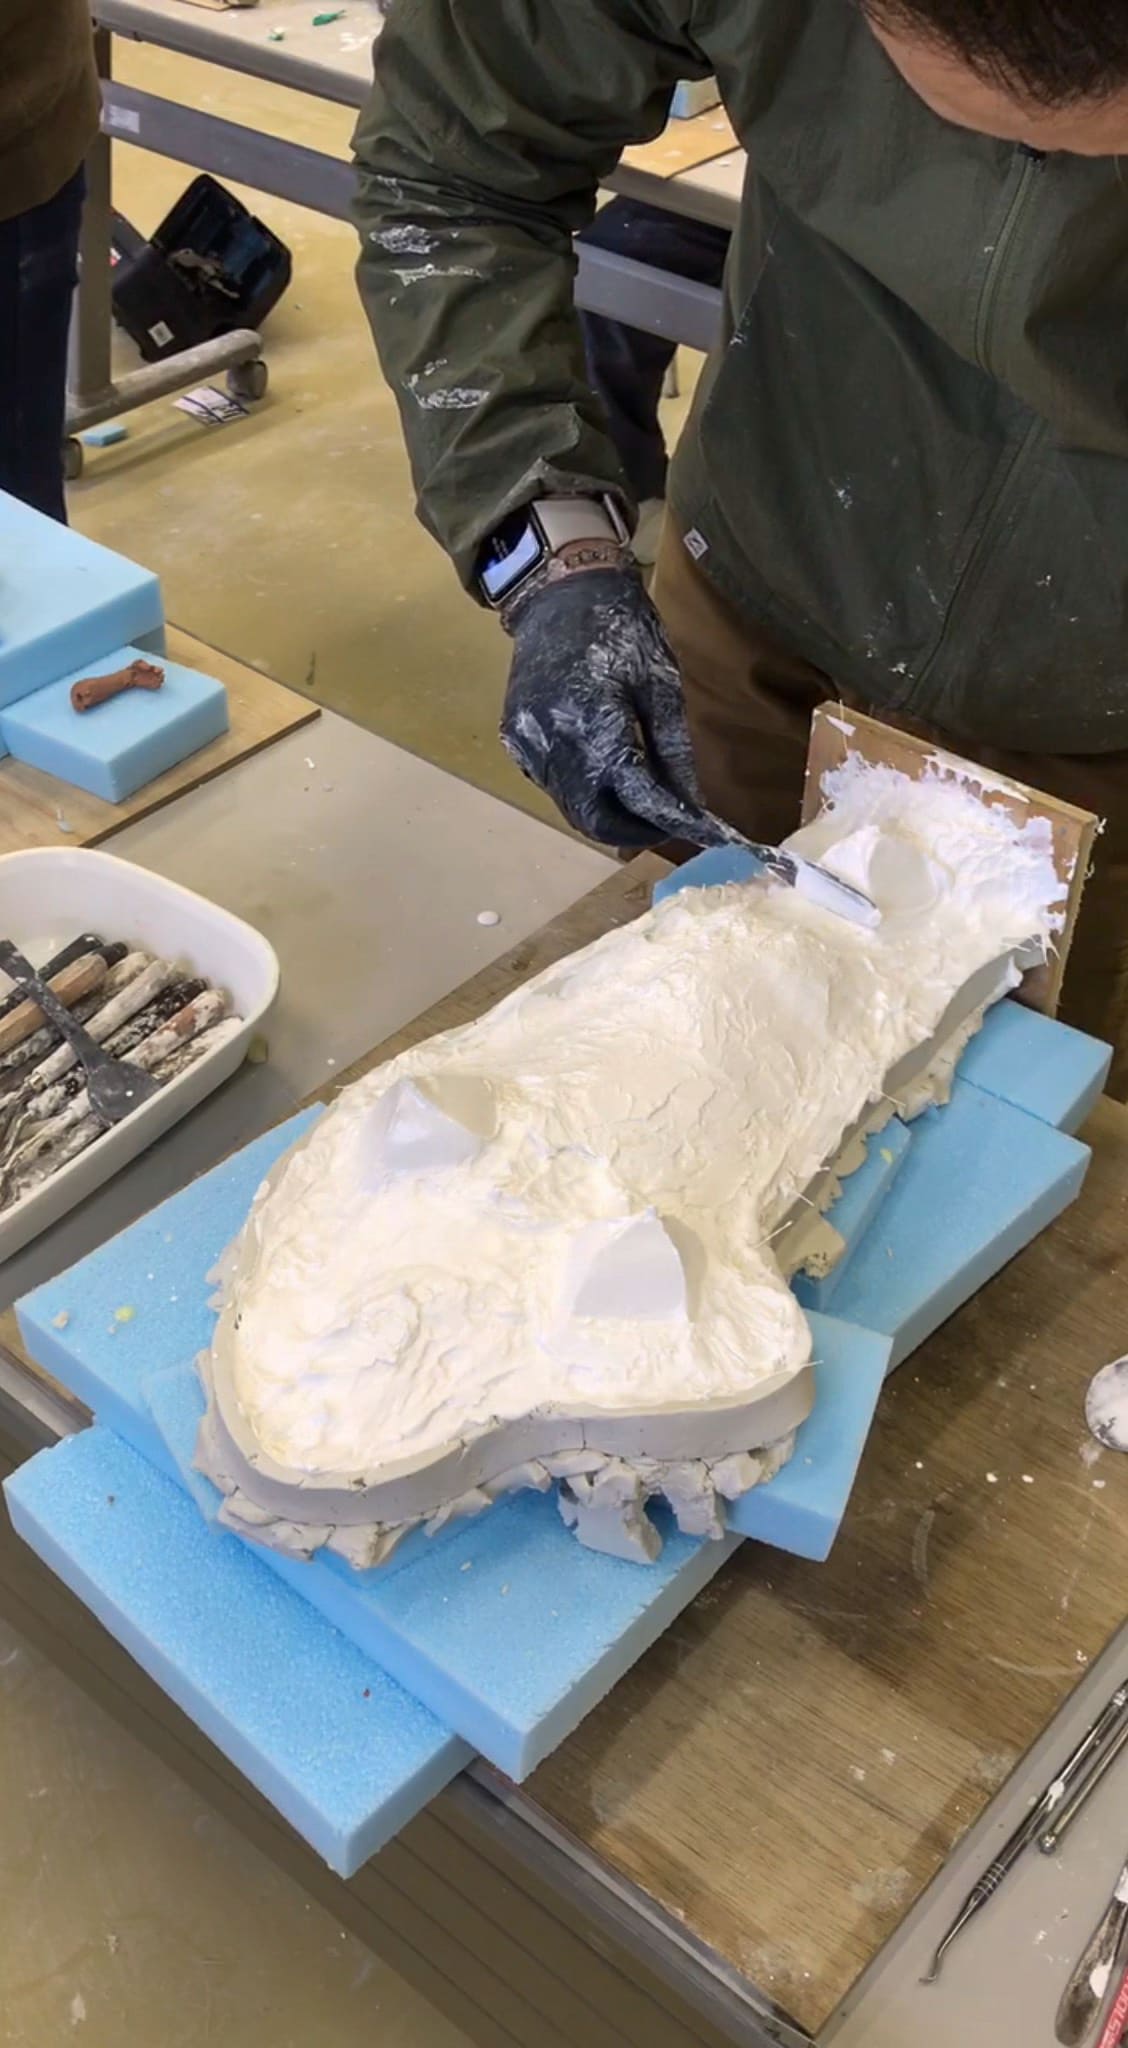
Add three pyramid-shaped plaster supports so that the mold can stand securely and remain stable when placed on a flat surface.
-
step9
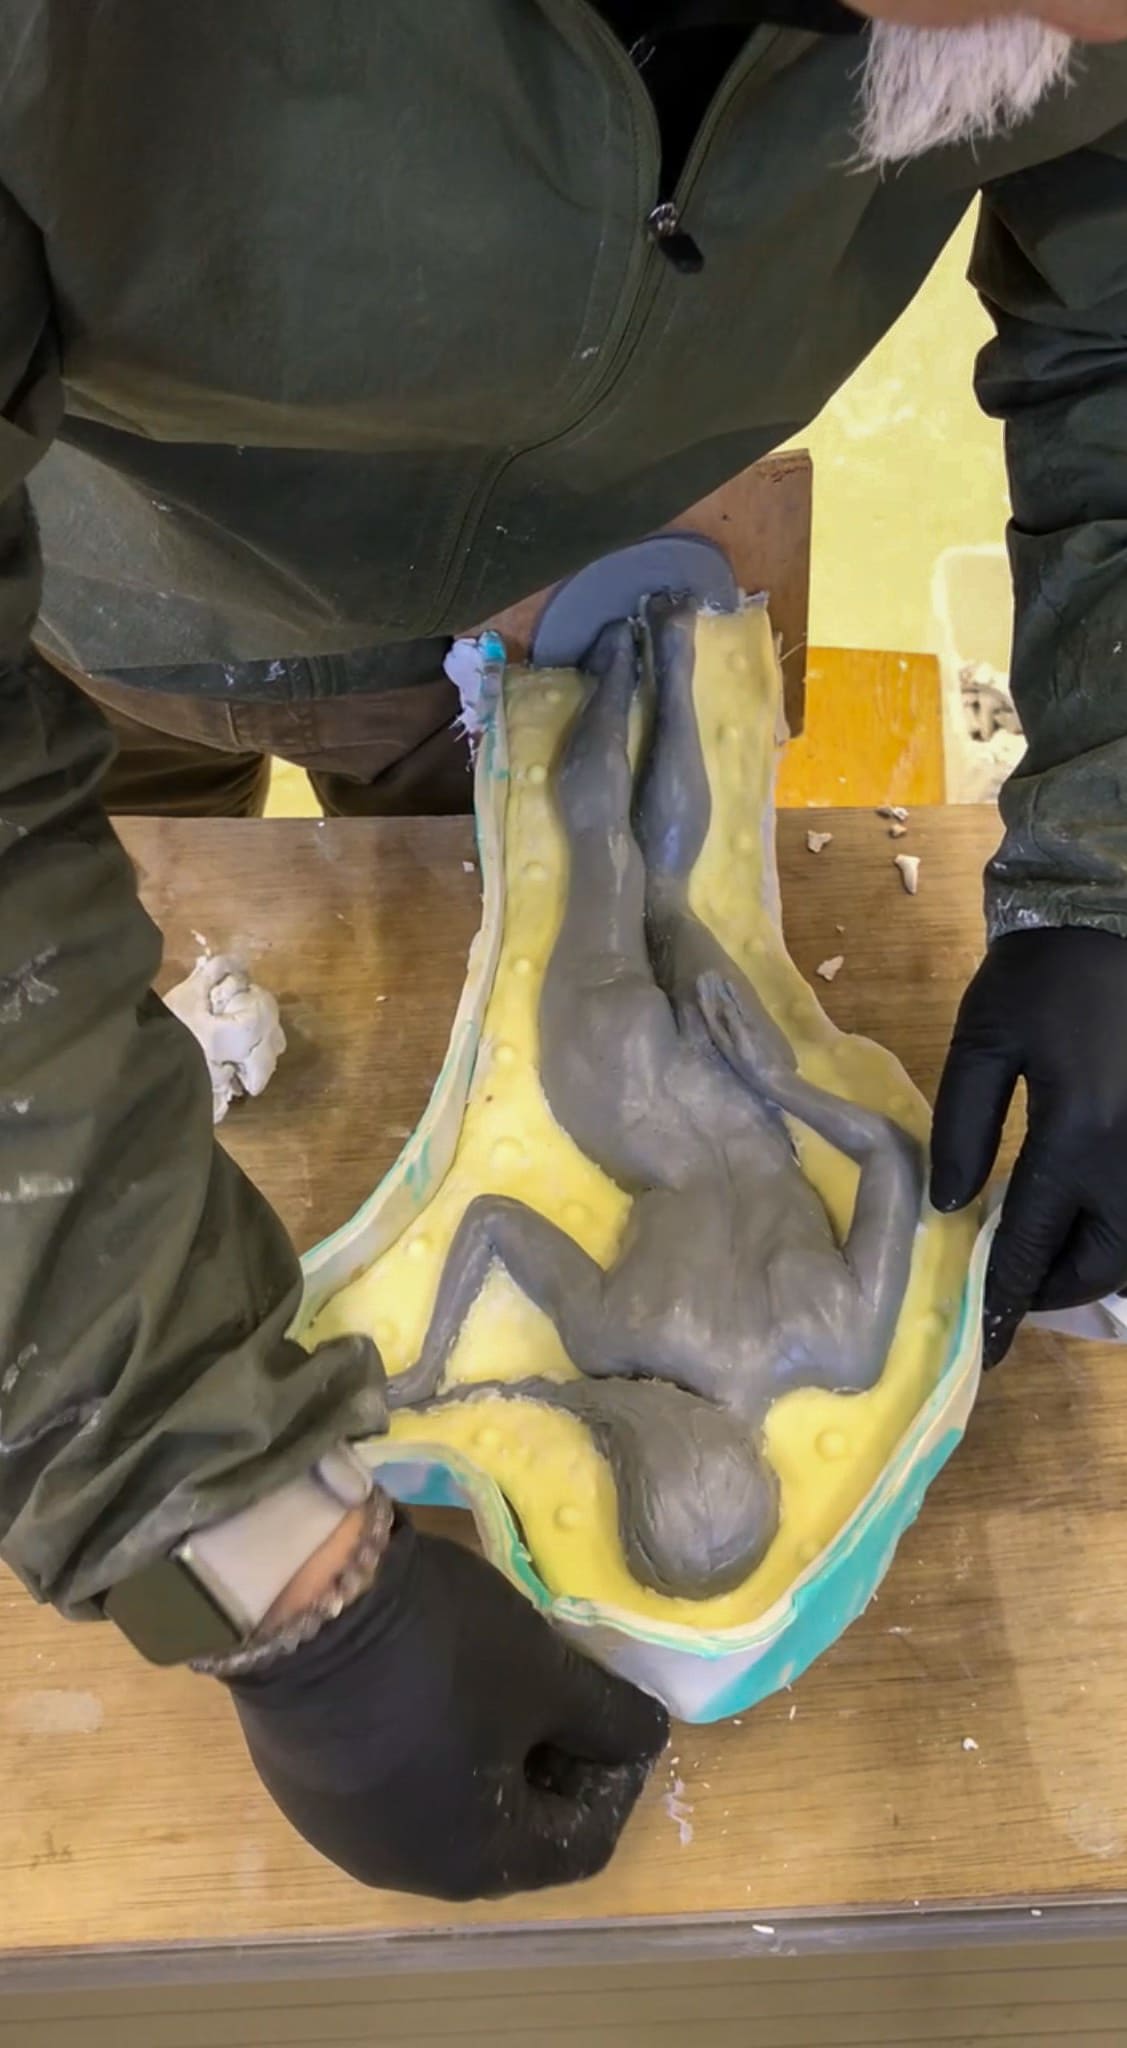
After the plaster support has cured, turn the mold over, remove the oil-based clay, and expose the opposite side of the silicone mold. Build a new clay wall in the same manner.
-
step10
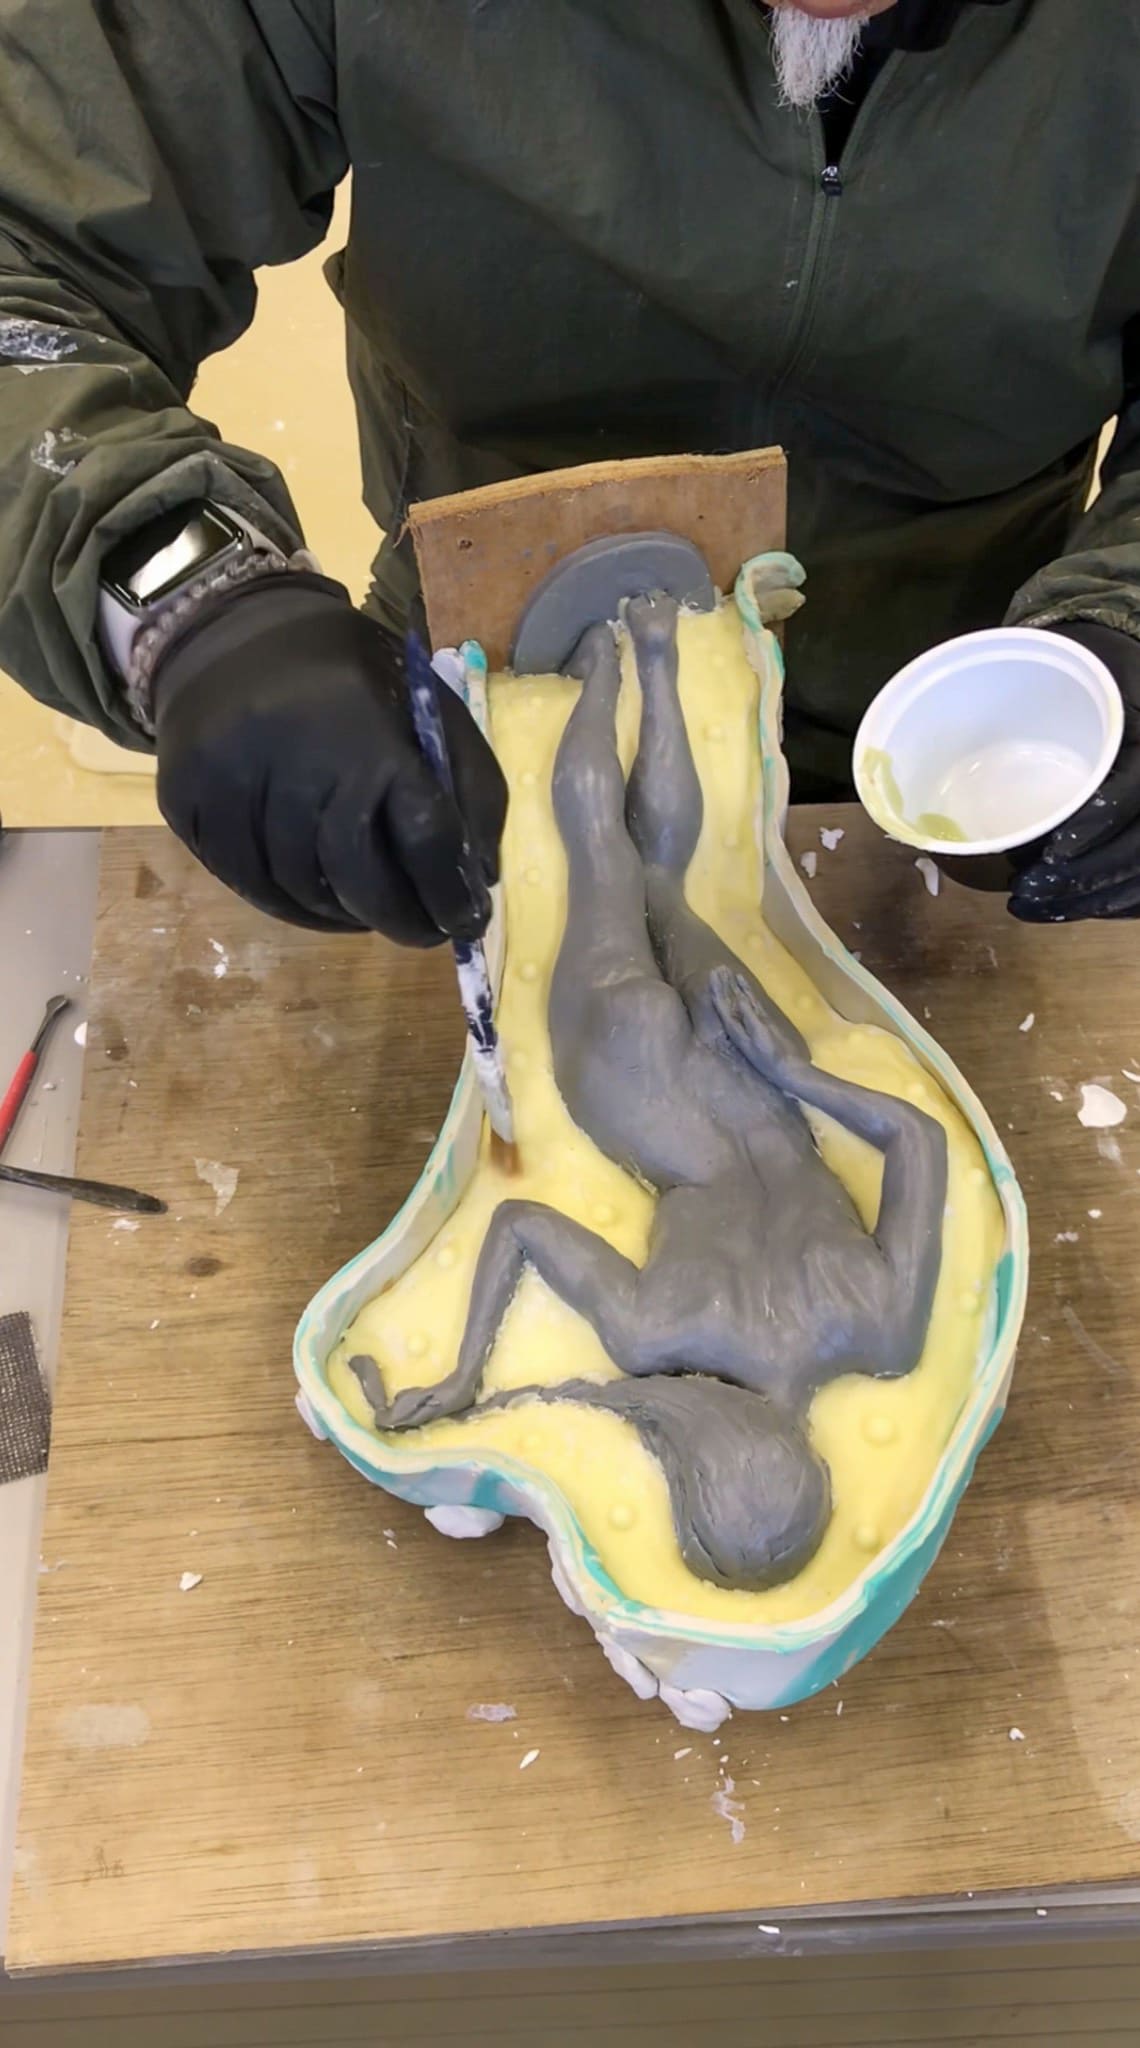
After the clay wall is complete, carefully apply a wax-based release agent to the silicone surface so that the second silicone layer will not bond to the first.
-
step11
When the release agent has dried, pour silicone rubber over the opposite side using the same method as before.
-
step12
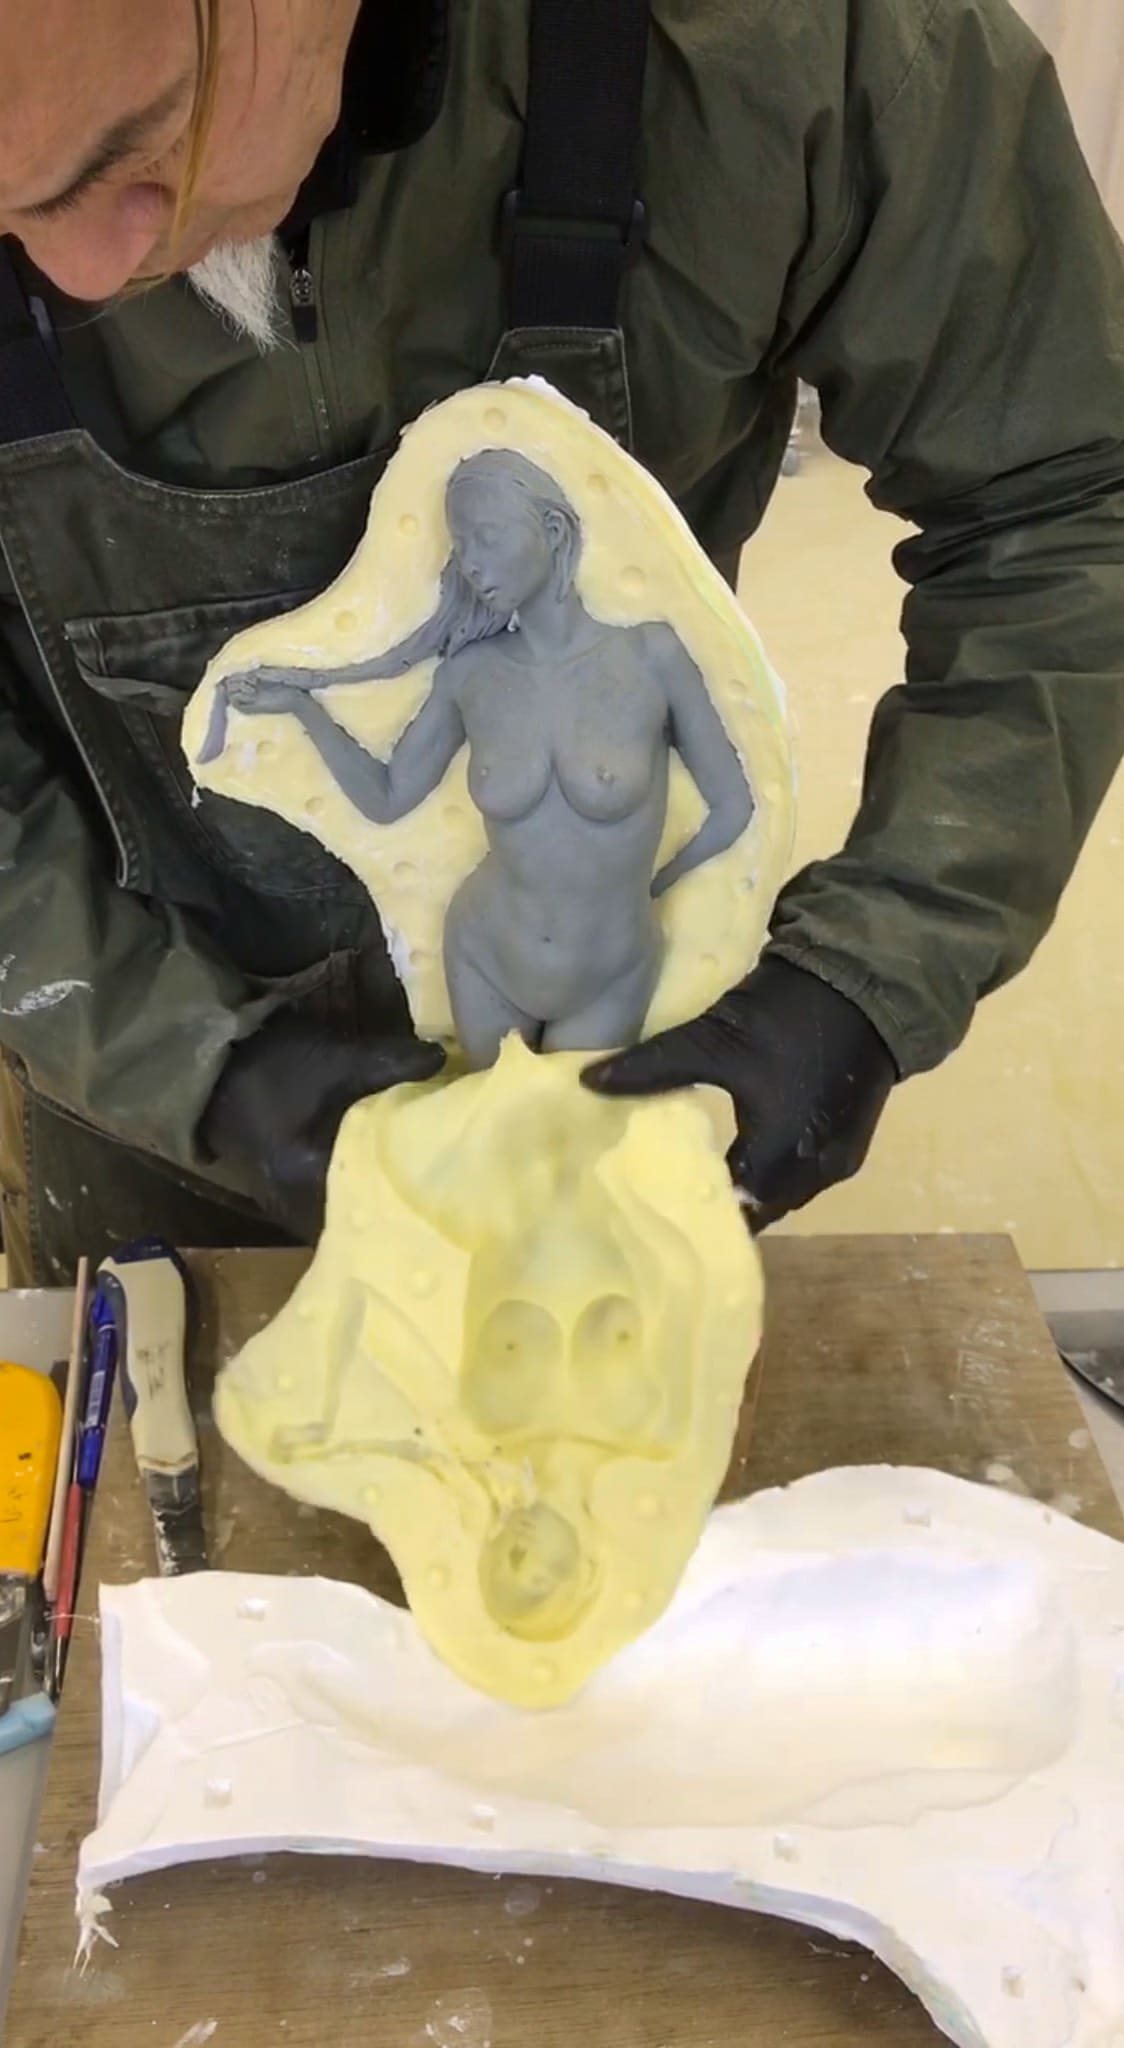
Create the plaster support shell for the second side in the same way. After it has cured, remove the plaster supports and silicone layers in order. The two-part silicone mold is now complete.
Bronze Casting
allowing sculptures to exist across generations
while preserving fine details and surface character.
-
step1
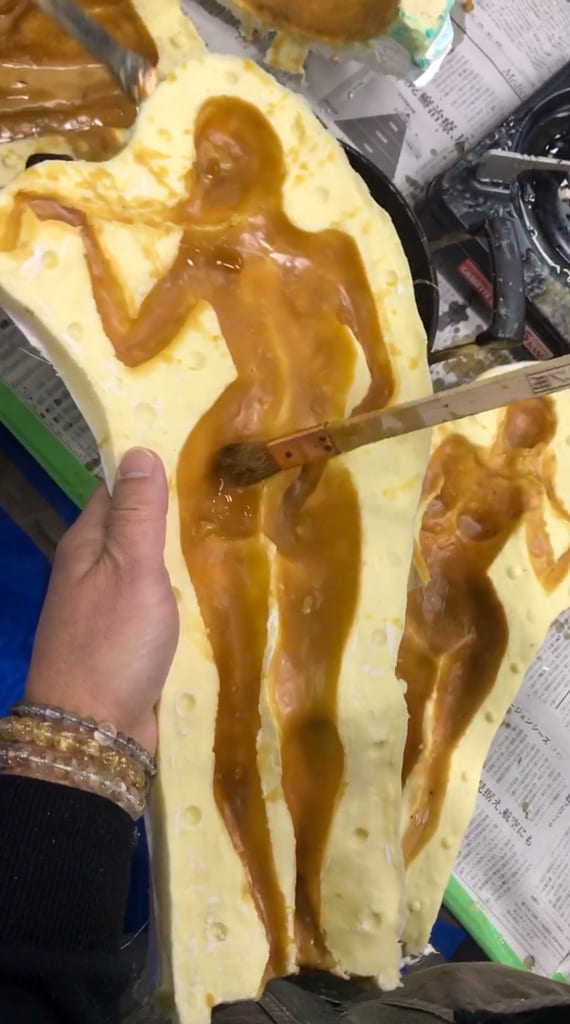
A blend of beeswax, paraffin wax, and microcrystalline wax is heated until melted, then carefully brushed into the silicone mold to create the first wax layer.
-
step2
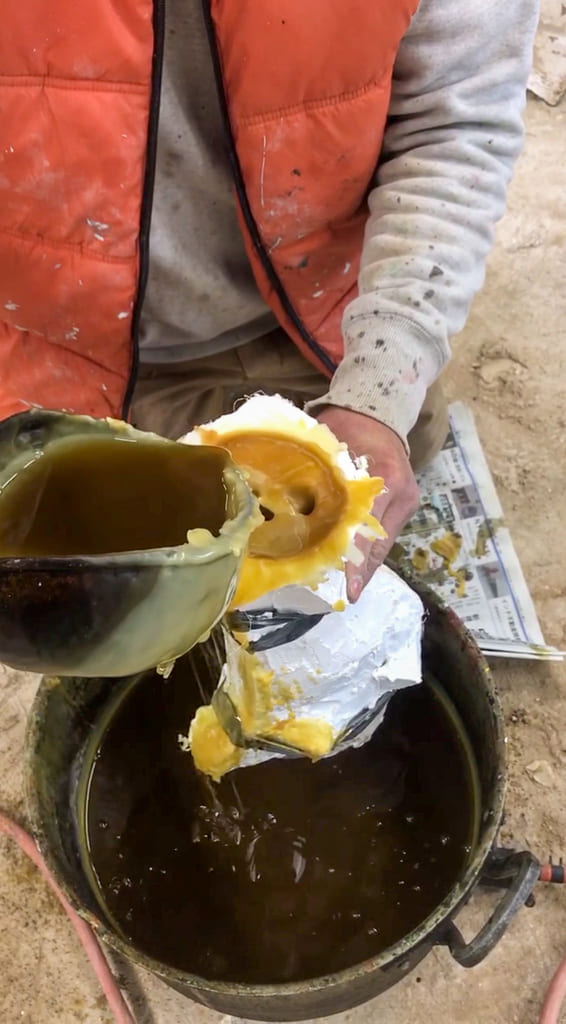
After both sides of the mold have been coated with wax, the mold is closed tightly with rubber bands. Melted wax is then poured through the opening at the underside of the base. If the wax is too hot, it may melt the brushed-on wax layer, so it should be allowed to cool slightly before pouring.
-
step3
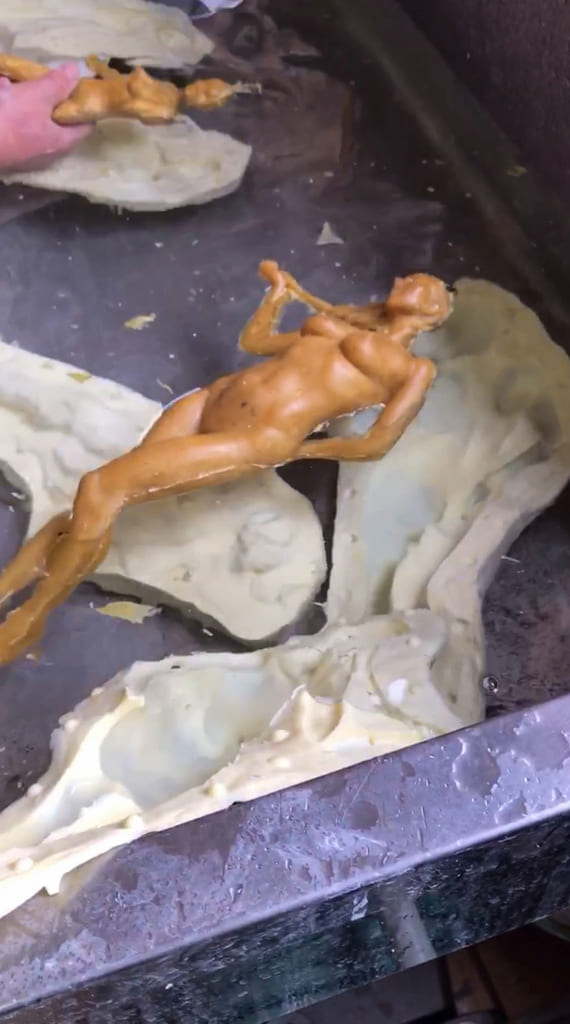
Once the wax has cooled, the entire mold is placed in a water-filled container to further chill and harden the wax. After the wax has fully solidified, the wax model is removed from the silicone mold.
-
step4
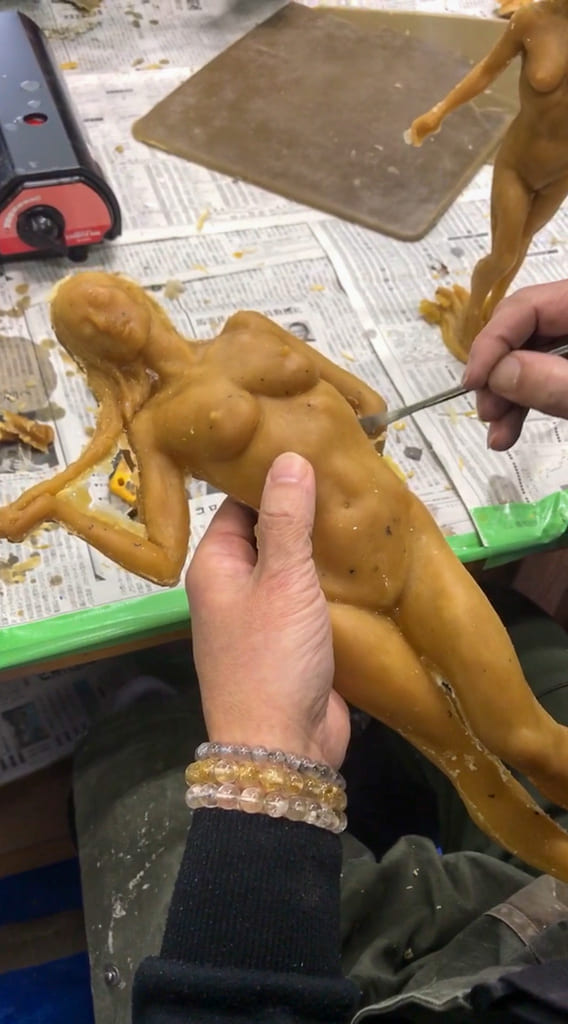
Using a heated metal spatula or similar tool, the seam lines and excess wax are removed from the wax model. The surface is carefully refined and repaired.
-
step5
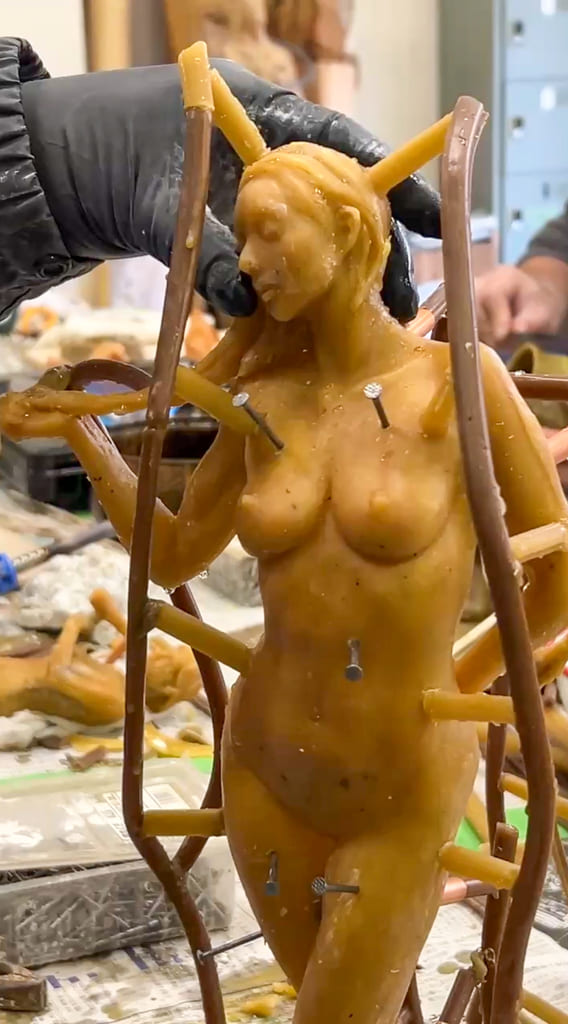
Wax rods are attached across the surface to create channels for the molten bronze to flow through. Metal pins are also inserted to hold the internal refractory core in place, allowing the final bronze sculpture to remain hollow.
-
step6
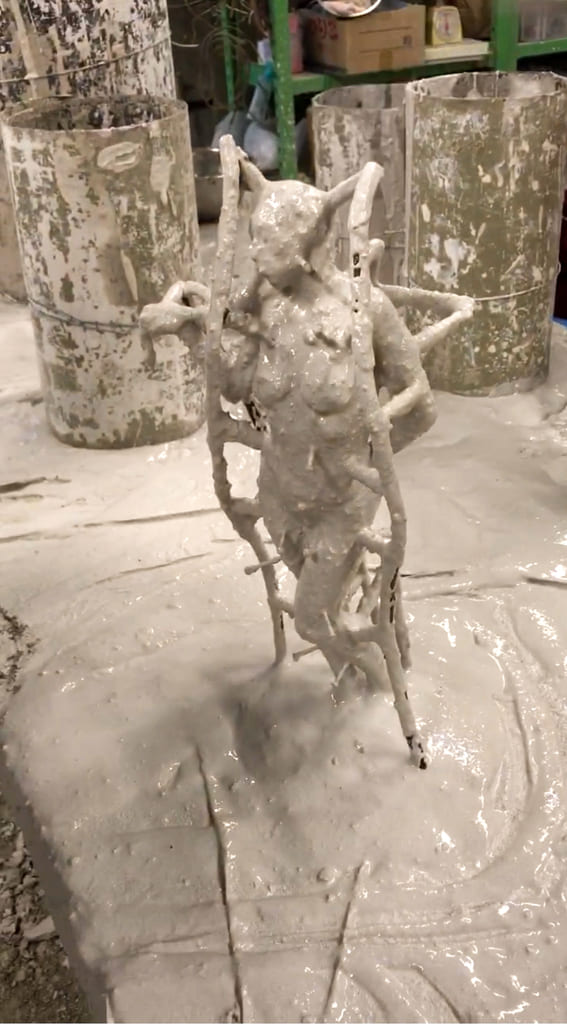
Finely sifted chamotte and refractory plaster are mixed with water, then carefully applied to the surface of the wax model to form the first detailed investment layer.
-
step7
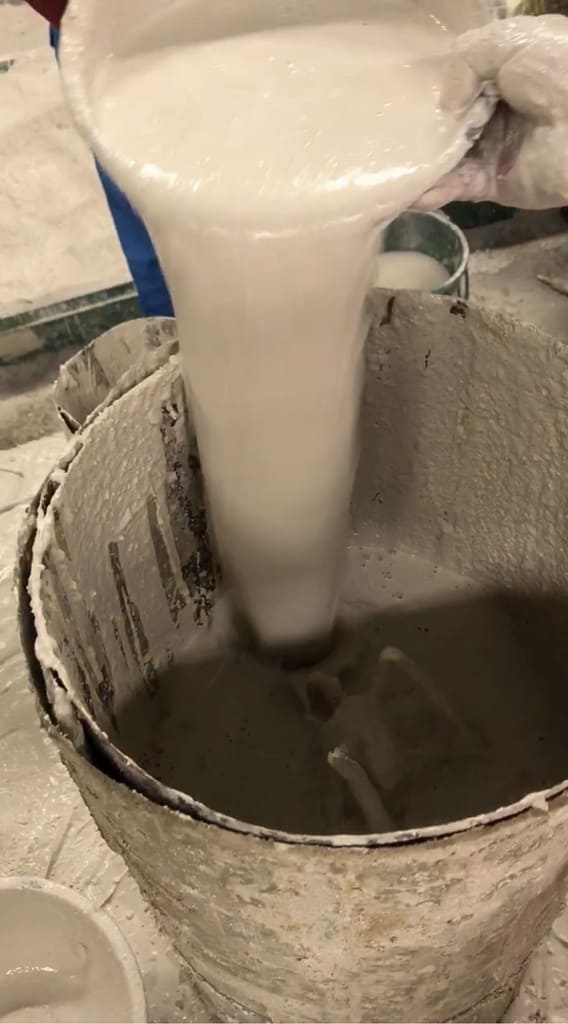
A cylindrical enclosure is made from a thin sheet of galvanized metal. A mixture of coarse refractory plaster and chamotte is poured into the enclosure, taking care not to strike the sculpture directly.
-
step8
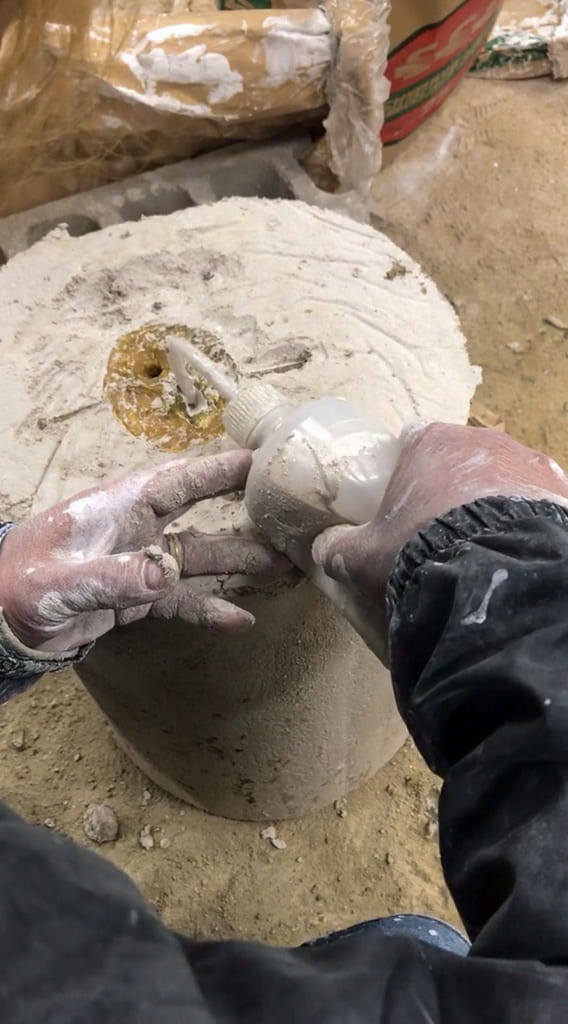
To create the hollow interior of the sculpture, finely sifted refractory plaster is mixed with water and carefully poured into the inside of the wax model through the opening at the underside of the base.
-
step9
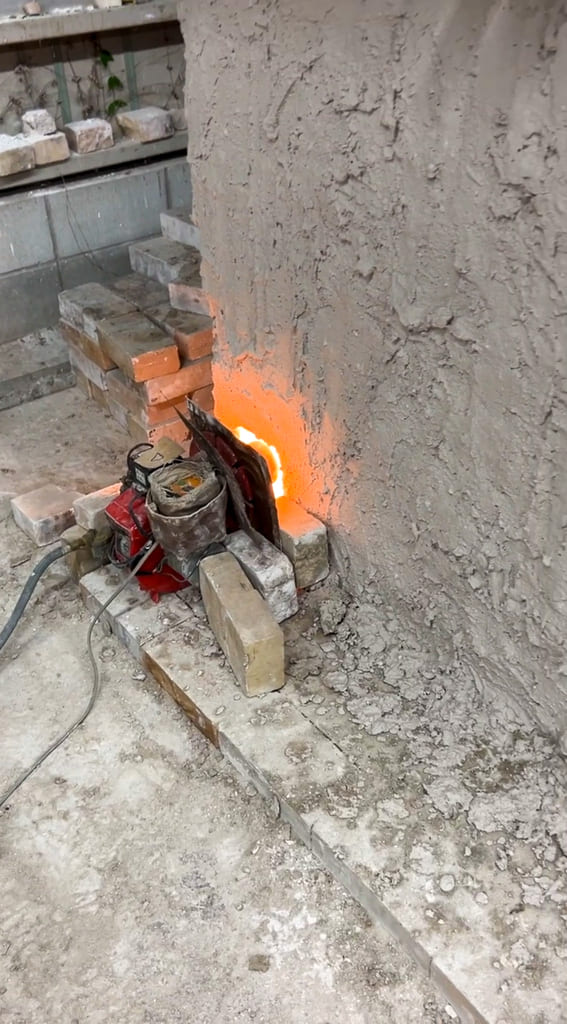
The investment mold containing the wax model is placed in the kiln and fired for more than 24 hours. During this process, the wax is completely melted out, leaving a hollow cavity for the bronze.
-
step10
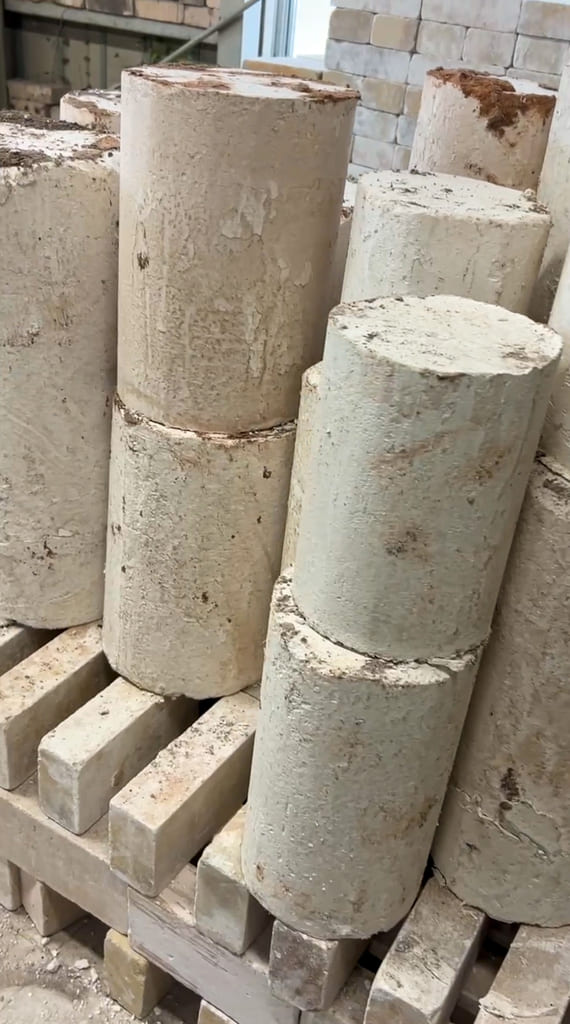
The investment mold is now complete. Because it is extremely fragile, it must be handled with great care. To prevent damage, the exterior is reinforced with coarse burlap soaked in plaster.
-
step11
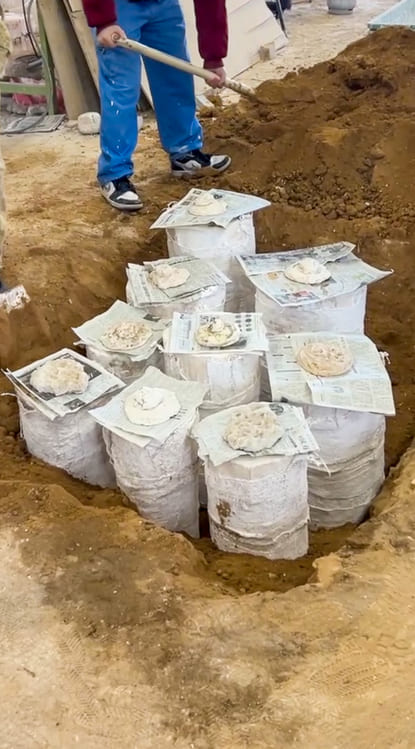
To prevent the pressure of the molten bronze from breaking the mold during casting, the investment molds are buried securely in the ground.
-
step12
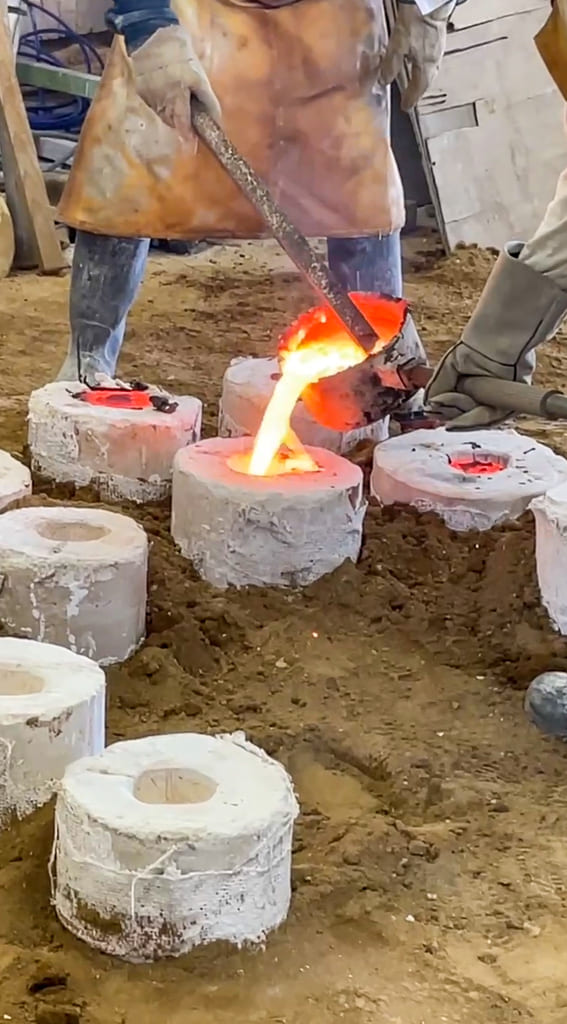
Molten bronze is poured into the mold through the pouring cup. To prevent slag from blocking the sprues, the casting is performed by two people: one removes impurities while the other pours the bronze steadily.
-
step13
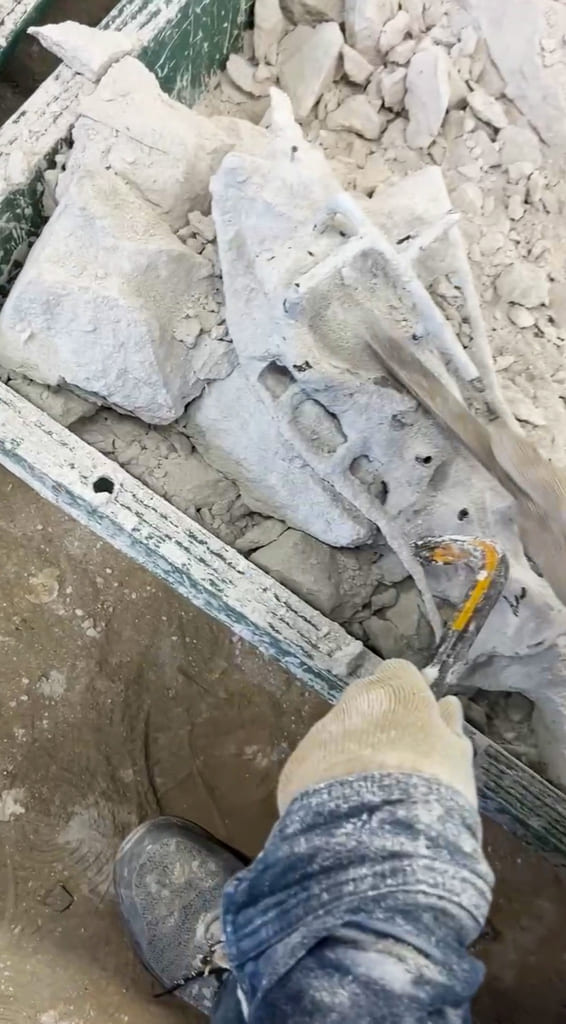
After approximately two hours, once the bronze has cooled, the investment mold is broken away and the sculpture is removed. Because the bronze remains extremely hot, careful attention must be paid to safety.
-
step14
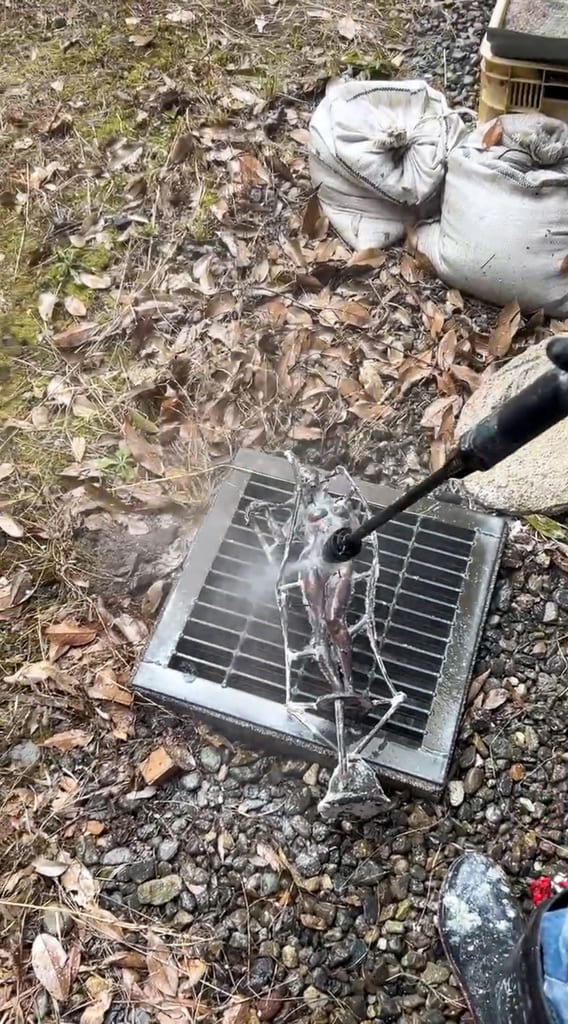
The internal refractory core used to make the bronze hollow is completely removed, often with a high-pressure washer and other tools.
-
step15
All sprues and casting channels attached to the bronze are cut away using a disc grinder.
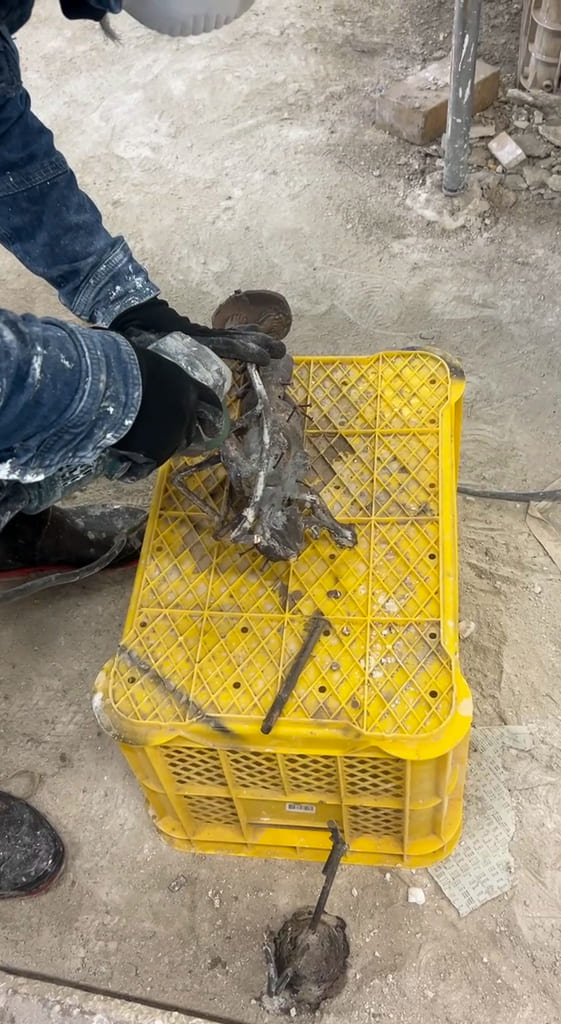
-
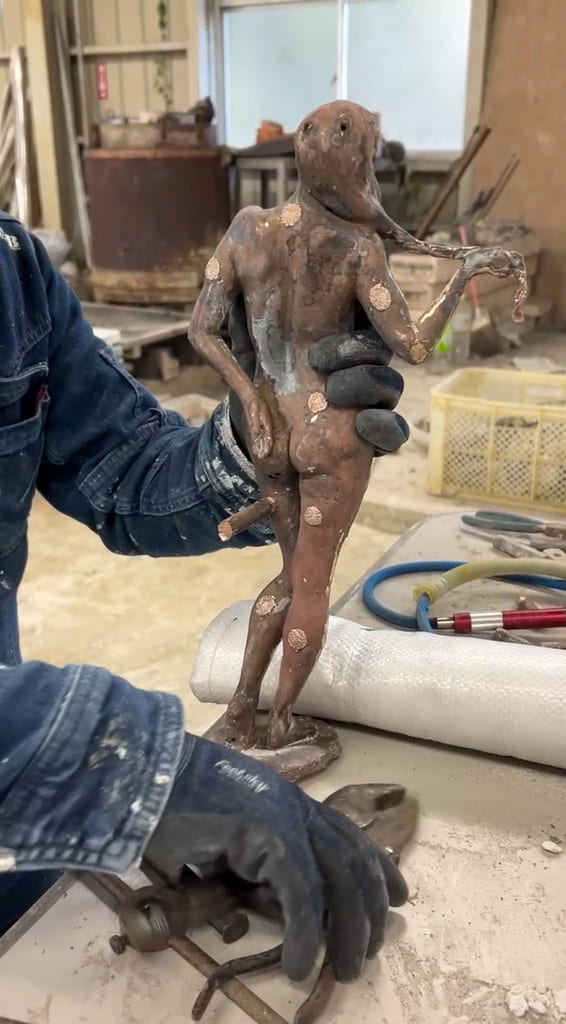
step16
Holes left by core pins or gas vents are plugged with bronze rods. The repaired areas are then chased, hammered, filed, and refined until the joins are no longer visible.
-
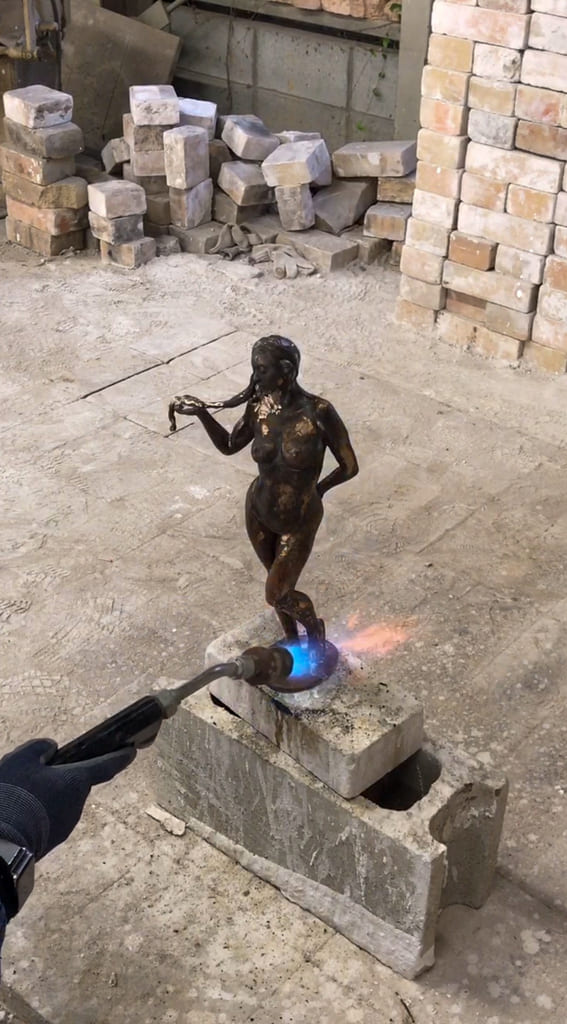
step17
The surface is heated with a torch to create an oxide layer and apply the patina. In this case, a sulfur-containing solution was sprayed onto the surface to create a subtle verdigris tone on the bronze.
-
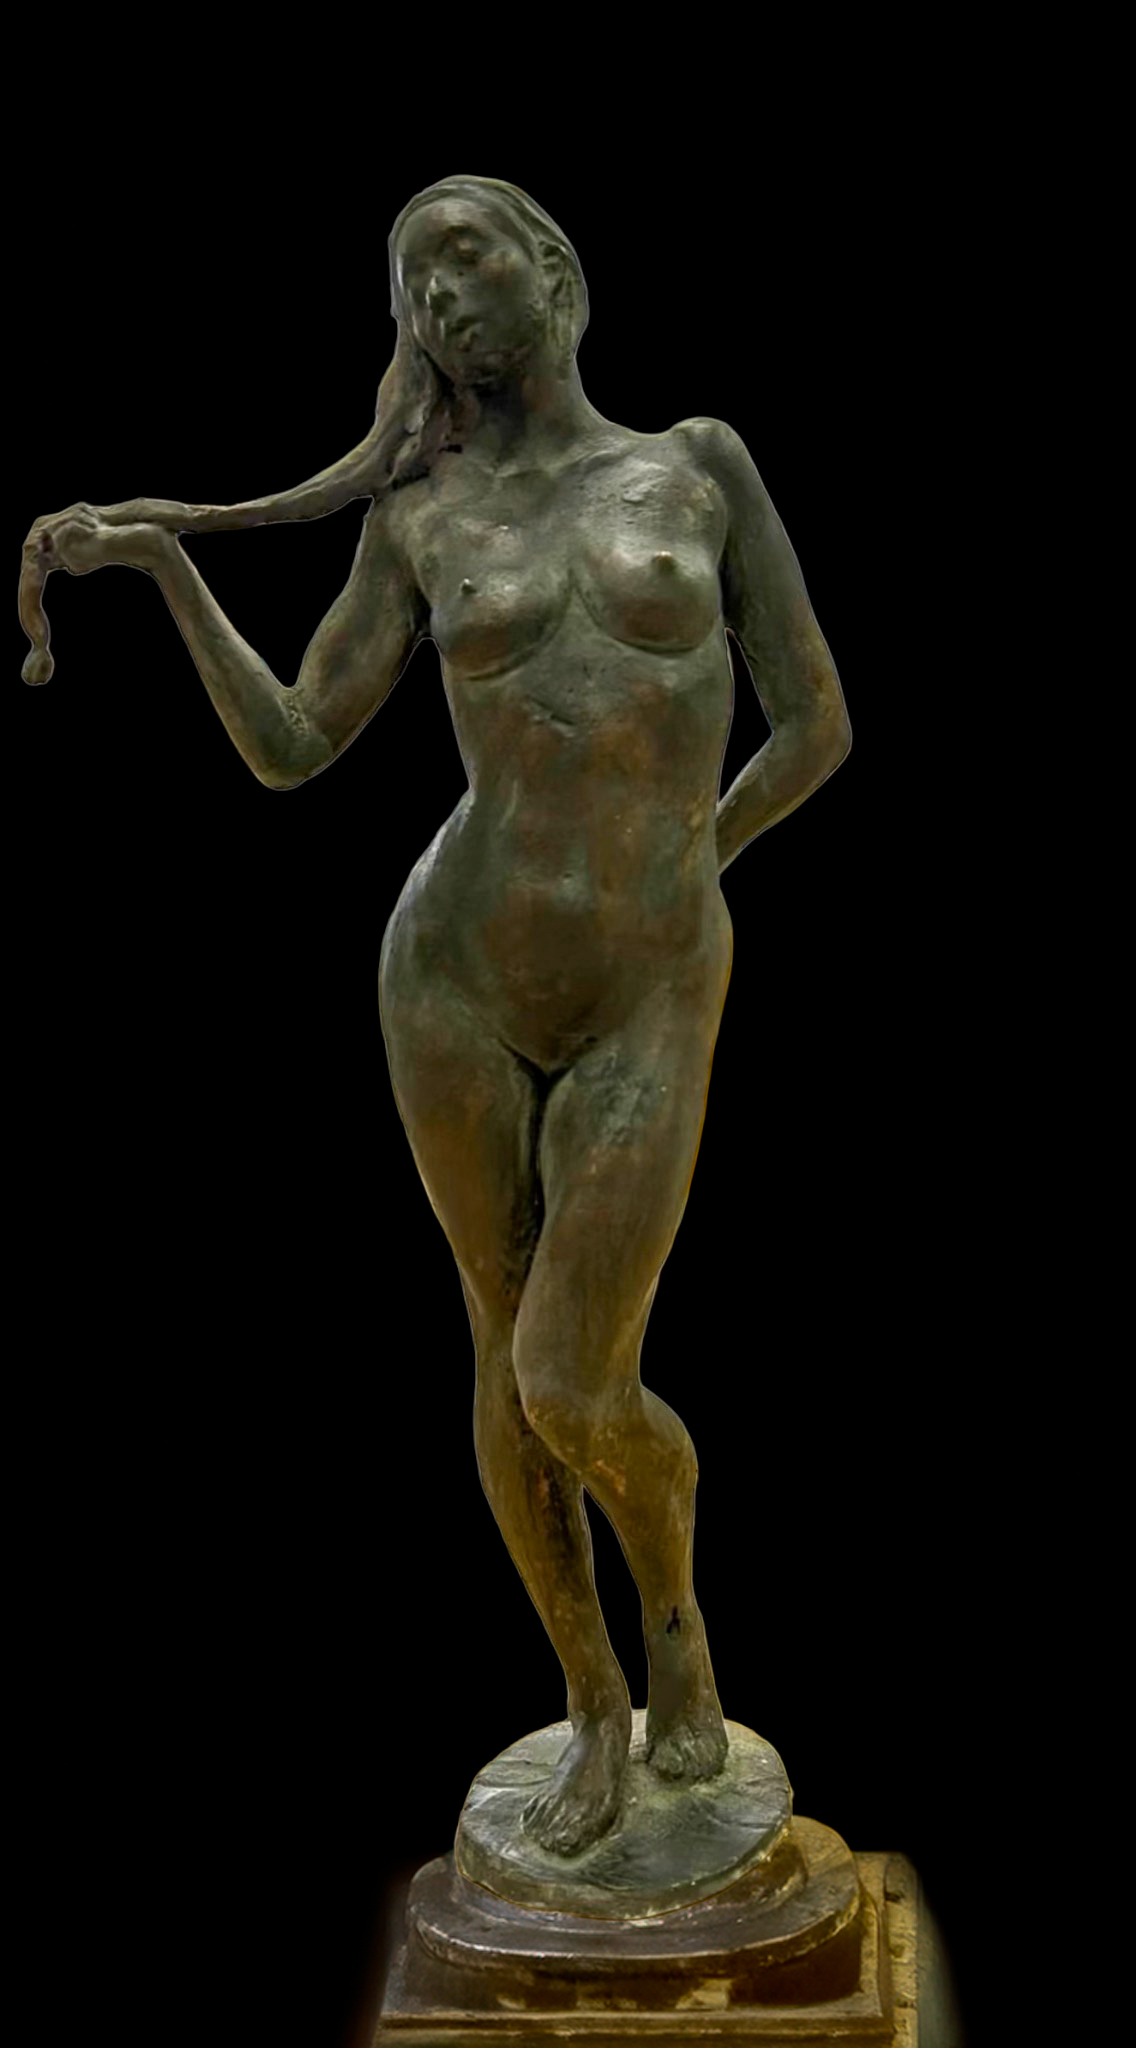
step18
The bronze sculpture is complete.
3D Printing
expand the possibilities of figurative expression,
enabling precise production and experimentation with new forms.
-
step1
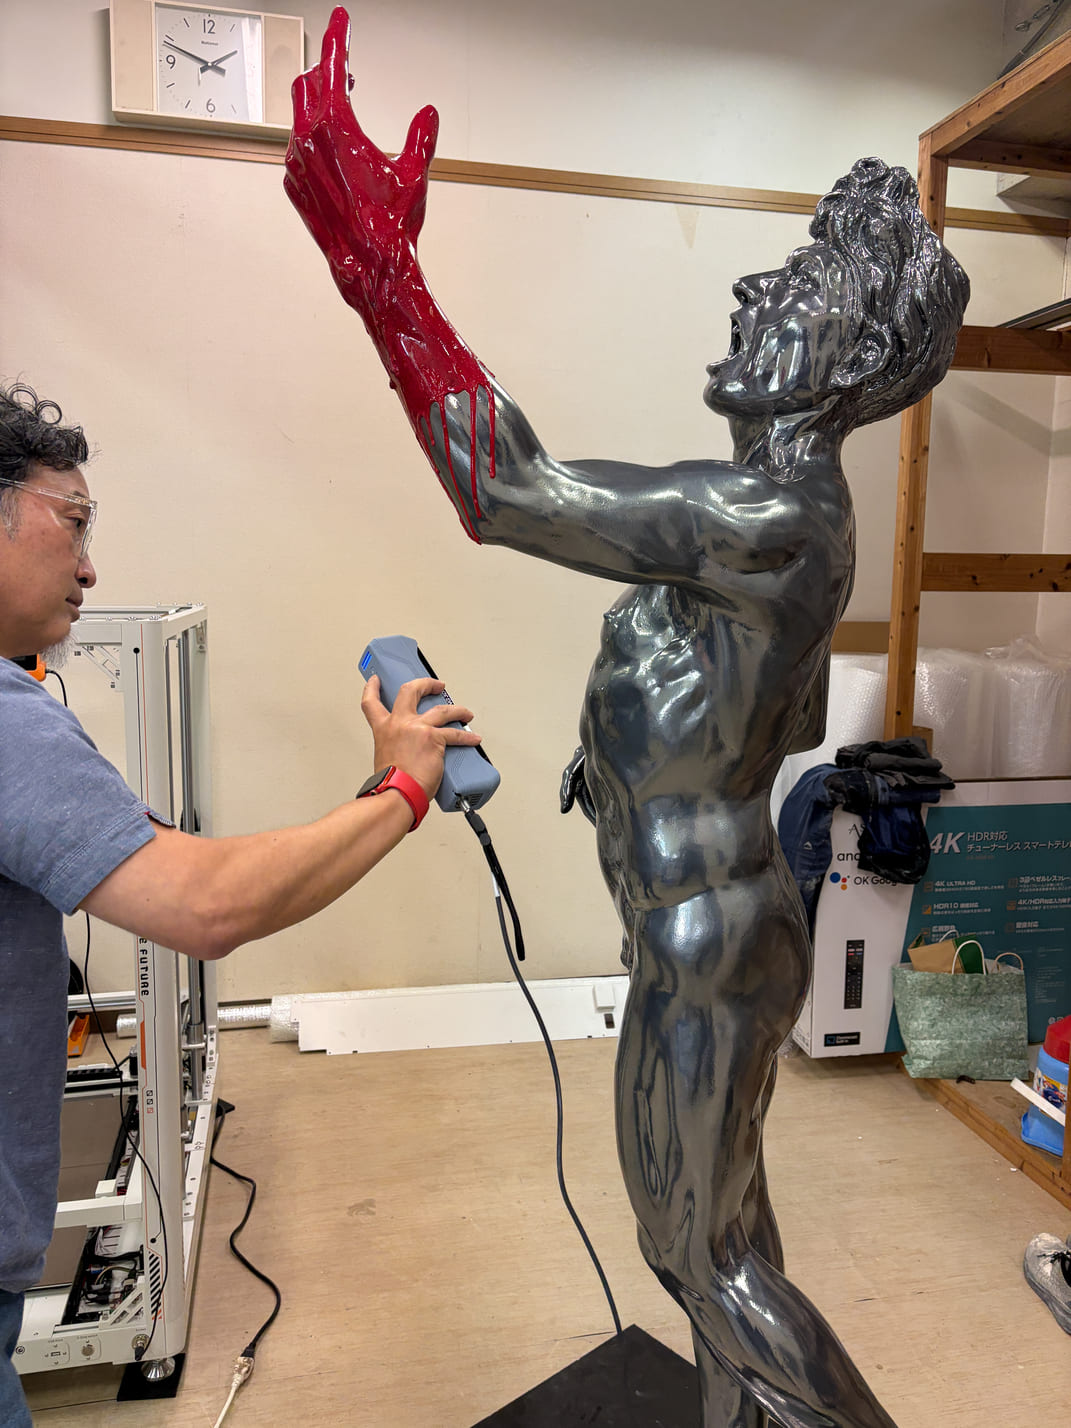
The original sculpture is captured as 3D data using a 3D scanner.
-
step2
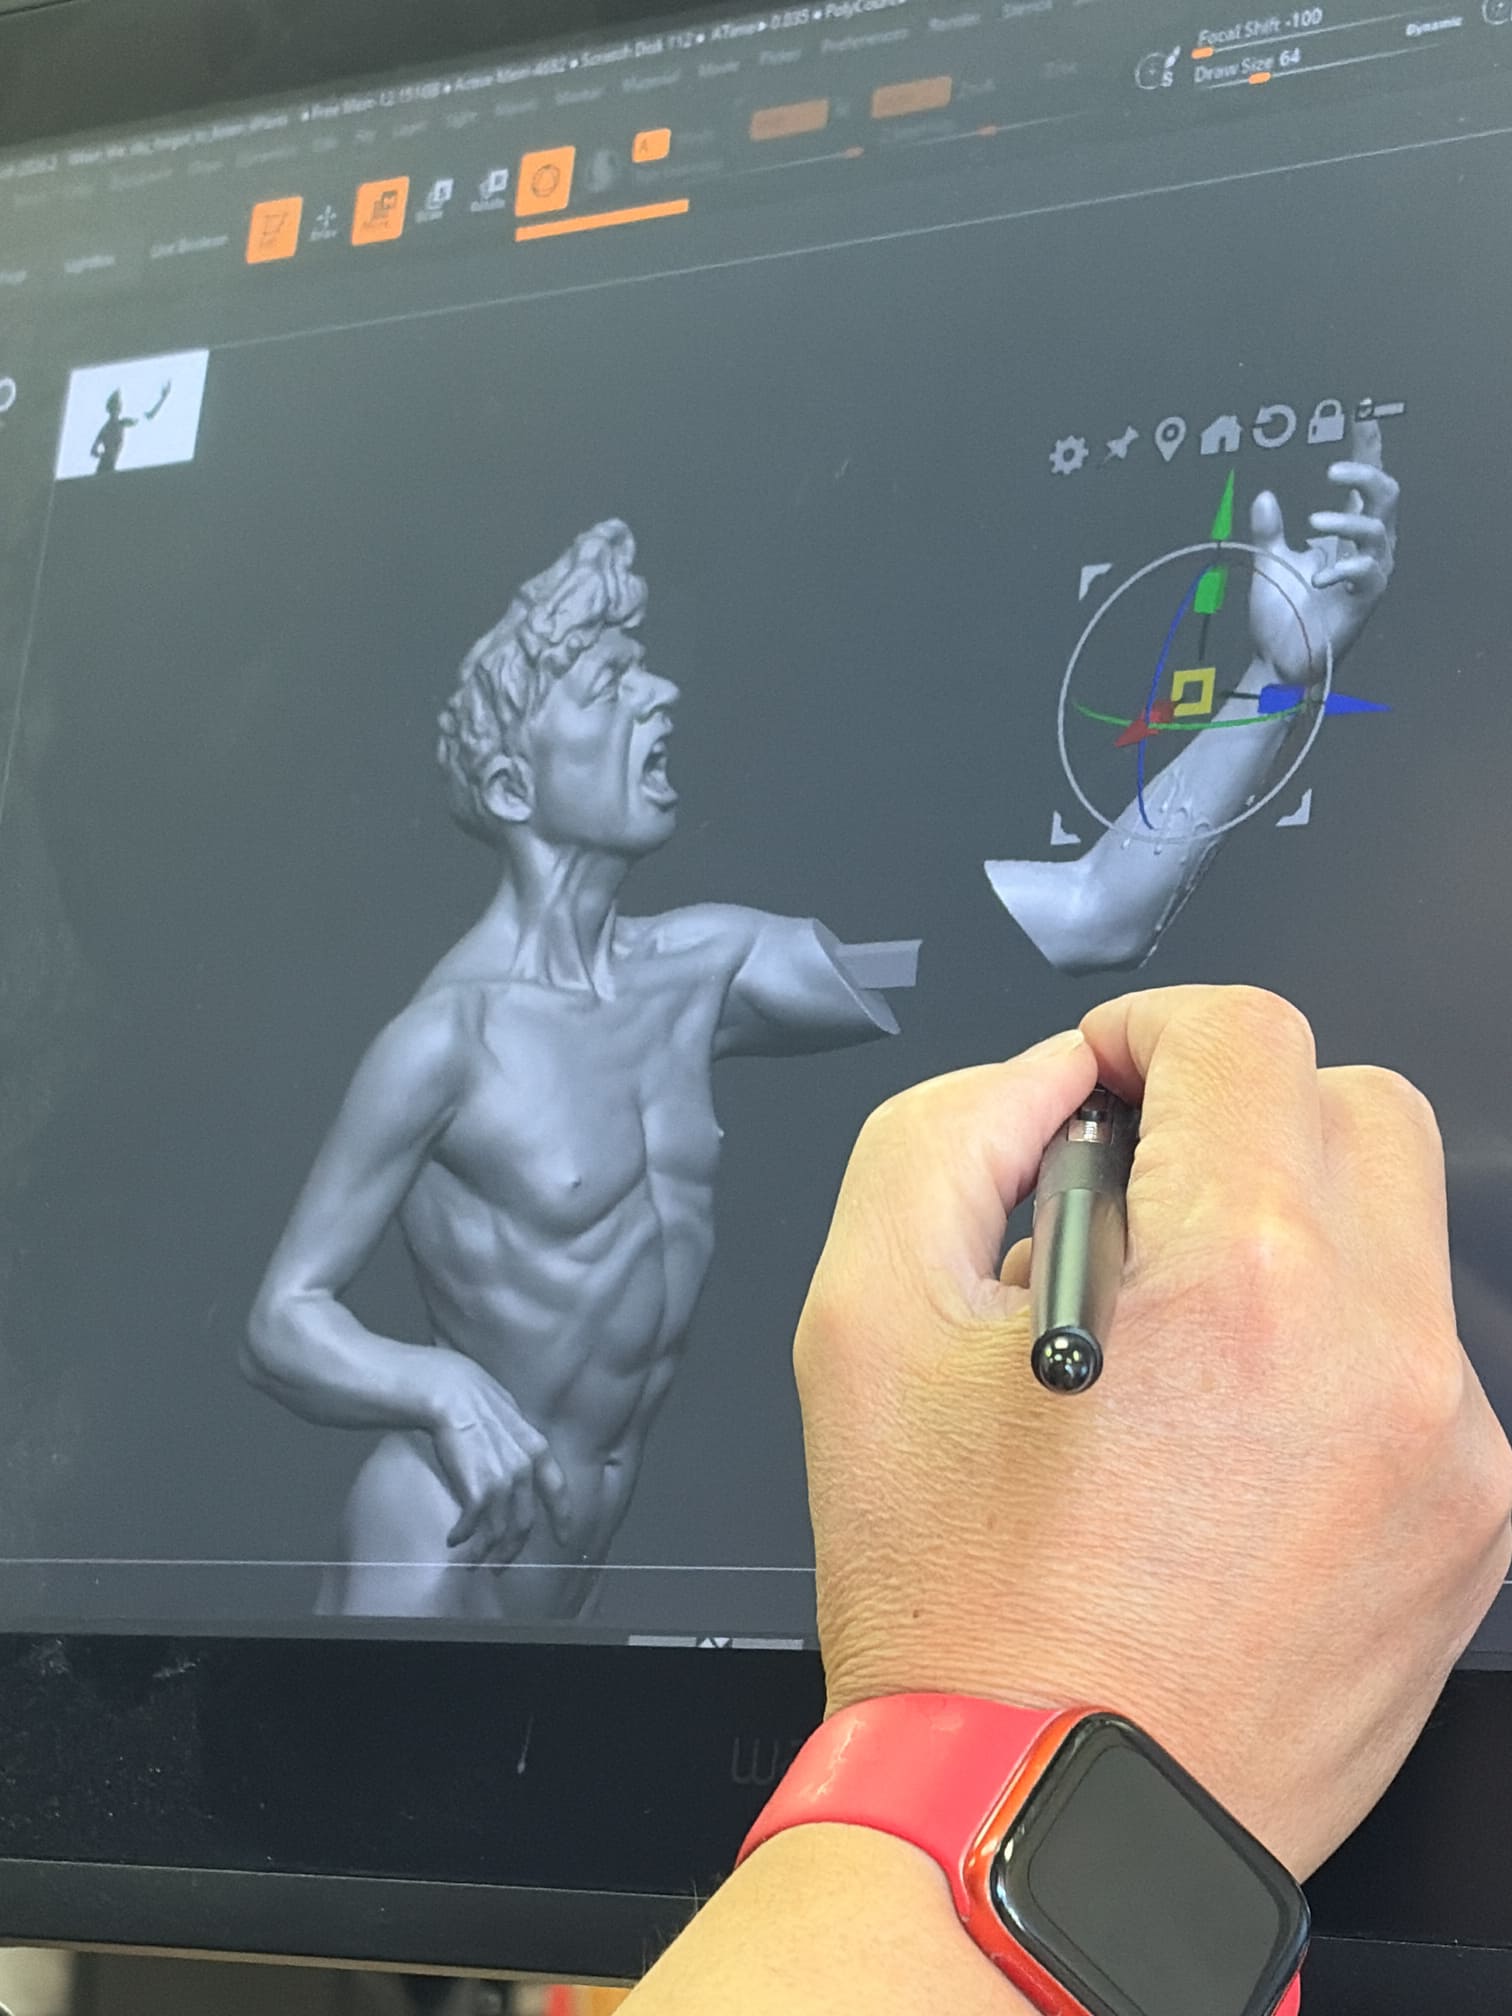
The scanned data is converted into a mesh and refined in ZBrush. Areas with scanning errors are corrected, and the model is divided into printable parts for 3D printing.
-
step3
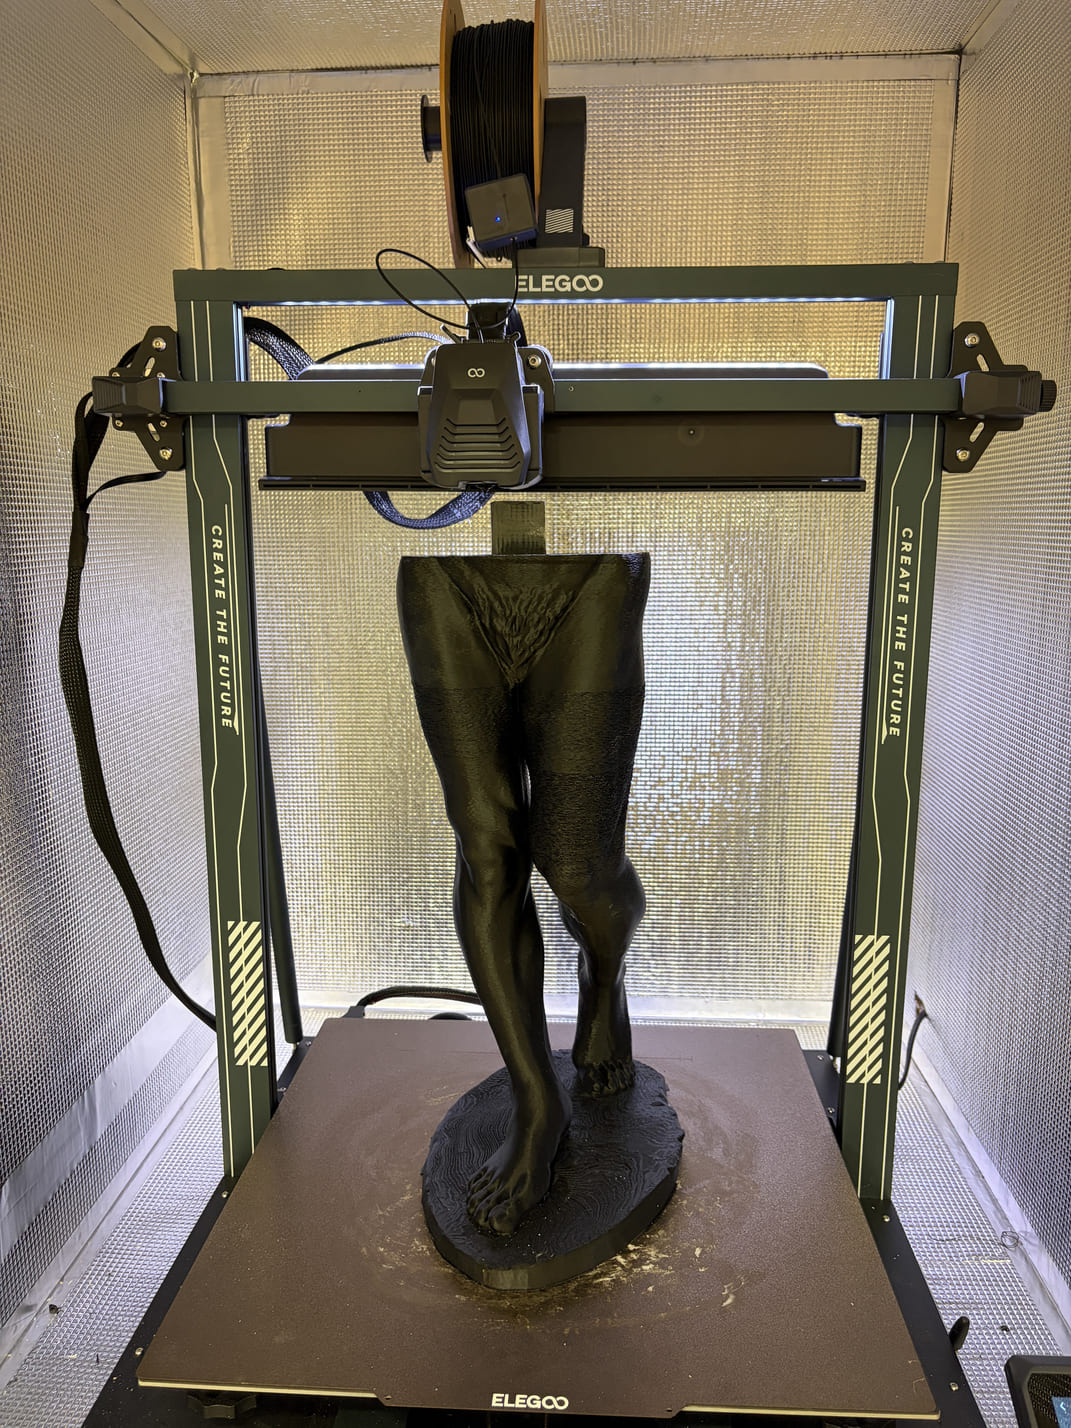
The completed 3DCG data is exported as an OBJ file and prepared for 3D printing in slicing software. For this work, the model was printed with an Elegoo Neptune 4 Max.
-
step4
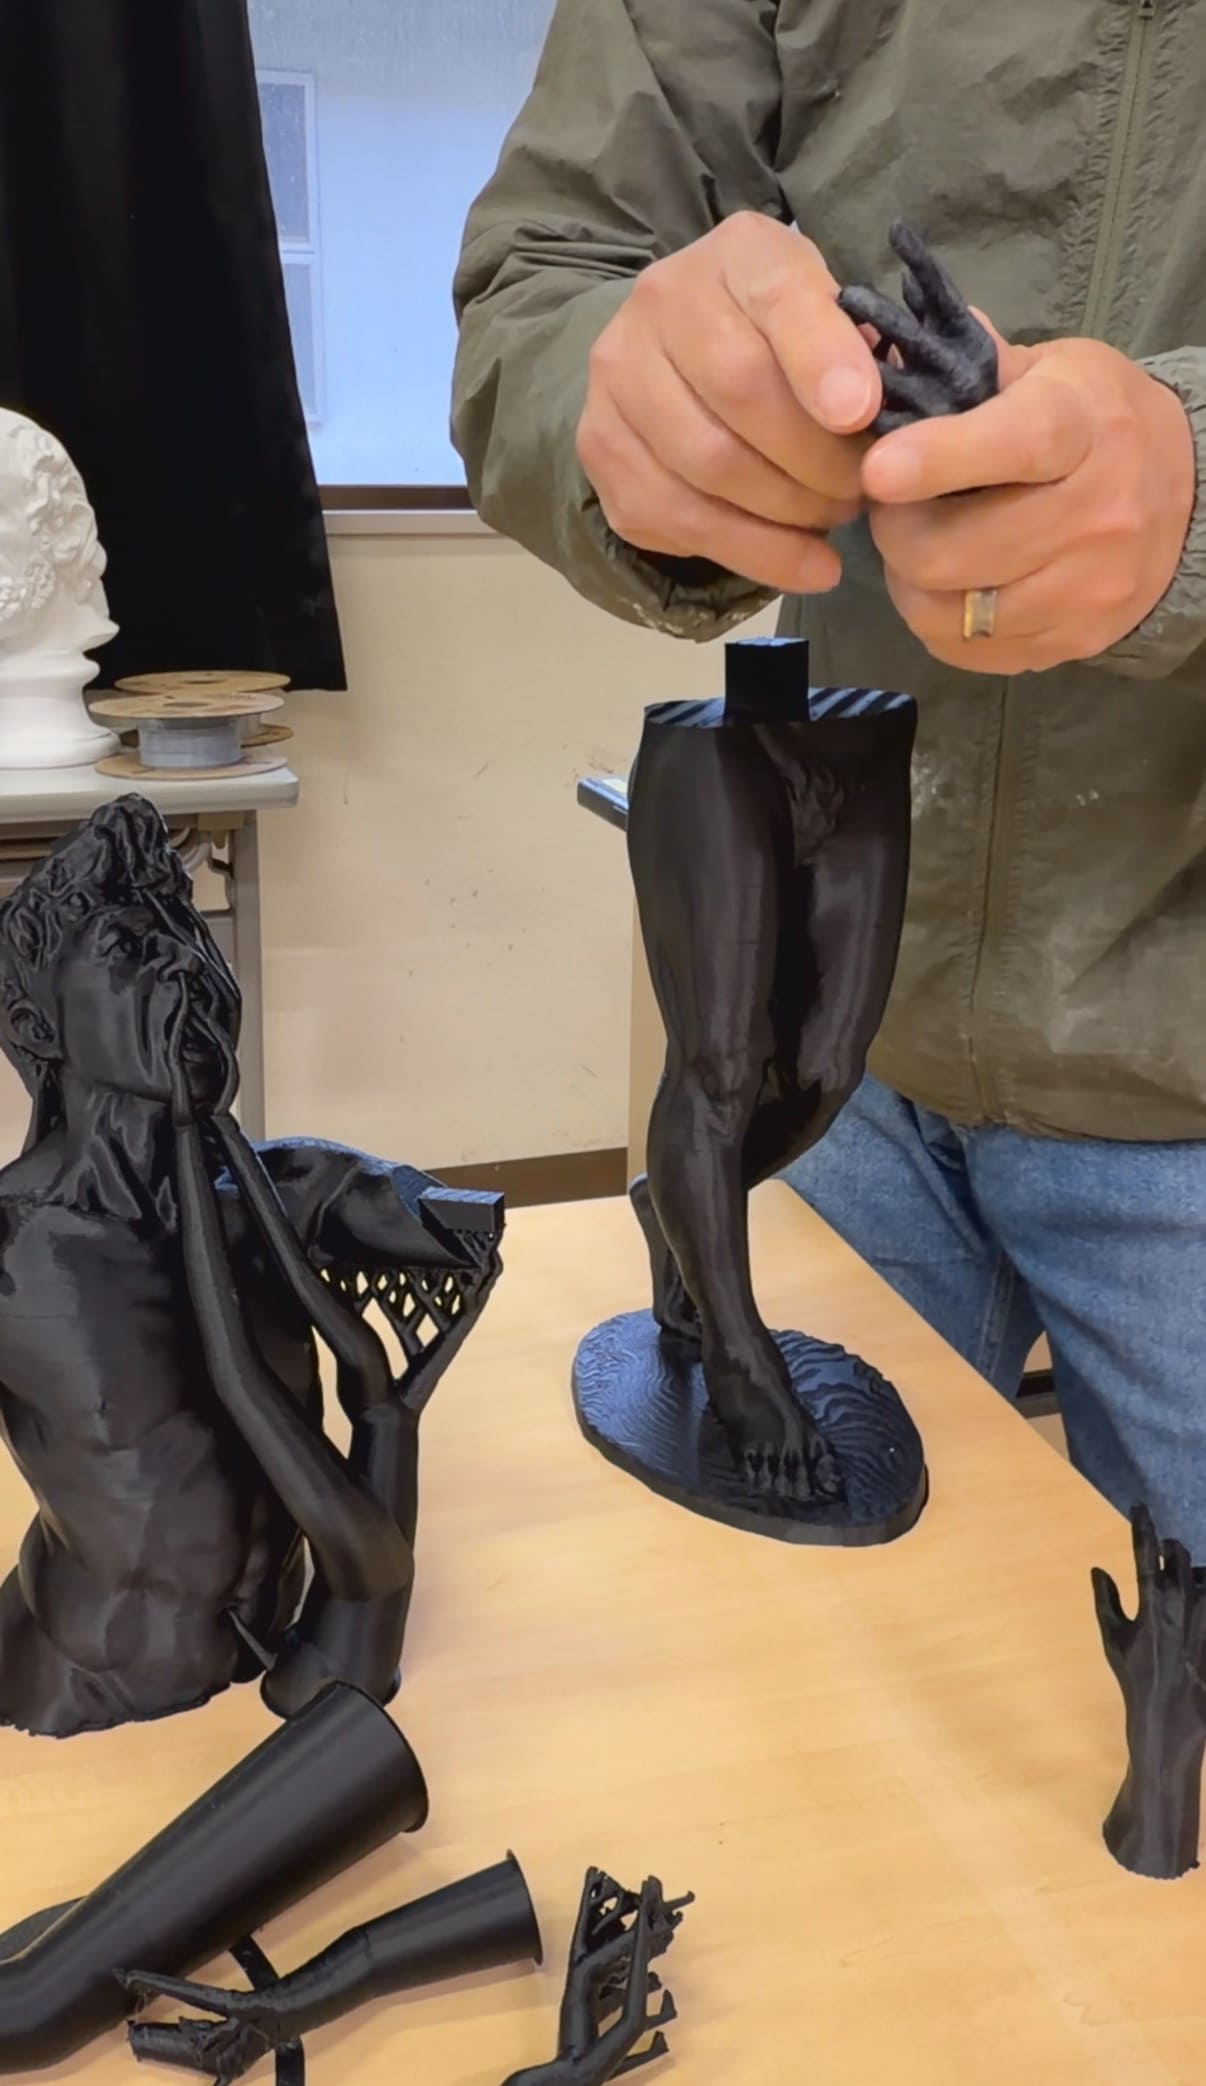
After approximately 36 hours of printing, the support structures are carefully removed from the printed model.
-
step5
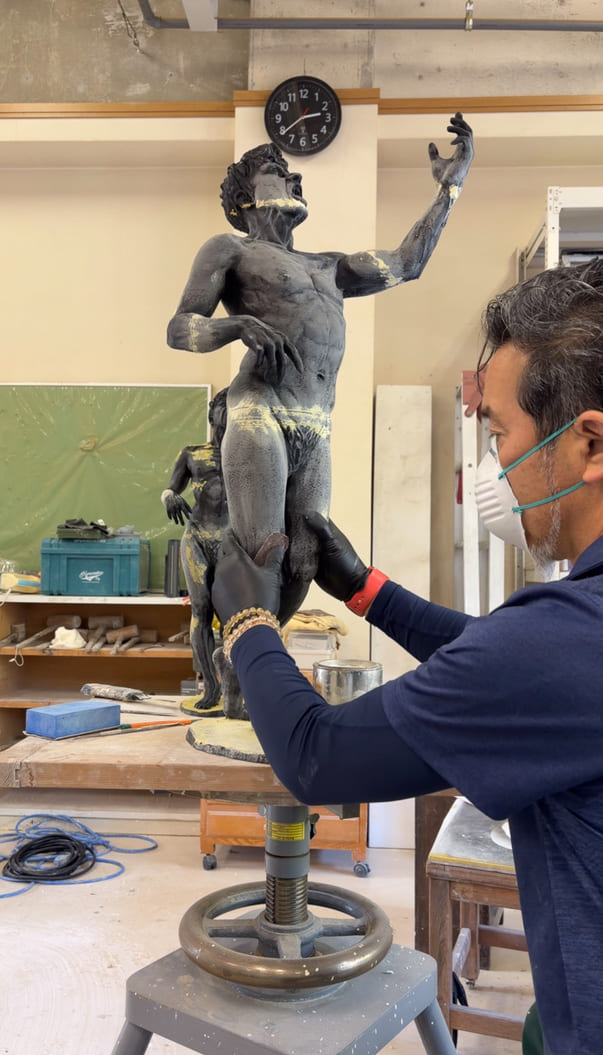
Each printed part is assembled using Konishi Quick Mender adhesive. The layer lines on the surface are then carefully sanded.Although 3D printing is often imagined as an automatic digital process, a large part of the final quality depends on hand finishing and sculptural judgment.
-
step6
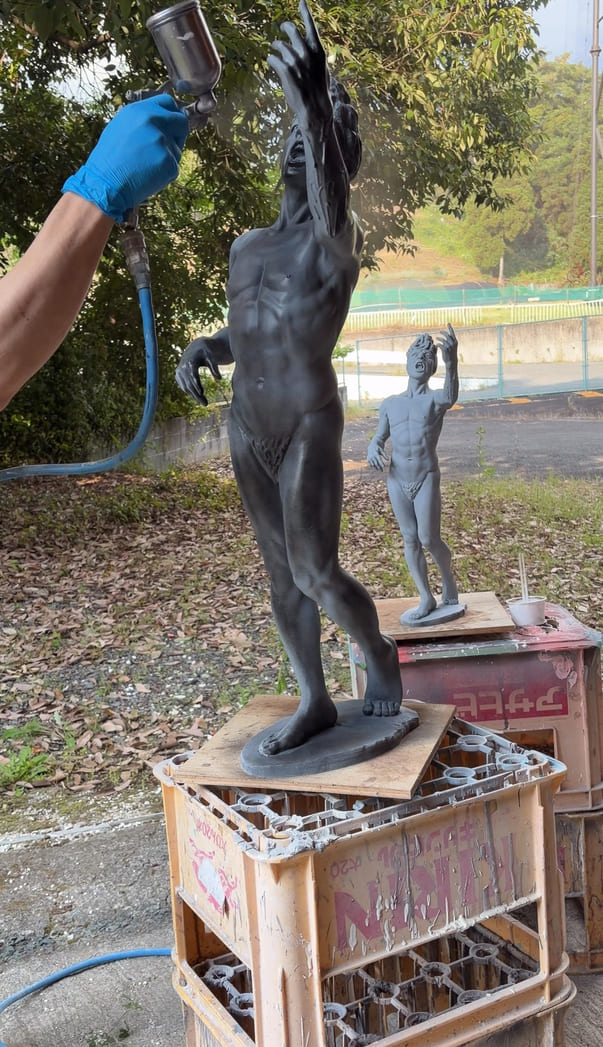
Remaining layer lines can reduce the quality of the work, so the surface is sanded thoroughly over time. A thinned acrylic resin coating is applied with an air spray to help fill the printed texture.
-
step7
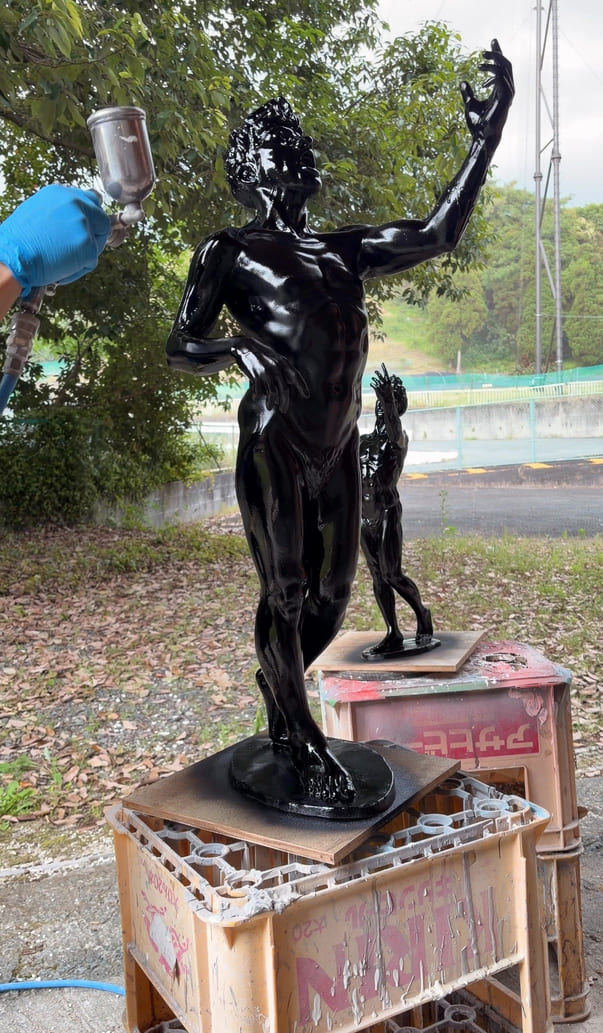
When removing the layer lines, the surface must not simply be made smooth. The sanding process also needs to recover the flow of the muscles and the sculptural structure that were present in the original clay modeling. After this stage, a black urethane base coat is sprayed onto the surface.
-
step8
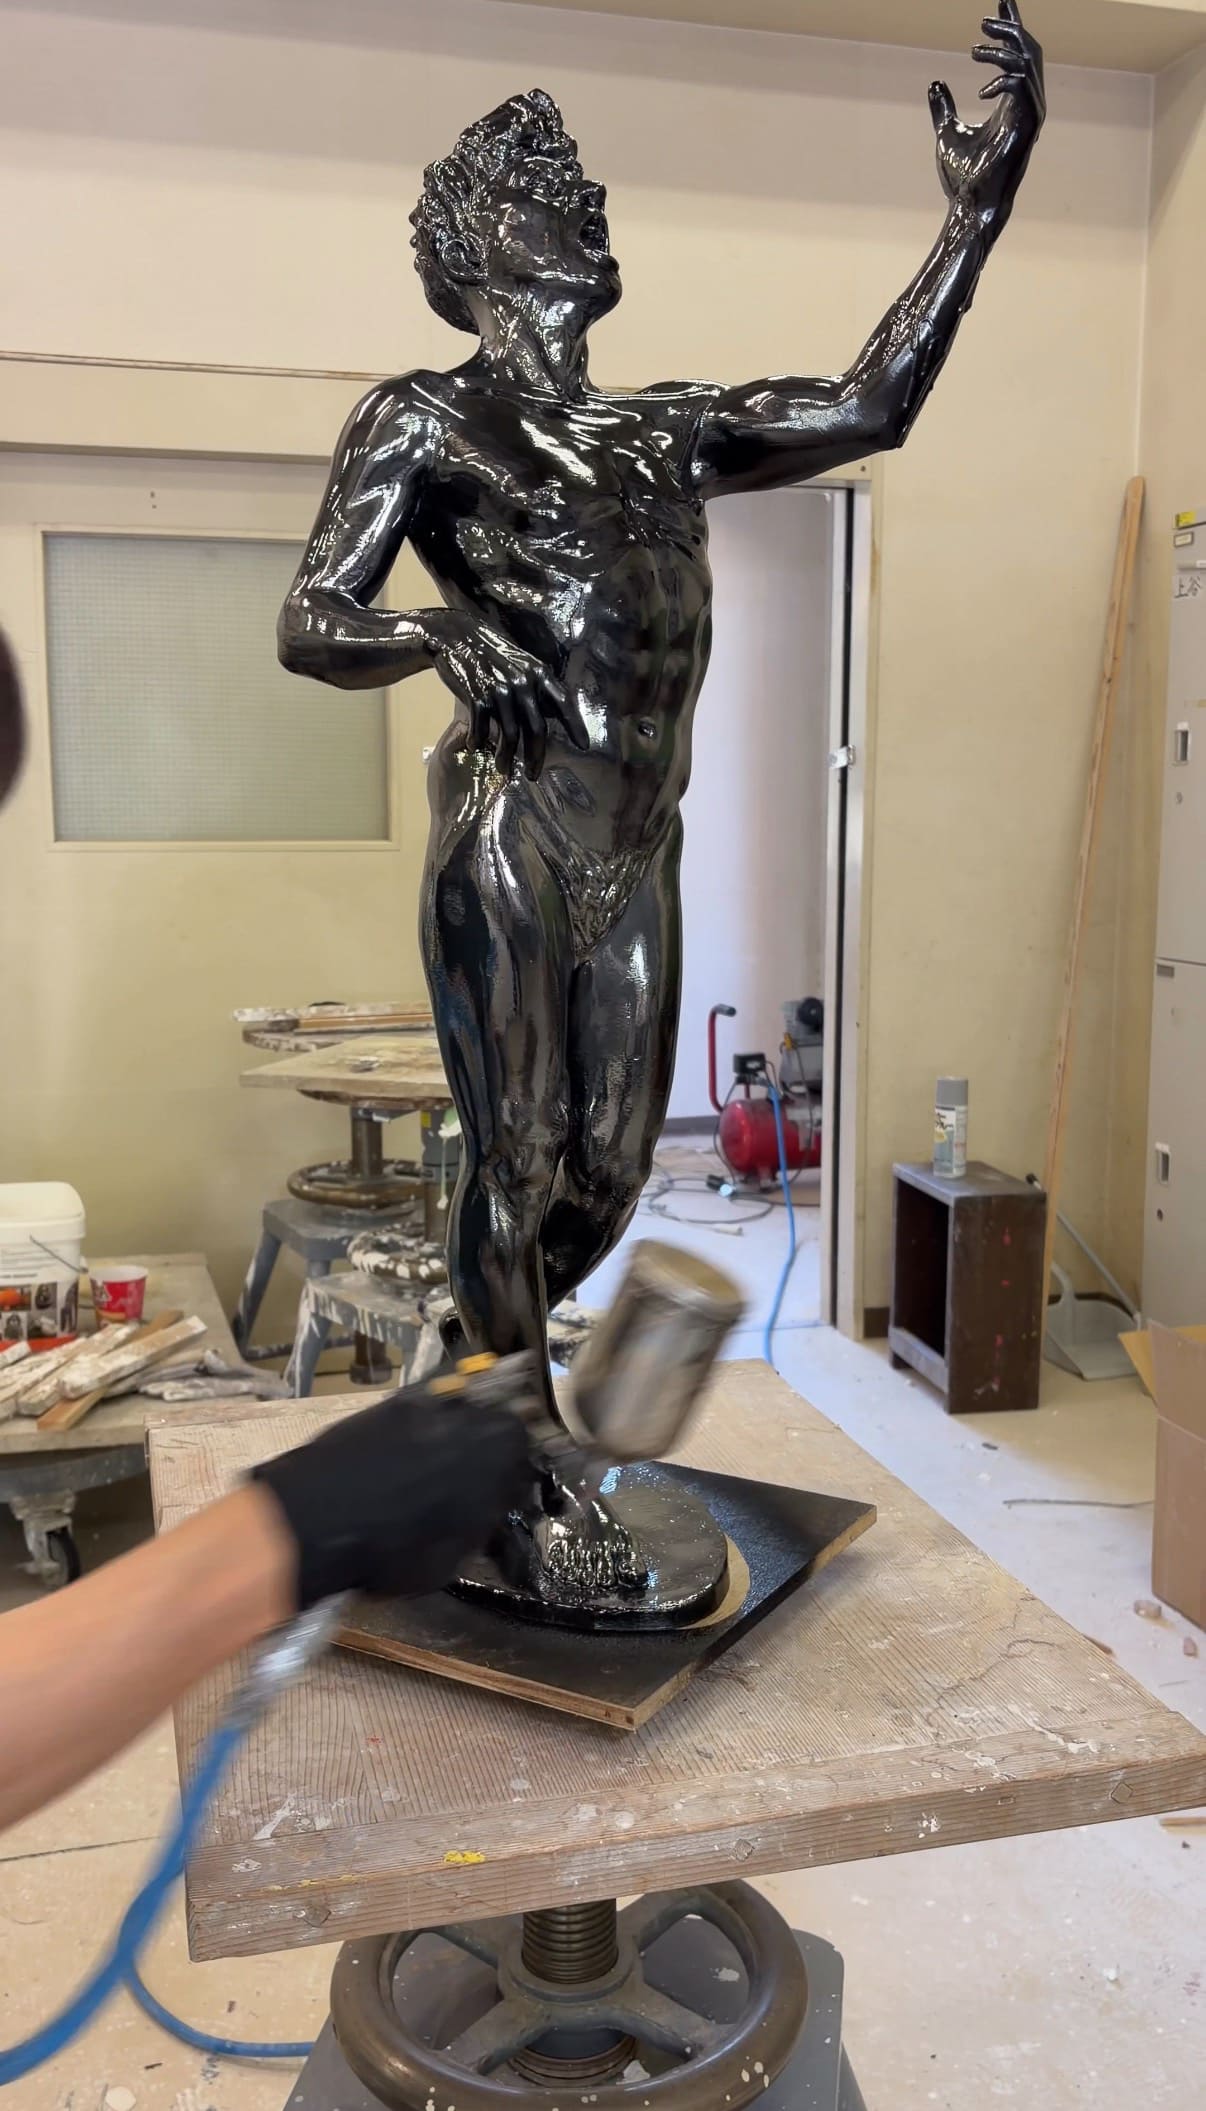
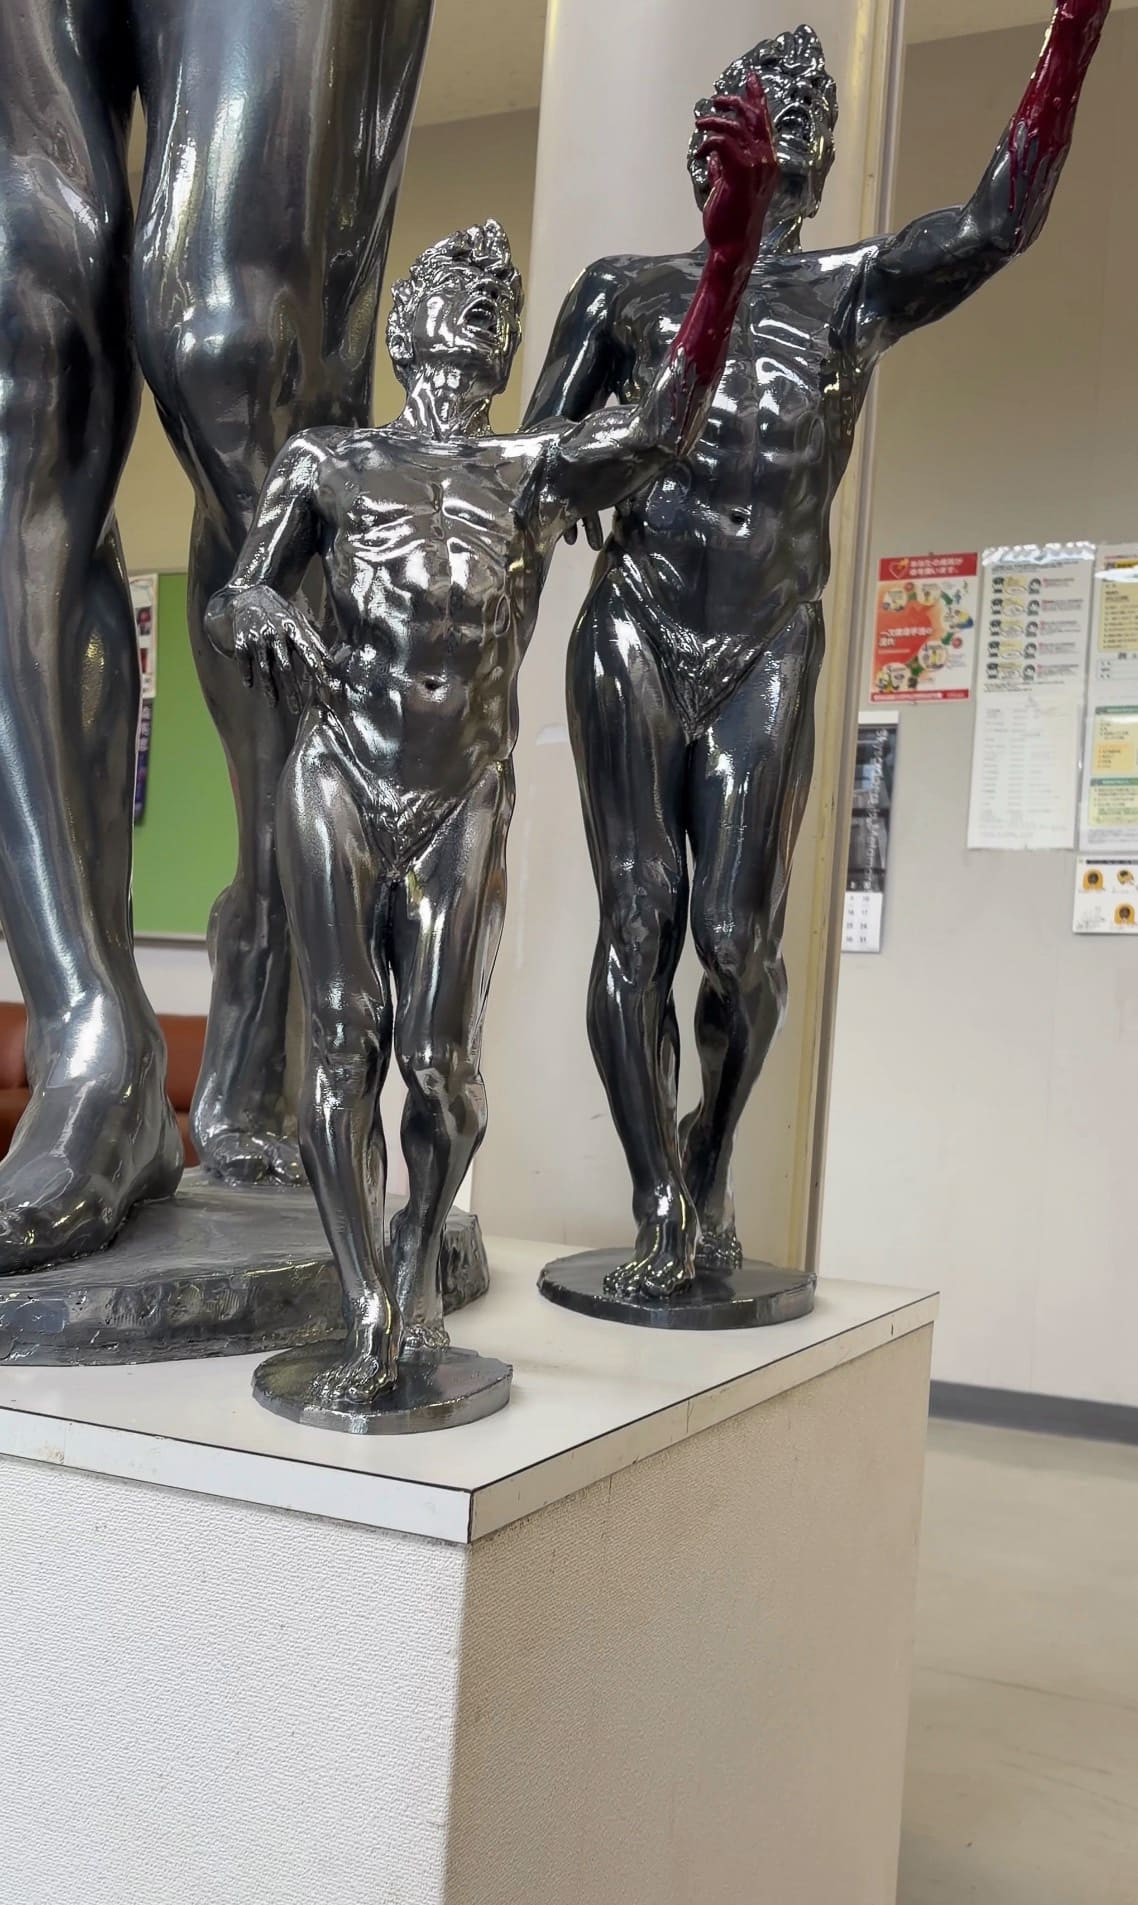
To create a reduced-scale version of the original sculpture, the printed work is finished with a coating that corresponds to the original. In this case, a metallic IZU-color finish was applied.
-
step9
Through this process, a reduced-scale version of the original sculpture can be created using 3D printing technology. However, as the process shows, the result is not produced by the machine alone. It becomes a sculpture through repeated handwork, finishing, and the sculptor’s technical judgment.
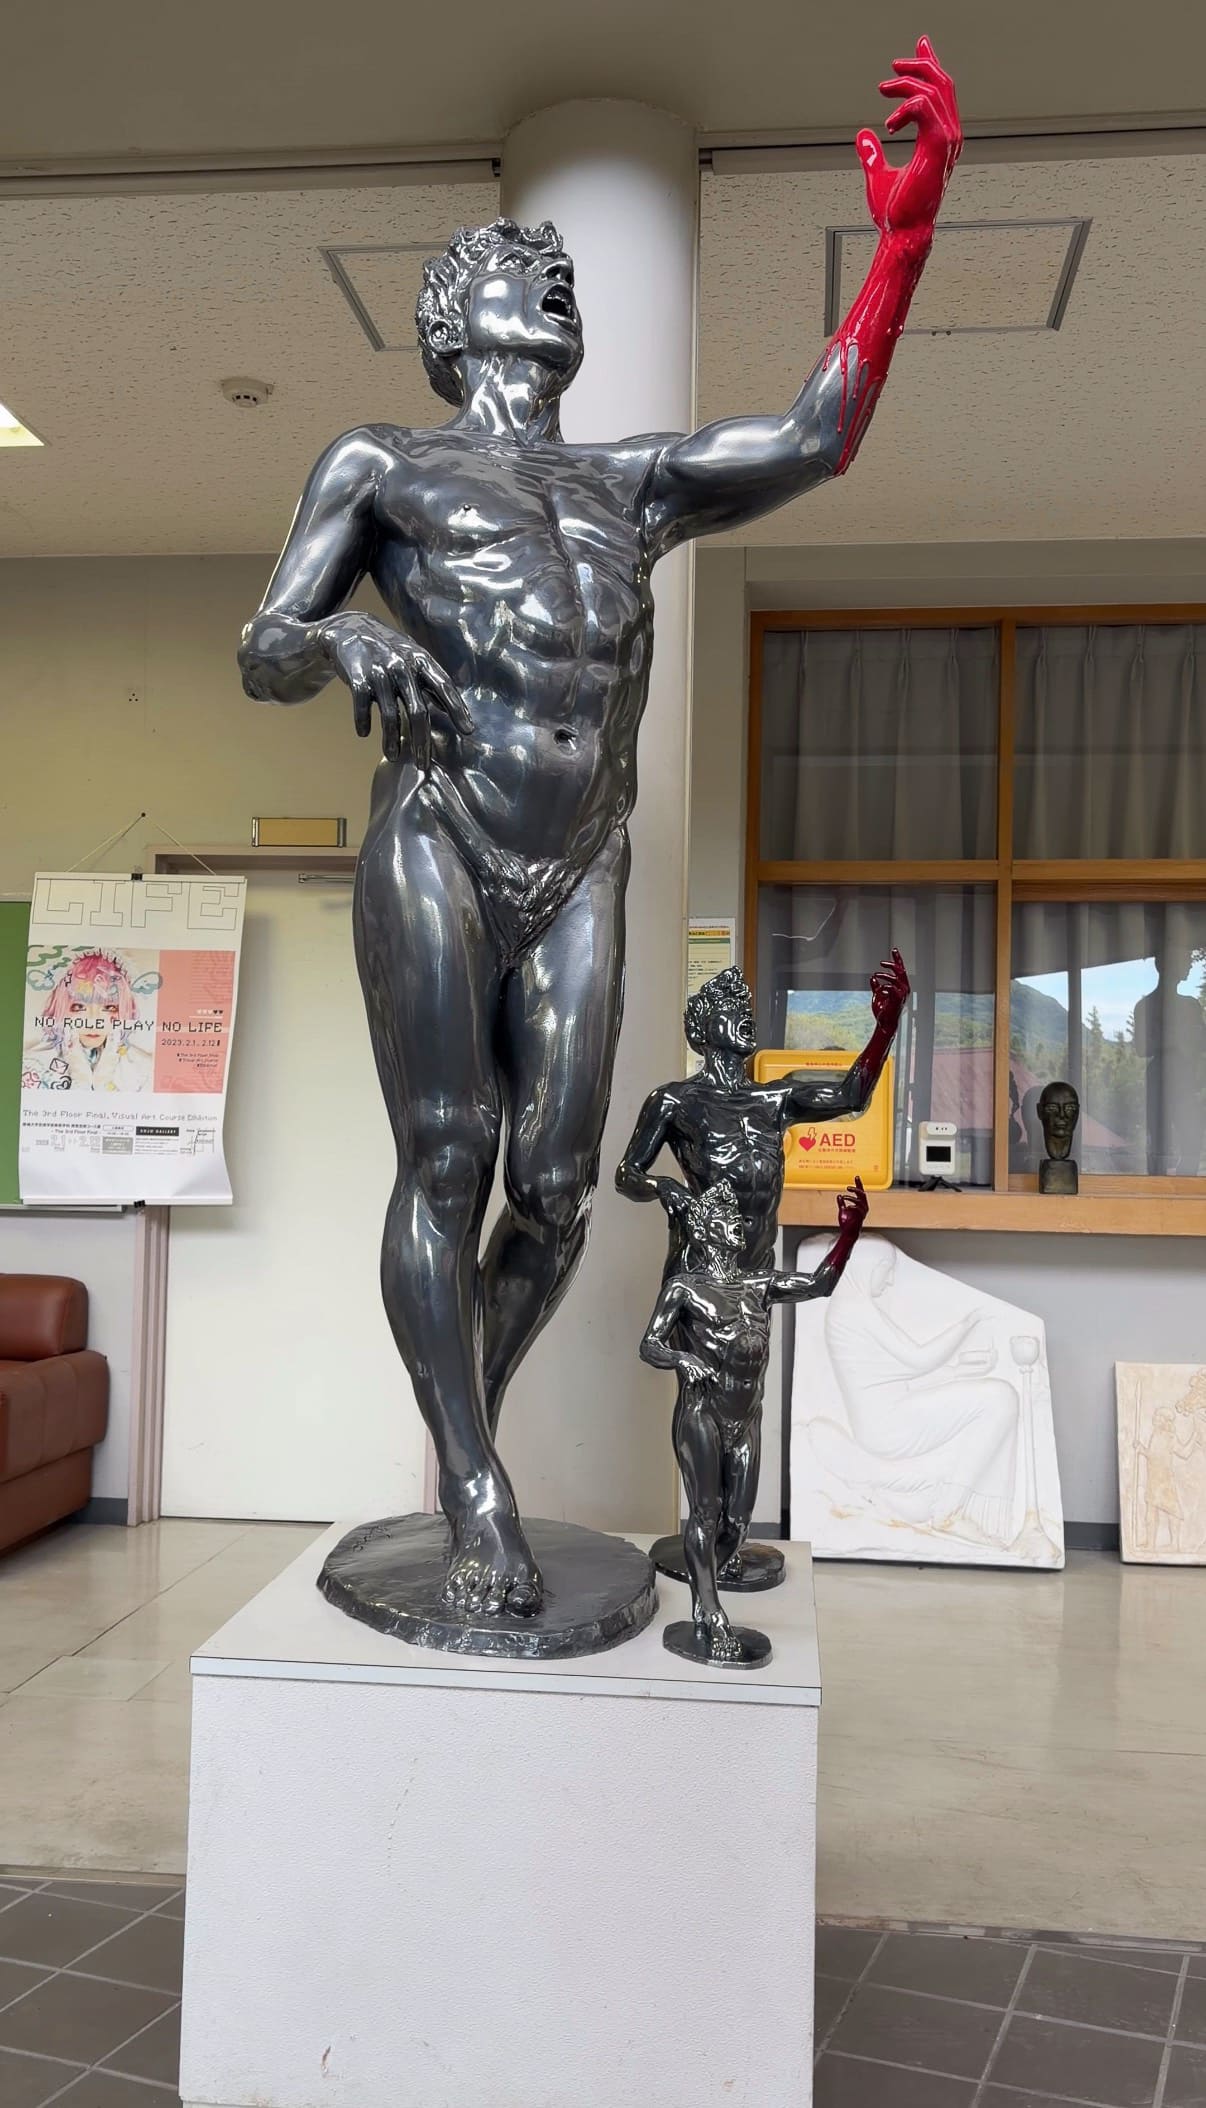
-
step10
3D printing opens new possibilities for figurative sculpture. Even when a life-size work cannot be installed in a private space, a carefully produced smaller edition can allow collectors and art lovers to experience the presence and quality of the original work in a more accessible form.
Augmented Reality
& Mixed Reality
to extend beyond physical space,
creating immersive experiences that connect viewers
with new dimensions of artistic expression.
-
step1
The 3D data of the original sculpture is captured using a 3D scanner.
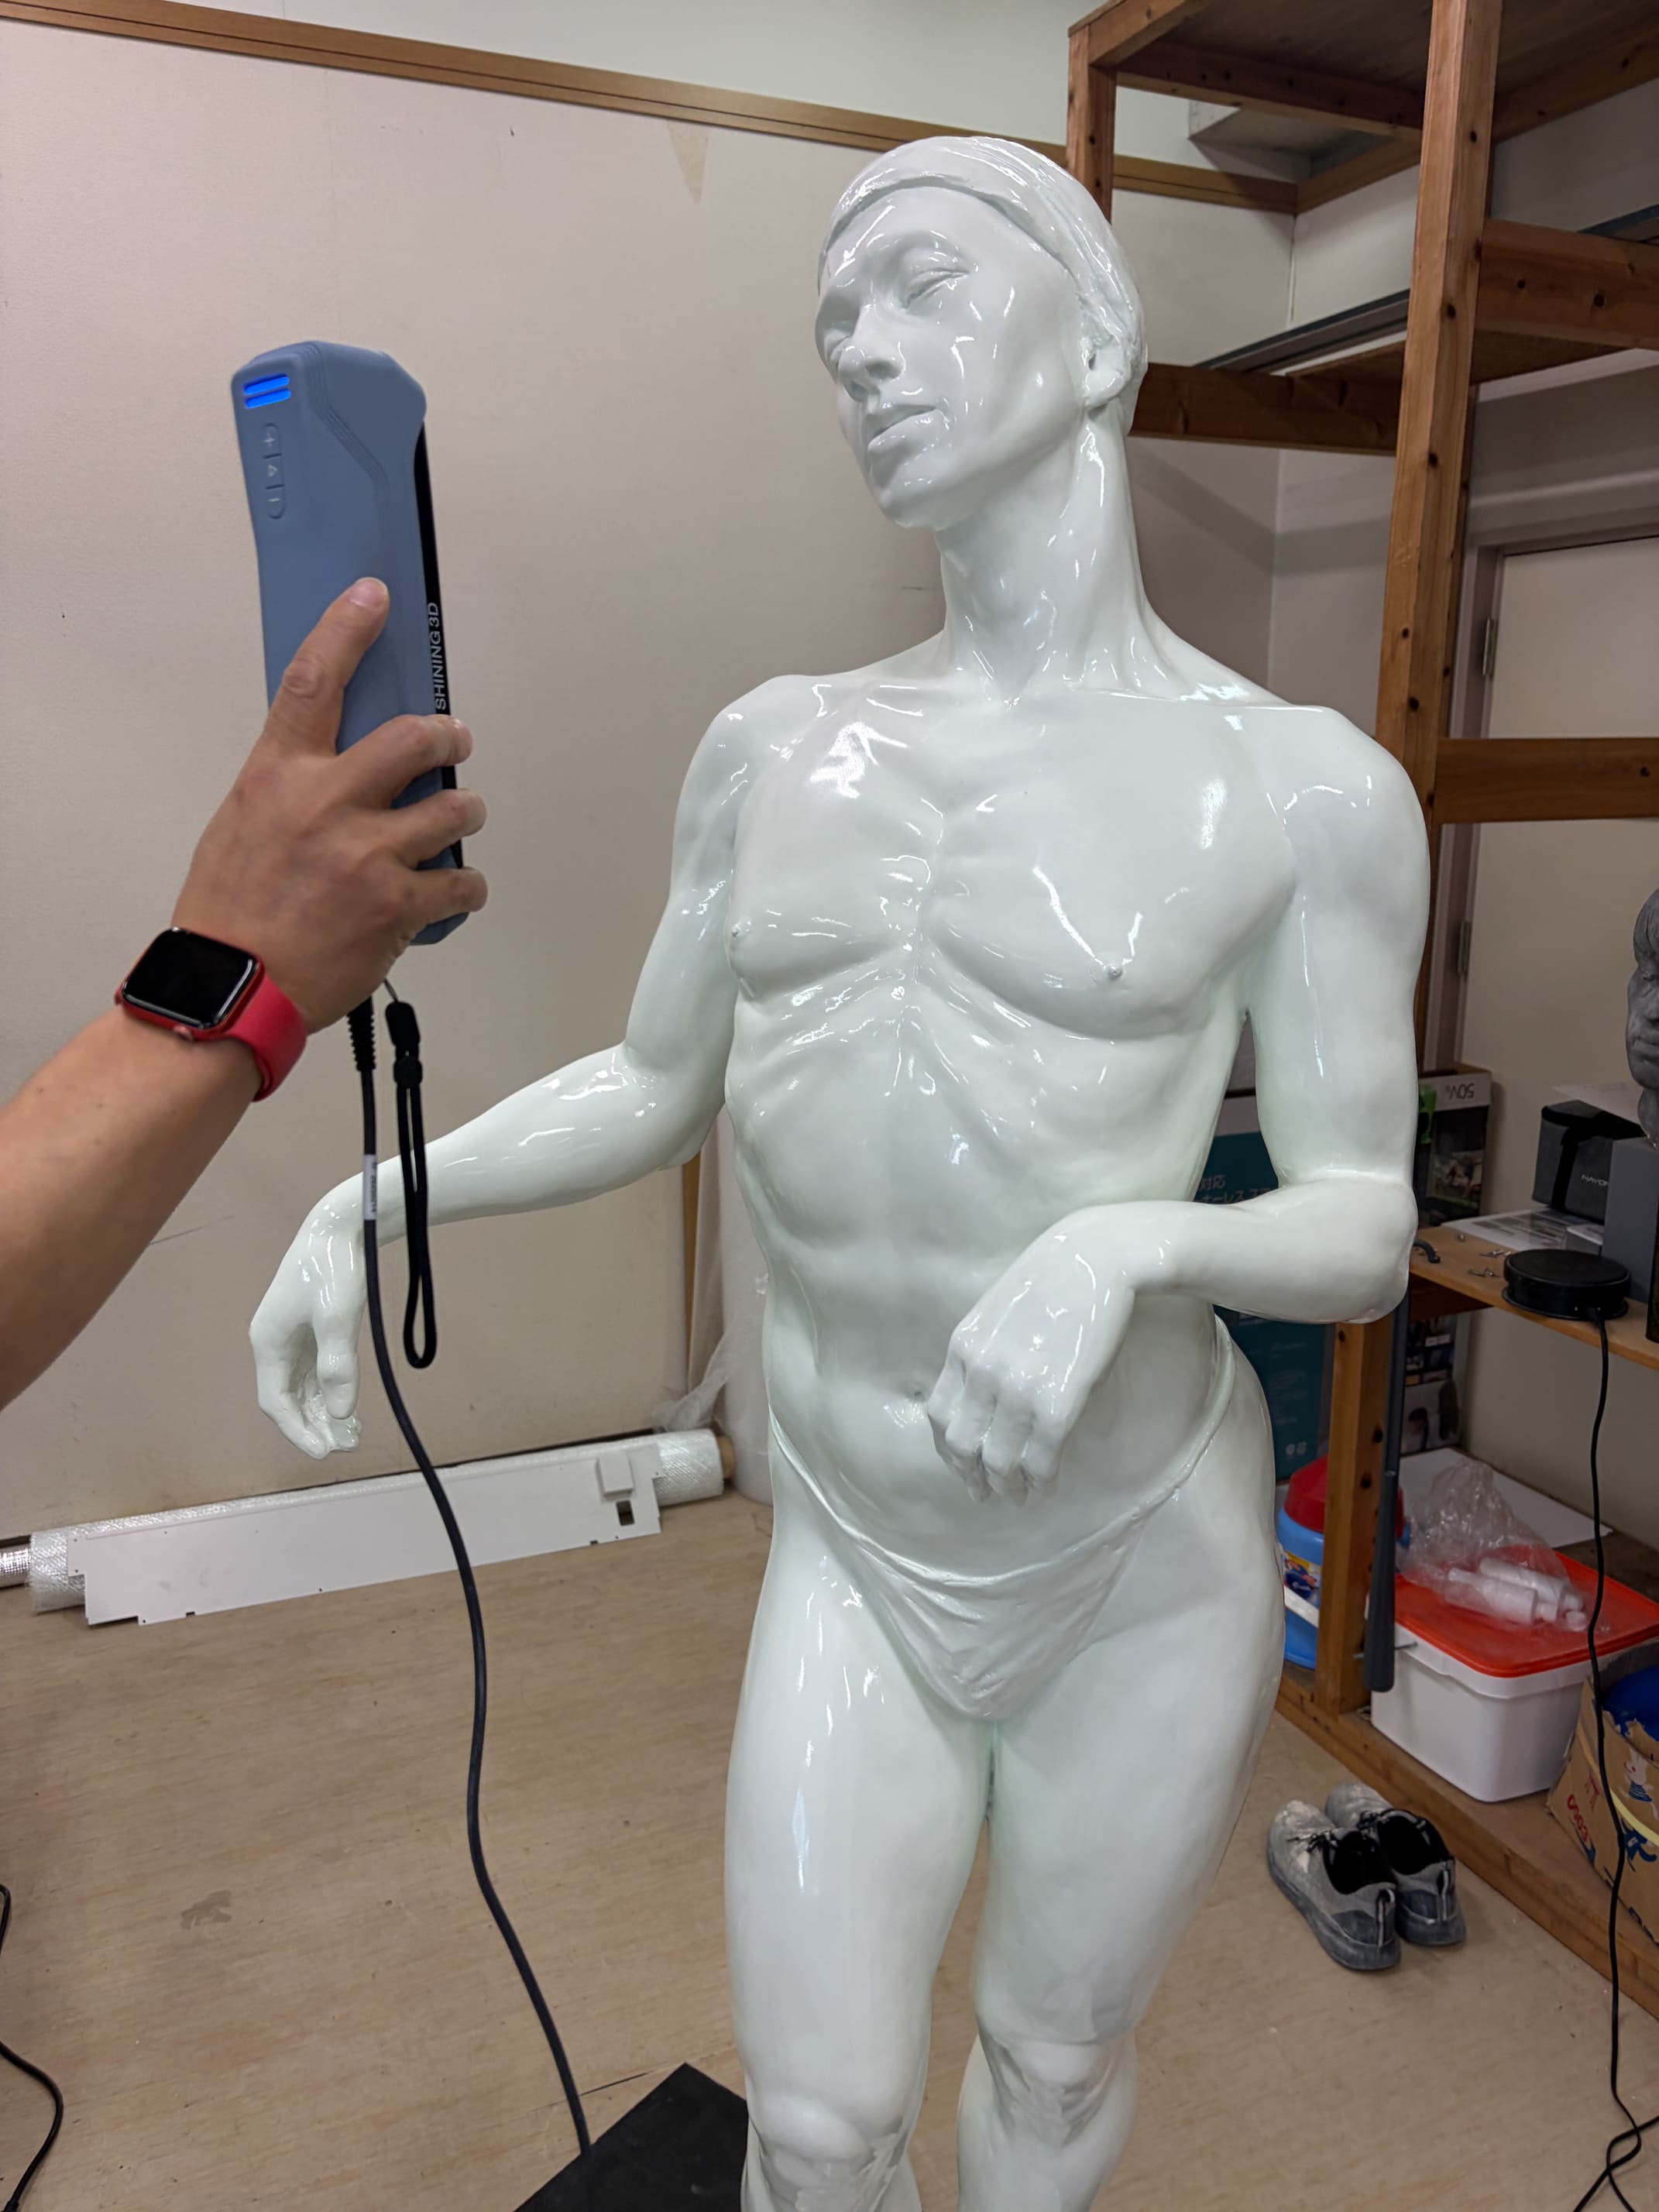
-
step2
The scanned data is converted into a mesh and refined in ZBrush. Irregularities caused by the scanning process are carefully corrected.
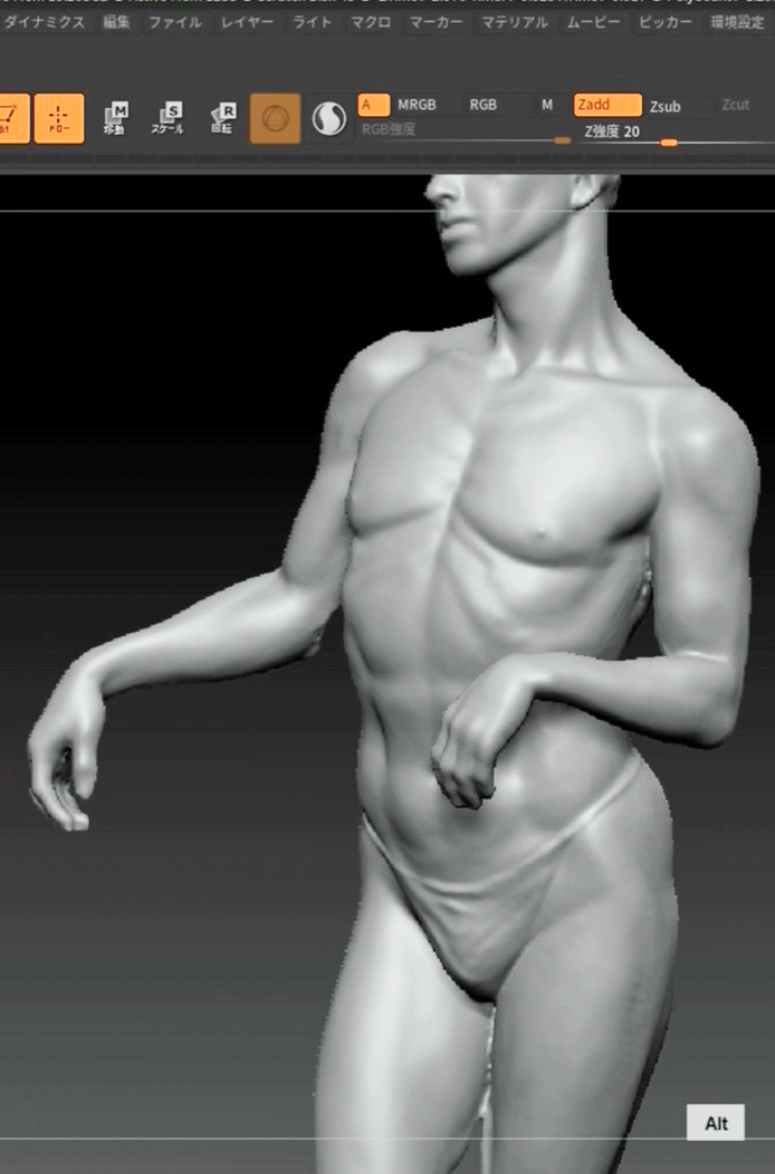
-
step3
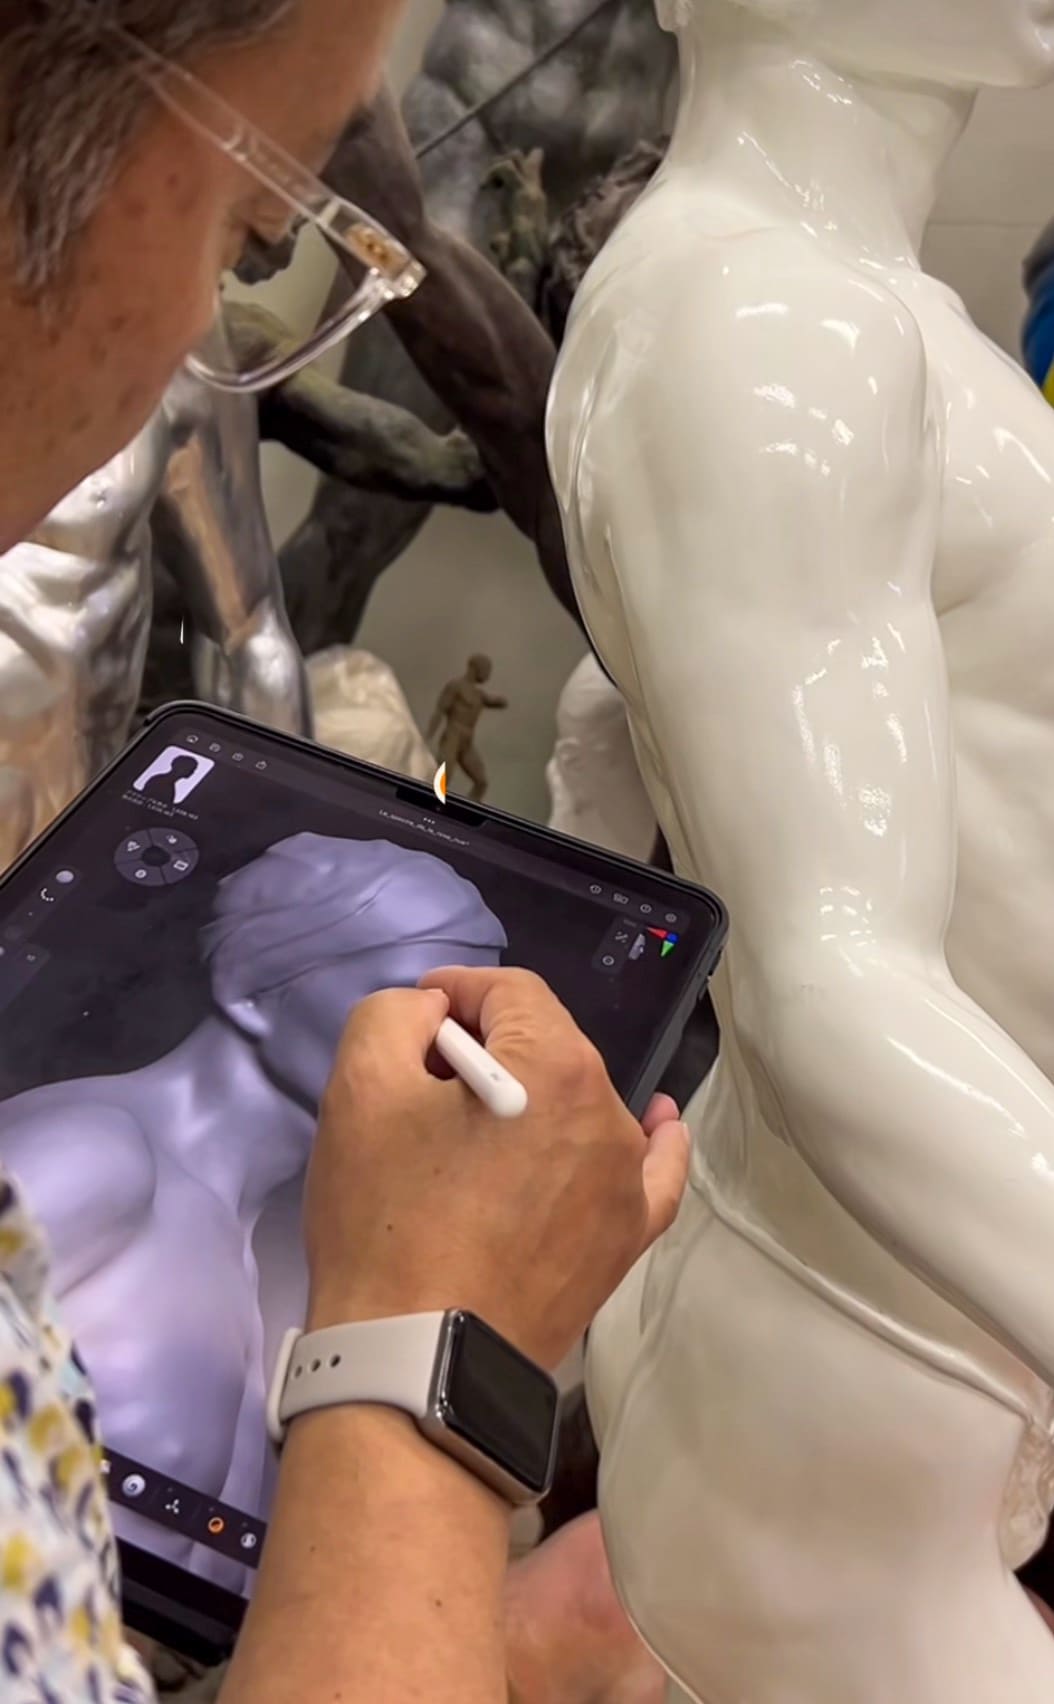
Using the iPad version of ZBrush, the digital model is adjusted in detail while constantly comparing it with the original sculpture from multiple angles.
-
step4
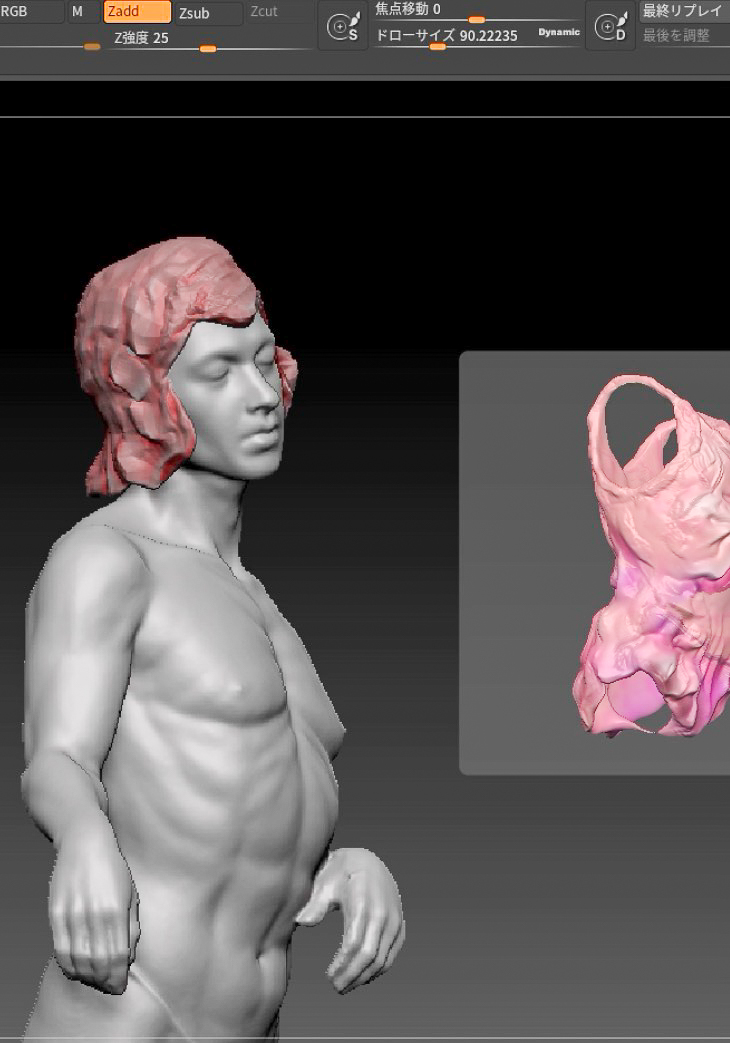
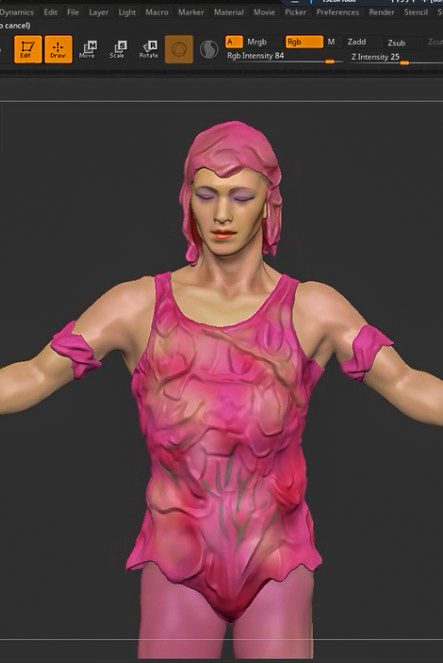
After the main body is corrected, costume elements, hair ornaments, and other details are digitally sculpted and attached to the 3DCG model in ZBrush.
-
step5
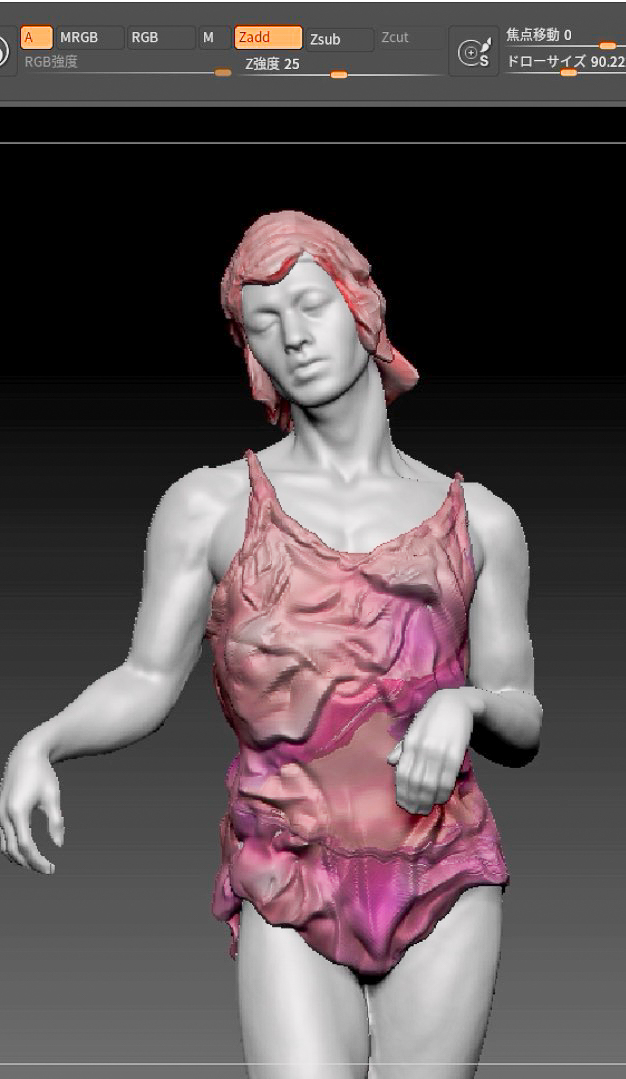
Because this project is based on Nijinsky’s Le Spectre de la Rose, the costume is colored with ZBrush PolyPaint while referring to visual research materials.
-
step6
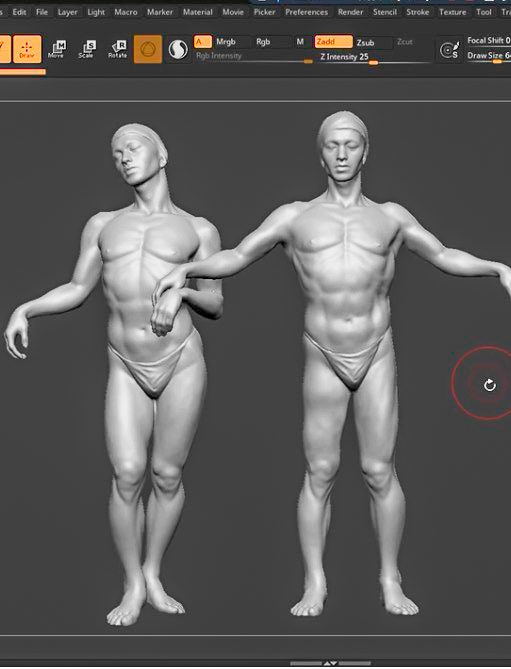
The pose of the original sculpture is transformed into a T-pose using functions such as Transpose Master in ZBrush, preparing the model for animation.
-
step7
PolyPaint is also applied to the body of the T-pose model in an attempt to evoke the appearance of Nijinsky. UV unwrapping and other preparations are then carried out for animation.
-
step8
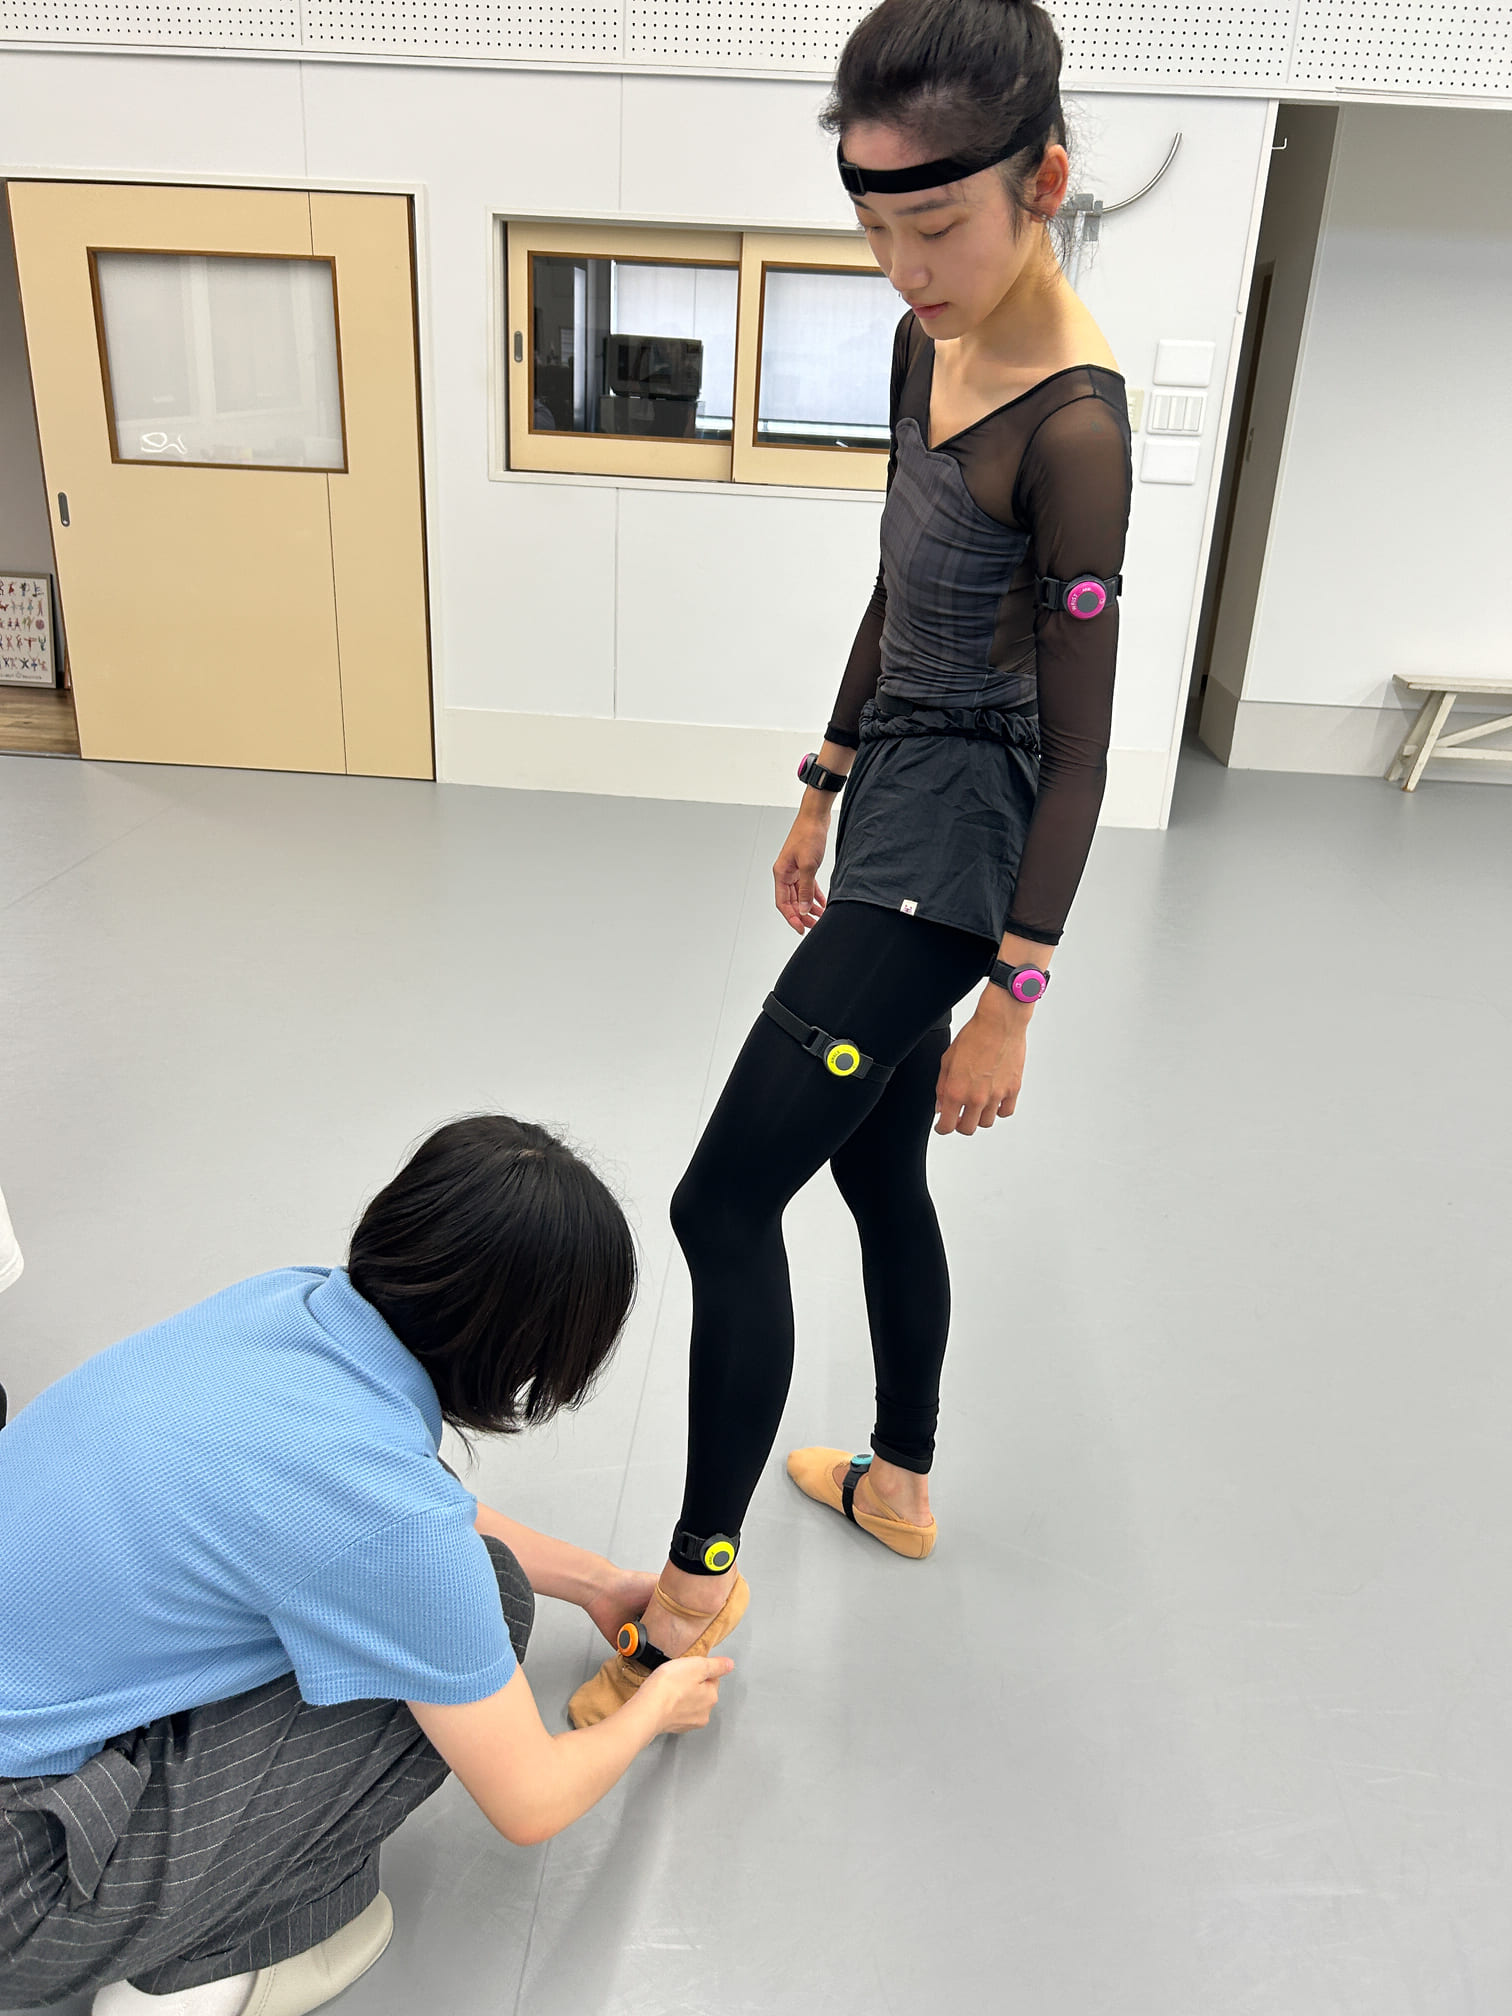
A ballet dancer wears Sony mocopi motion-capture sensors to record the movements for the AR animation.
-
step9
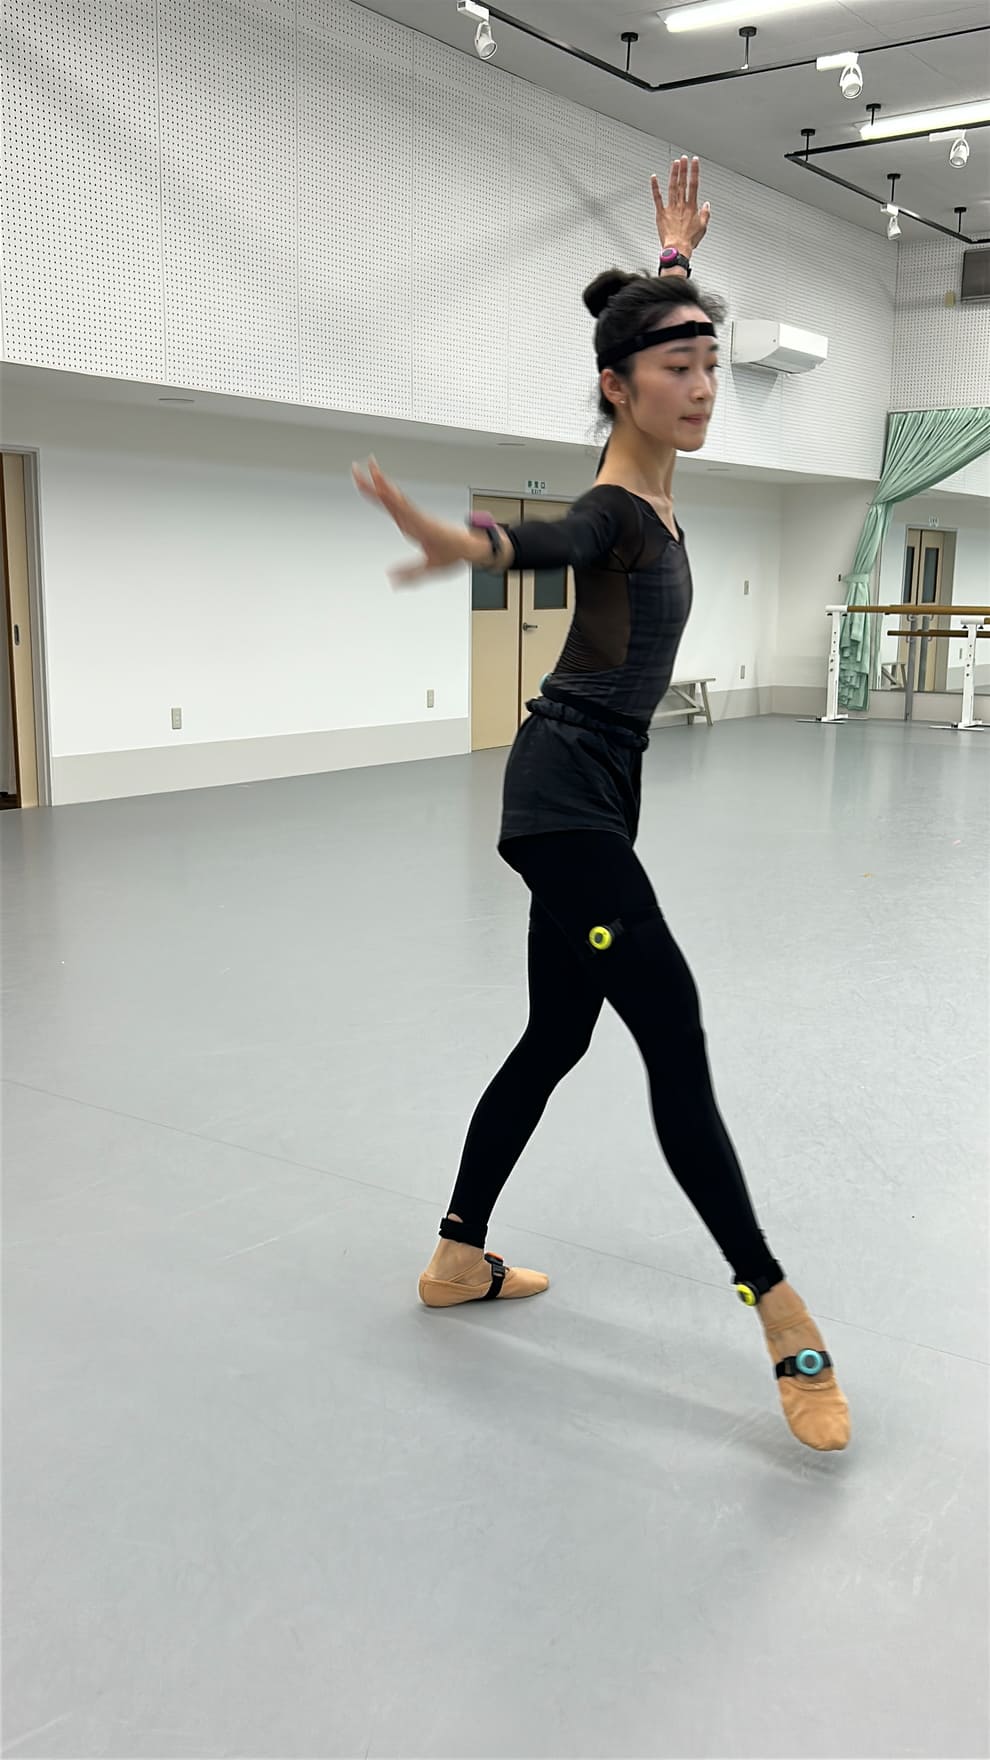
The dancer performs movements inspired by Le Spectre de la Rose, and the motion data is captured for use in the digital model.
-
step10
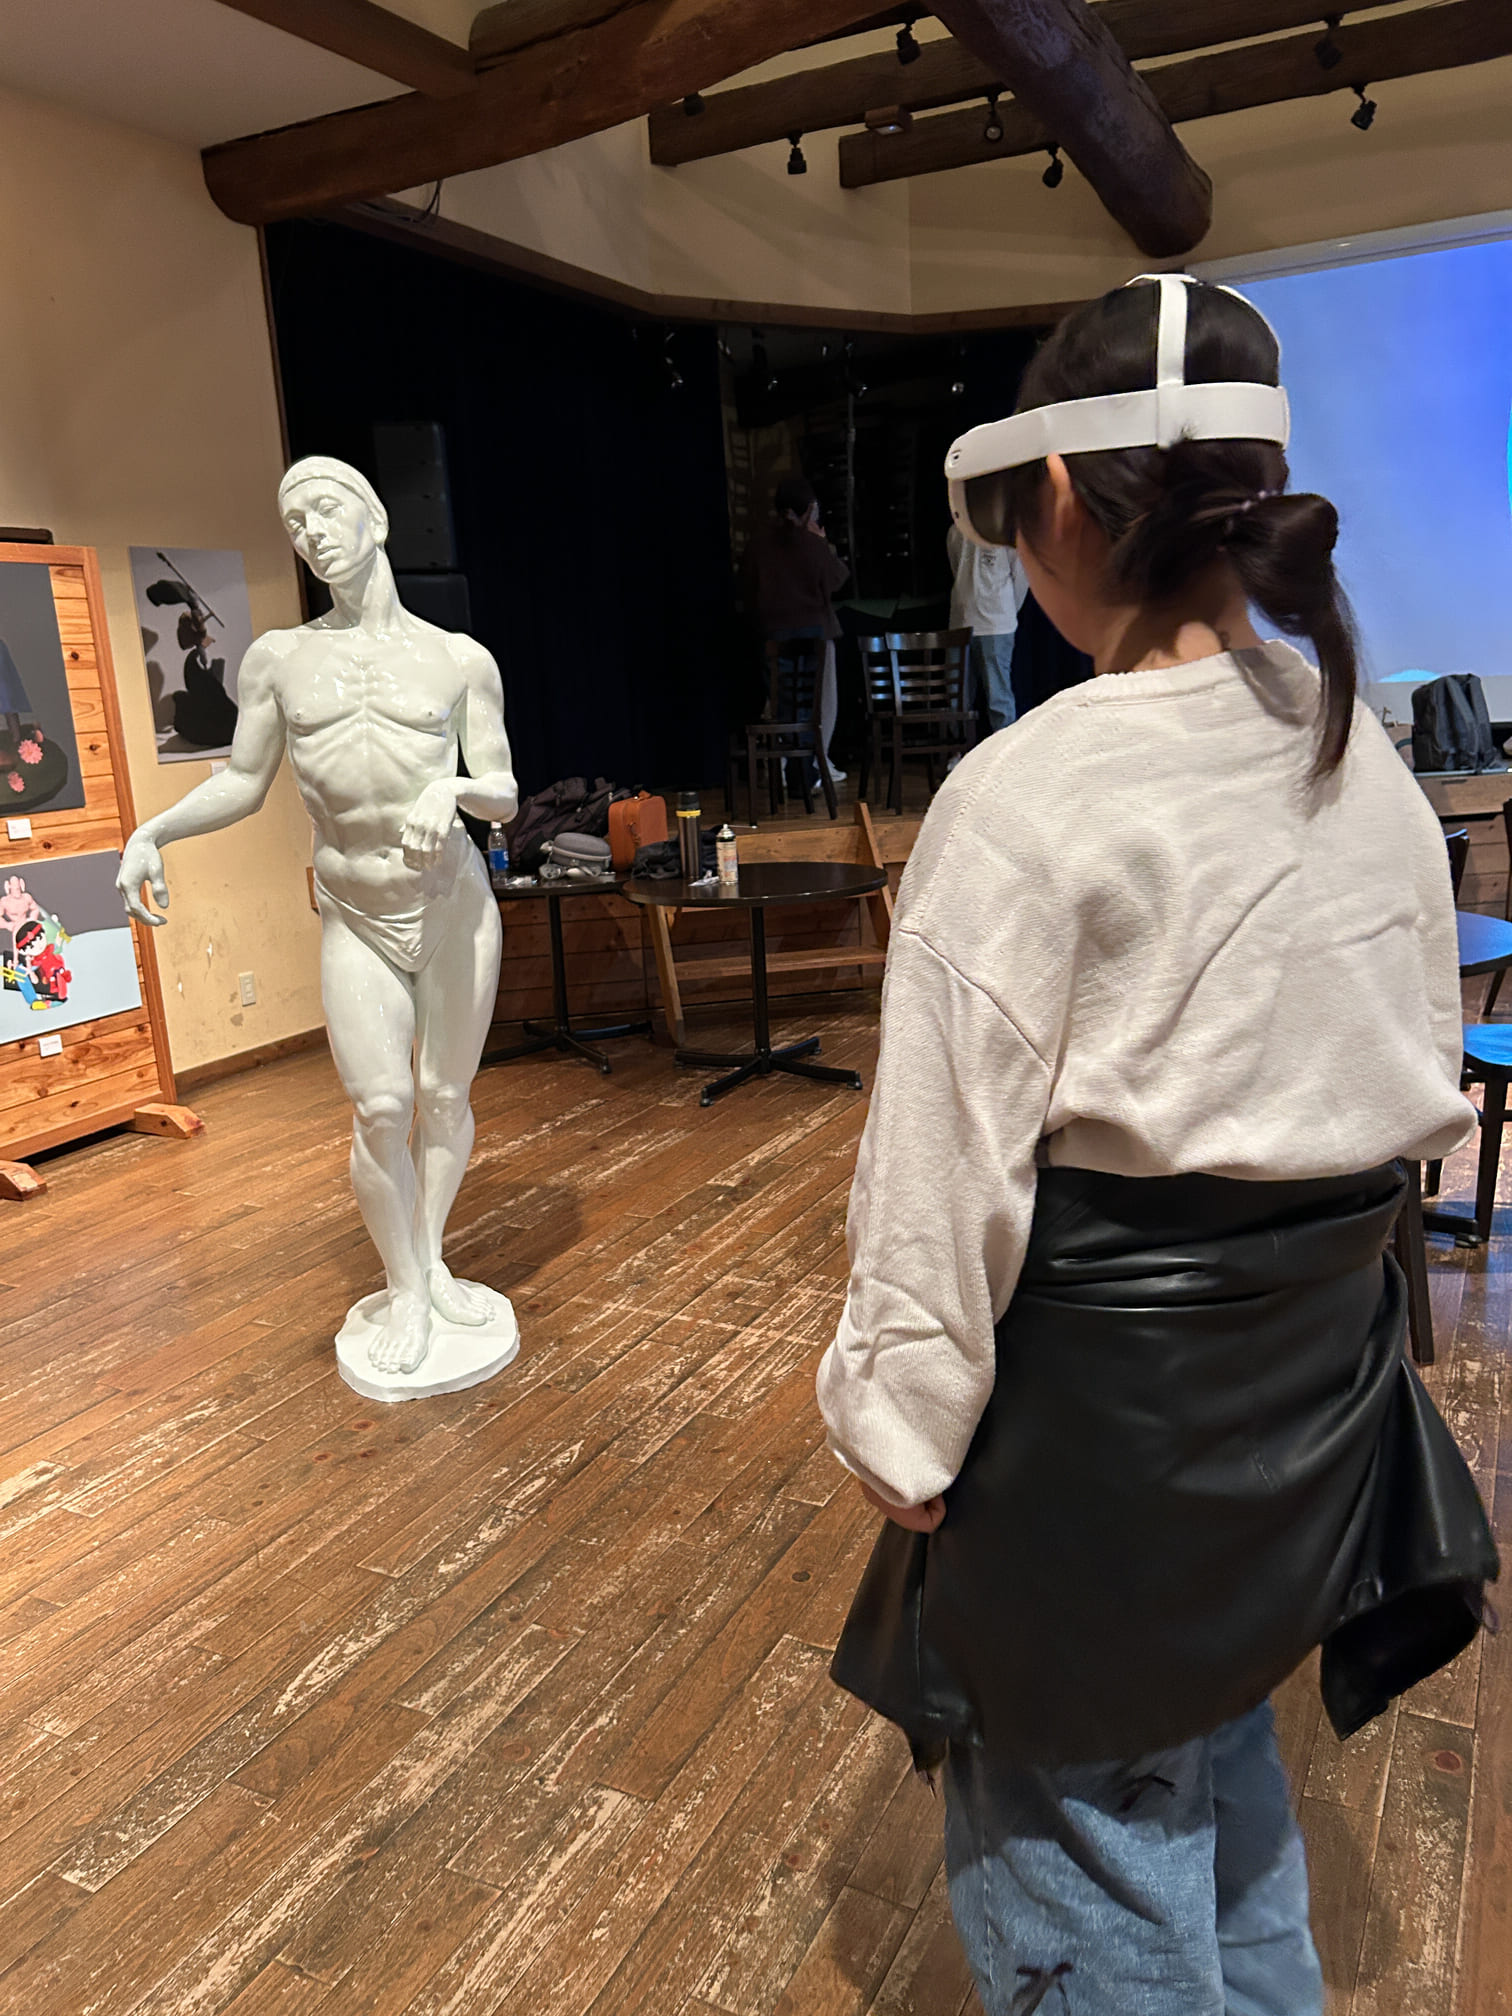
The motion data is linked to the 3DCG model. The animated model and the physical sculpture are aligned through anchoring, and the experience is developed as an application for Meta Quest 3 using Unity.
-
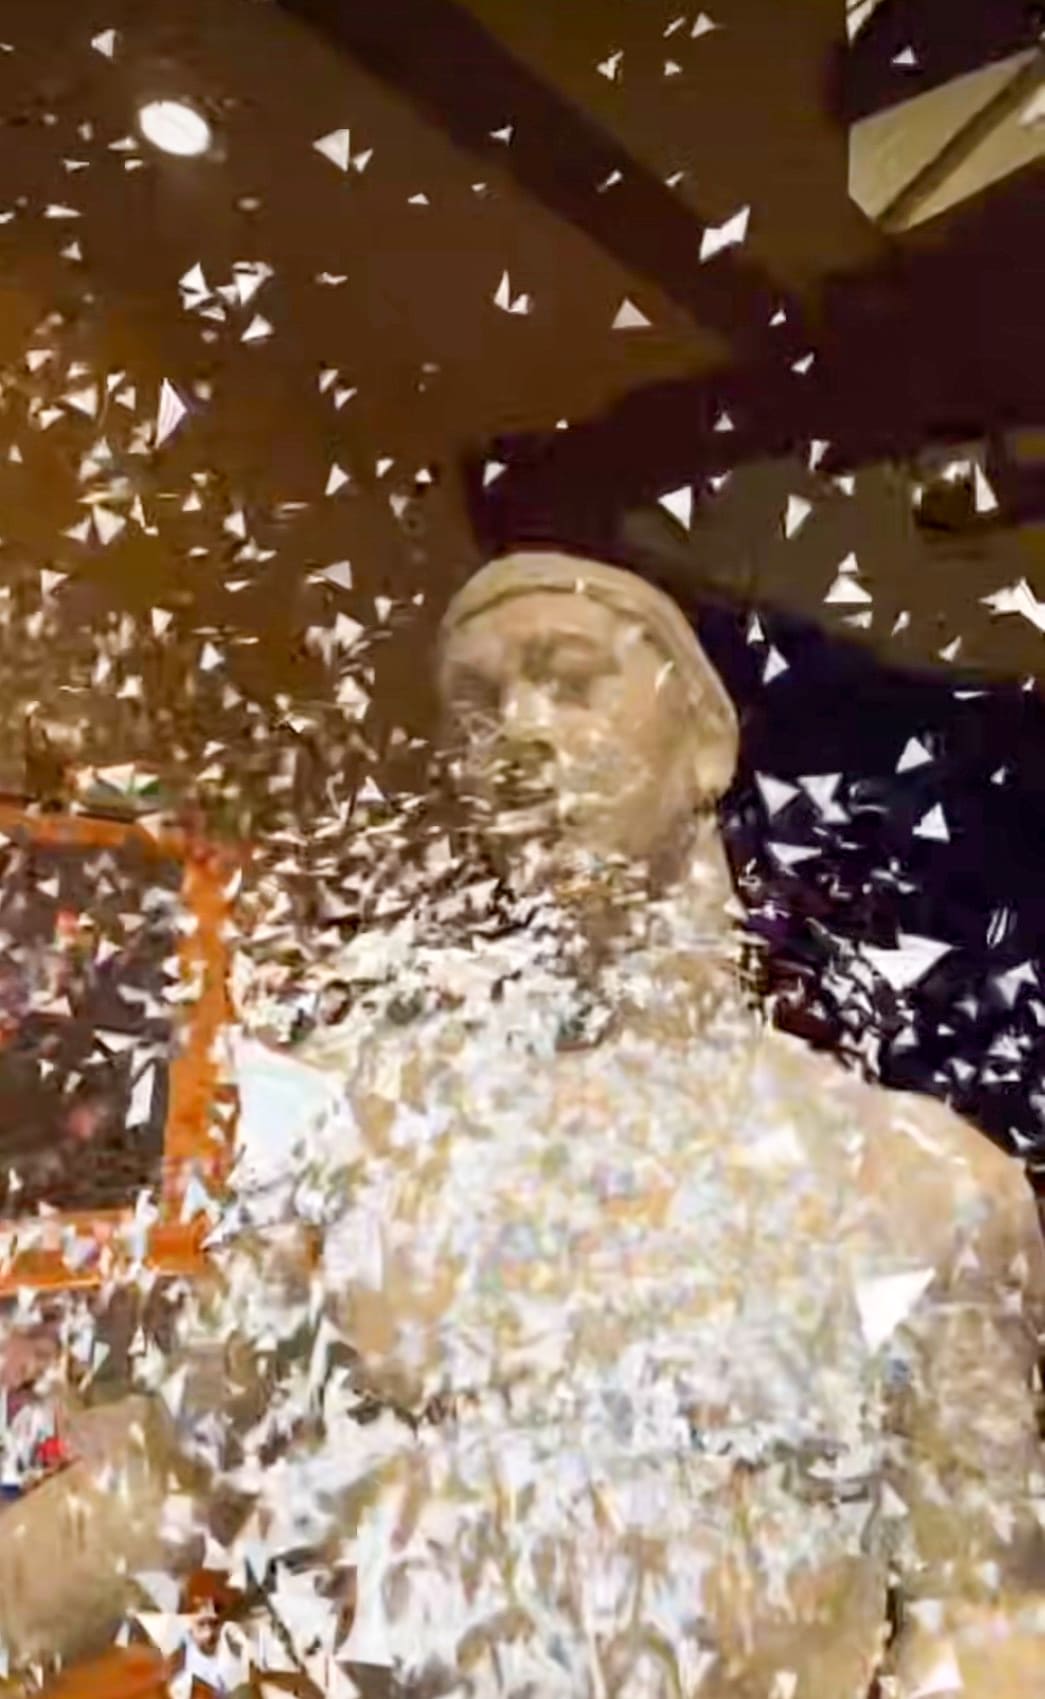
step11
Hand tracking is used so that touching the physical sculpture becomes the trigger for the animation. The project aims to create a new interactive experience between sculpture, body, and digital motion.
-
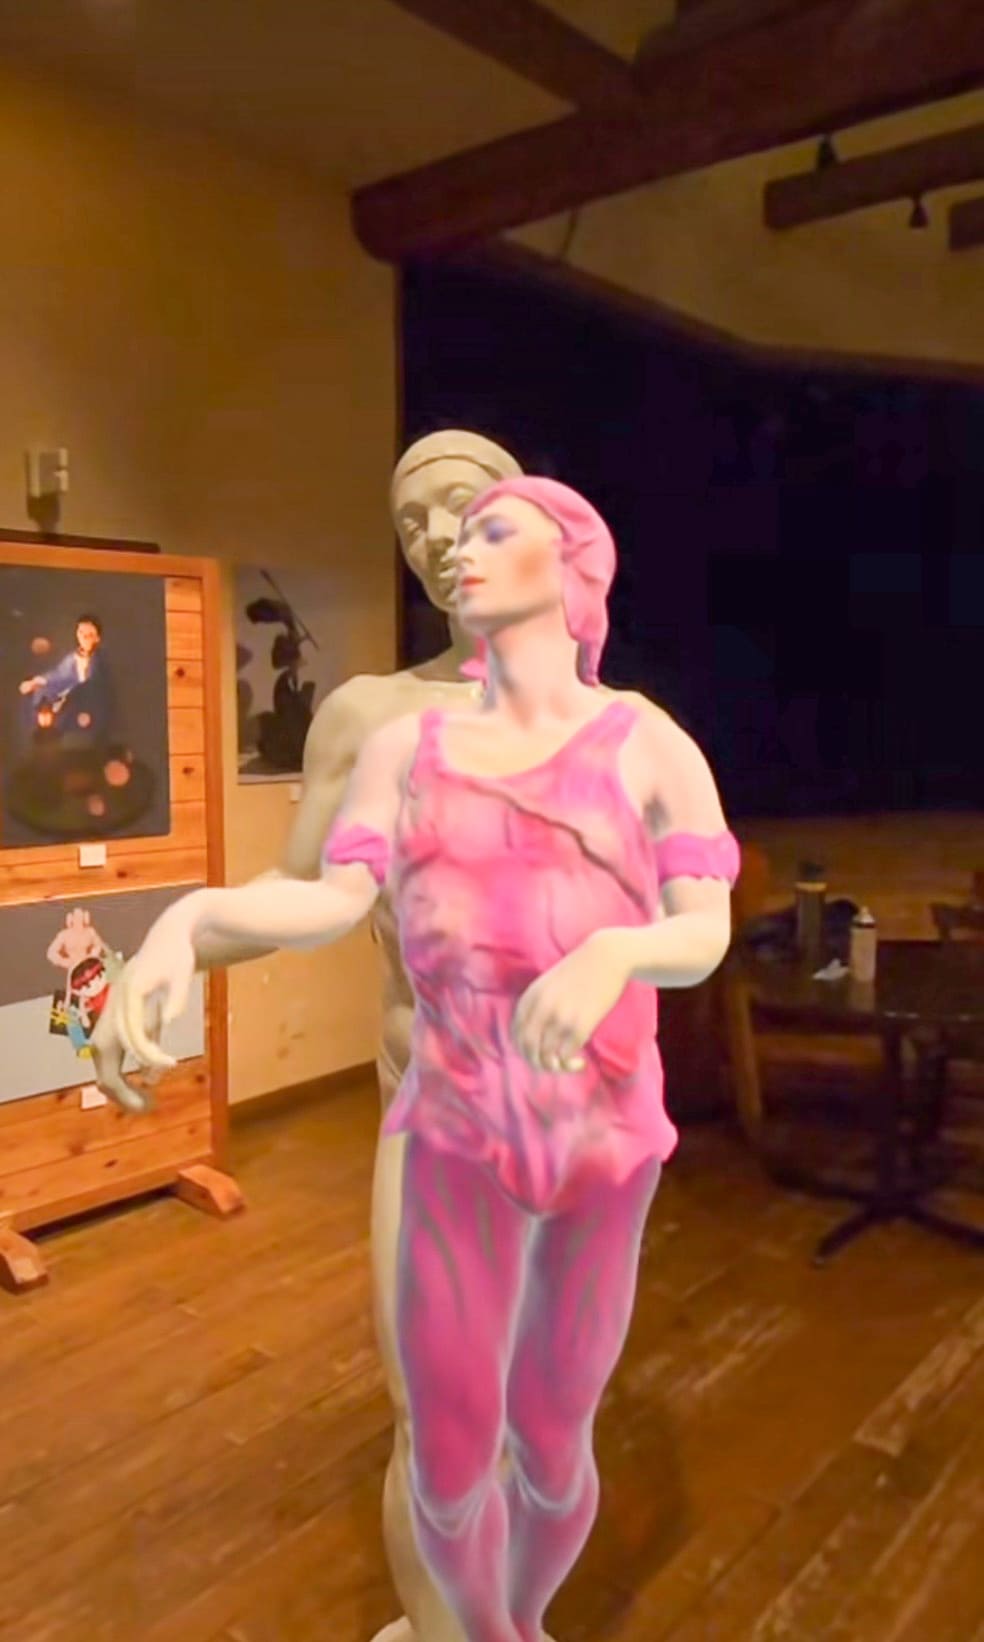
step12
Through the AR headset, viewers experience a costumed Nijinsky emerging from the nude sculpture of Nijinsky, as if another presence is being released from within the still figure.
-
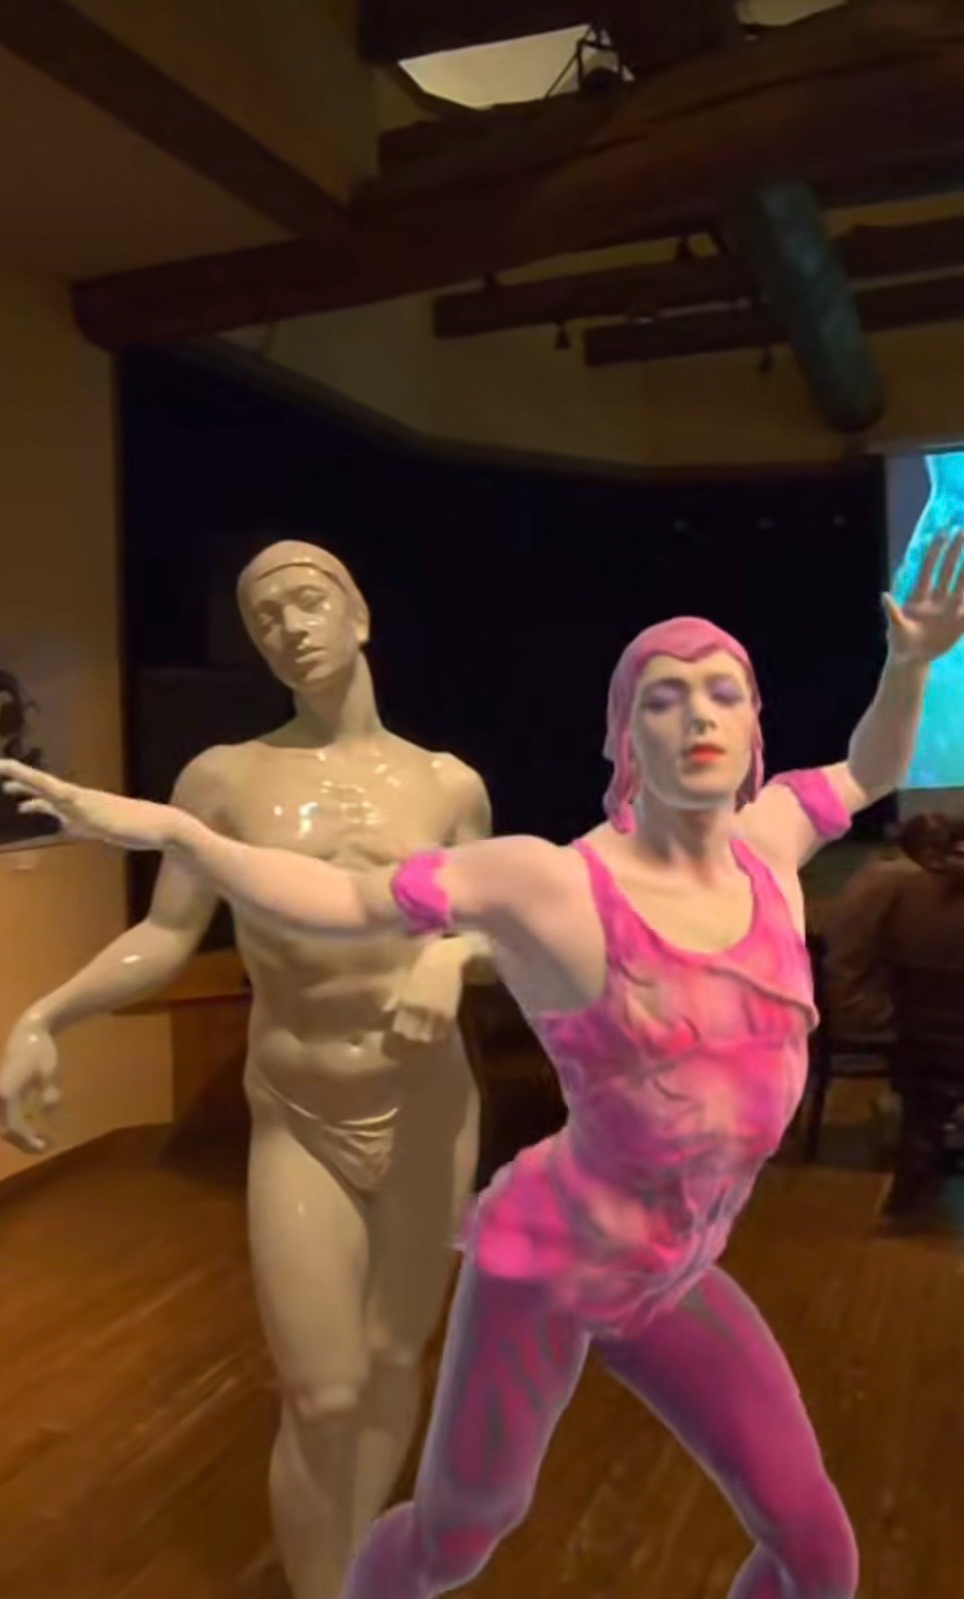
step13
This step shows the moment when Nijinsky emerges from the sculpture and begins to dance. The project attempts to give life to an otherwise motionless sculpture through AR.
-
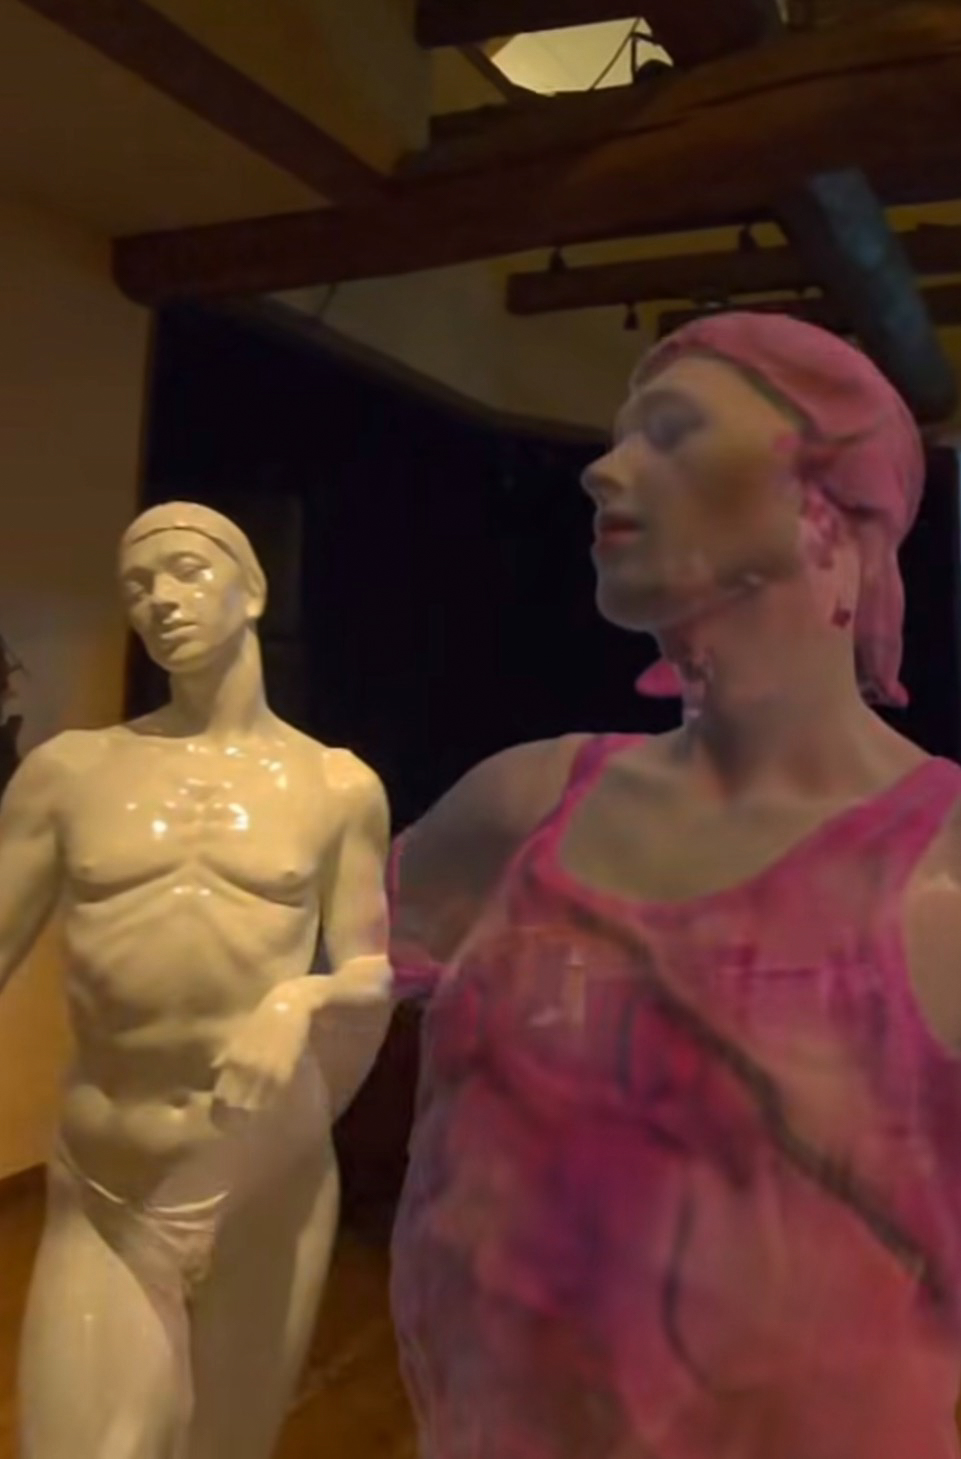
step14
The animation ends as the digital figure returns toward the original sculpture and gradually fades out.
Creative Process
-
01
Concept Development
Ideas emerge from observations of human experience,
personal reflection, literature, mythology, and contemporary society. -
02
Sketches & Studies
Initial drawings, digital sketches, and small-scale maquettes are created to explore composition and movement.
-
03
Sculpting
The form is developed through continuous observation, refinement, and anatomical study.
-
04
Mold Making & Production
The finished sculpture is prepared for casting, fabrication, or digital reproduction.
-
05
Finishing
Surface treatments, patinas, coloration, and final adjustments complete the work.
-
06
Exhibition & Experience
The sculpture is presented in physical or digital environments where it engages with viewers and creates new interpretations.